Uncle John's Pirogue - Pictures | SouthernPaddler.com

Uncle John's Pirogue - Pictures

gbinga

Well-Known Member
Nov 7, 2008
736
2
Hoschton, GA
Now that I seem to have figured out the Photobucket thing, let's see if I can share some build pics.

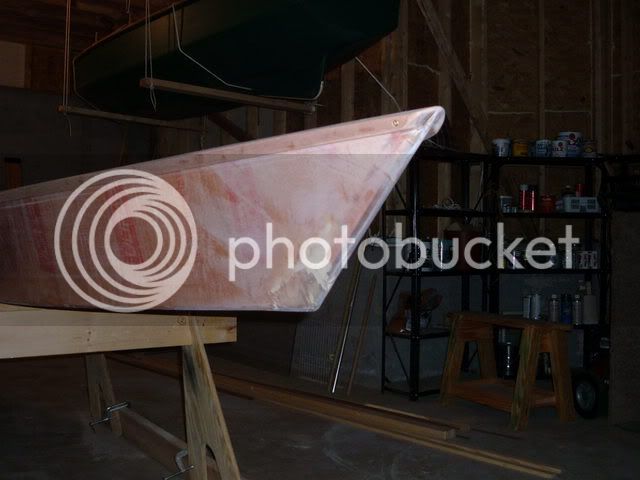
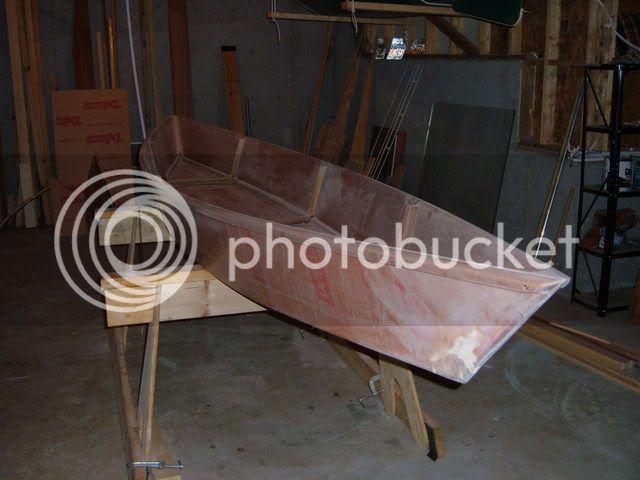
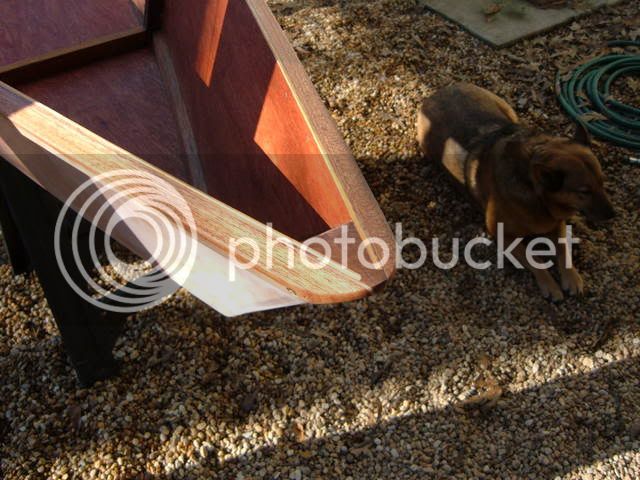
Here is an early pic; sides attached to stem, frames installed. This is far and away the easiest boat I've built. That's a blessing, as I am working long hours lately and a multi-chine hull would probably take me a year at the rate I'm going.

DSCF1238.jpg


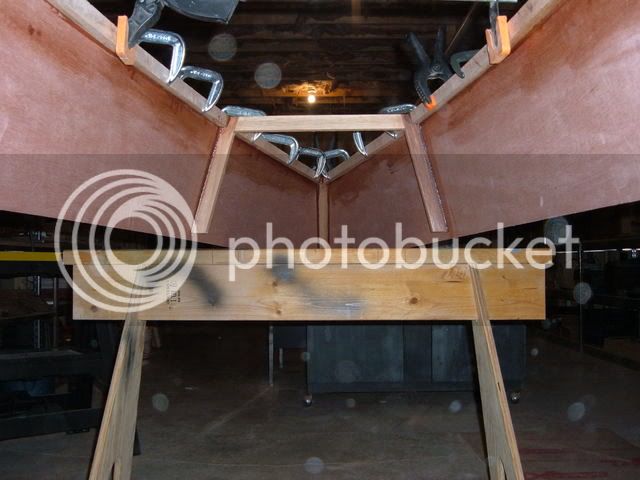
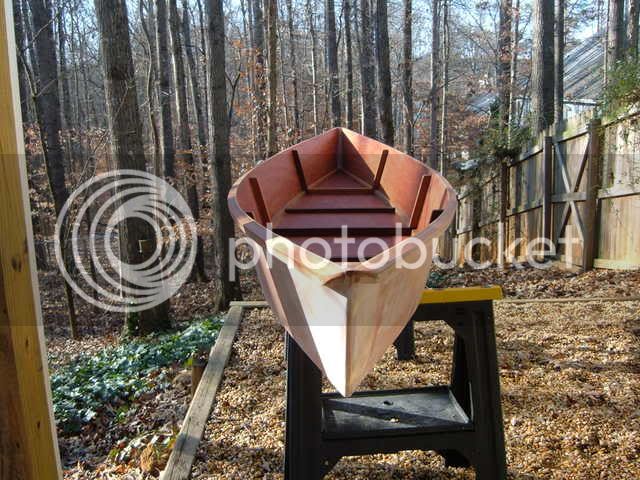
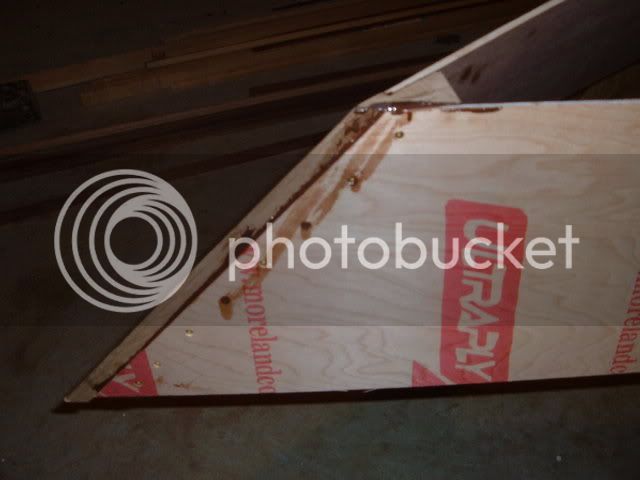
Close up of the stem. The stem and ribs are made of mahogany. I collected left over brickmold and such from door and window jobs I worked on. I should have plenty left over to do a canoe seat. The plywood is the underlayment that I've talked about buying at Lowe's.

I used more screws than the plans called for. I wanted to make sure...

[/img]
DSCF1240.jpg
 

gbinga

Well-Known Member
Nov 7, 2008
736
2
Hoschton, GA
This seems to be working... I wish the photos were better quality. I have the basement lighted with compact fluorescent bulbs, and I have a hard time getting decent photos.

Here is a photo of the interior chines being glued in. I wanted to use chines instead of fillets because I don't enjoy doing fillets and I felt like doing the carpentry. The pine pieces that are clamped to the outside of the hull are to hold a fair curve while the chines are being clamped and glued to the inside of the hull. Since I ran the chines in sections from stem to frame to frame, instead of making them continuous, I figured they would mess up the shape of the boat if I didn't do something about it. So the Pine strips you see on the outside are just a building fixture... like a temporary form or mold.

DSCF1241.jpg


Same process, viewed from beneath.

[/img]
DSCF1246.jpg


Here is a pretty good view of the hull prior to mounting the bottom panel. It went together and took shape very easily.

DSCF1249.jpg


End view, nearing completion. The rub rails are installed. The hull is actually complete at this point, although there is a lot of miscellaneous sanding left to do before I start painting.

[/img]
DSCF1285.jpg


A close up of the intersection of stem and rub rails. I have to do some shaping here... sweep back the corners on the rails. Any thoughts?

DSCF1284.jpg


Here is a pretty good overall view. This is the last one for now...

[/img]
DSCF1283.jpg
 

Nockatee

Well-Known Member
Nov 21, 2008
104
0
Tryon, NC
Good stuff...Ultraply

Coming right along!
I have enjoyed working with the Ultraply.
I debated on putting the Luan on the inside as the opposite material "seems" harder and might deflect hits better. Might do that on the bottom since I'm only taping the seams and not covering the whole bottom.
What ya think?
 

gbinga

Well-Known Member
Nov 7, 2008
736
2
Hoschton, GA
Nockatee, I know exactly what you are talking about. I put the pretty wood on the inside because I want the natural finish on the interior. I wonder how it is going to work out, though, because the veneer is thin and the wood is relatively soft.

Also I completely defied all advice and did not glass the interior. I'm going to finish it with a blend of linseed oil, turpentine, and paraffin. I didn't even tape the interior seams - went with chine logs instead because I wanted all natural wood.

For best durability I could have put the harder blond looking wood on the interior, and the softer mahogany looking wood on the outside where the glass would protect it. But then I would have had to paint the interior.

Next time I build a boat I think I may spring for actual marine ply. By the time you pay for epoxy and glass, and assign a value to your labor, high class wood starts to seem like pretty good investment.

On the other hand, the Ultraply is easy to work with, and seems quite solid. I would definitely recommend it to anyone doing a first boat, or any sort of boat that was going to be glassed in and out.
 

oldsparkey

Well-Known Member
Aug 25, 2003
10,479
123
Central , Florida
www.southernpaddler.com
gbinga said:
Nockatee, I know exactly what you are talking about. I put the pretty wood on the inside because I want the natural finish on the interior. I wonder how it is going to work out, though, because the veneer is thin and the wood is relatively soft.

Also I completely defied all advice and did not glass the interior. I'm going to finish it with a blend of linseed oil, turpentine, and paraffin. I didn't even tape the interior seams - went with chine logs instead because I wanted all natural wood.

.

If you would epoxy saturate the wood the epoxy will soak into the wood and strengthen it while making a a few shades darker , showing the grain in it. If you did that then the way you want to finish it would not work.

Chuck.
 

gbinga

Well-Known Member
Nov 7, 2008
736
2
Hoschton, GA
Chuck,

I can see where that would be a good compromise. I can think it over while I'm making my mind up about the keel.

George
 

Paddlin'Gator

Well-Known Member
Feb 2, 2008
148
0
Tequesta, FL
Smith's Penetrating Epoxy is a great material to use as a first coat on wood that you don't want to glass. It is low viscosity and penetrates well into the wood. You can then follow up with regular epoxy, paint or varnish.
 

oldsparkey

Well-Known Member
Aug 25, 2003
10,479
123
Central , Florida
www.southernpaddler.com
I can't find where I found the information but I do remember that they said a epoxy saturation will increase the strength of the wood up to 4 times the original strength if totally saturated.

All I can say is that I have tried it and it works for me. I start out with a epoxy mix that is thinned down with some acetone then graduate to a final coat of just epoxy.

The epoxy gets ( soaks ) into the wood and seals it against the weather , water and the rest. The better the penetration the better the protection.

Chuck.
 

Wannabe

Well-Known Member
Apr 5, 2007
2,645
2
on the bank of Trinity Bay
Chuck,
The Smith's Clear Penatrating Epoxy Primer That P Gator was talking about will out penetrate thinned epoxy. This stuff is so you cannot hardly apply it overhead with a brush. The stuff'll be running down your arm. It is a great primer for epoxy or paint.
Bob
 

oldsparkey

Well-Known Member
Aug 25, 2003
10,479
123
Central , Florida
www.southernpaddler.com
Wannabe said:
Chuck,
The Smith's Clear Penatrating Epoxy Primer That P Gator was talking about will out penetrate thinned epoxy. This stuff is so you cannot hardly apply it overhead with a brush. The stuff'll be running down your arm. It is a great primer for epoxy or paint.
Bob

YEP...

I have some here at the house. :D

Since Joe ( Paddlin' Gator) mentioned it I thought I would bring up the other choice.
Grant you mine is more on the dangerous side because of the acetone in it , do not use that mix anywhere near a open flame and with plenty of ventilation.

Chuck.
 

oldsparkey

Well-Known Member
Aug 25, 2003
10,479
123
Central , Florida
www.southernpaddler.com
Not sure who is posting on here so to do another idea and not have it on my last post.

This brings up an interesting thought.

Use the Smiths penetrating epoxy to totally saturate the wood , ( all the way threw it ) then use lighter glass and normal epoxy on the outside to make a lighter weight boat.

The wood would be saturated , all the way and the glass ( resistance to wear and tear ) would take care of any outside forces pushing against the hull as you paddle. For added protection glass the inside so the wood would be sandwiched between the glass like we normally do on a boat.

Technically thinking the wood in the center core would actually be solid epoxy but just wood colored.

The Smiths would require less epoxy to be used then the way I do my boats at this time with the normal diluted epoxy for the saturation process.

1. Step one .. Use the Smiths to saturate the wood.
2. Then use the normal epoxy and glass the outside.
3. Epoxy the inside for a sealer coat ..... NOW...I have to think about this............ Do I glass the inside , part of it or none of it. Or glass the front center part that will have the wear on it from me getting in and out of it to protect the wood.
I have made a few boats with all of the above in #3. and they still float.

Decisions , decisions , decisions.......... :?

Chuck......
gbinga , Don't you just hate it when someone answers a question with more questions.... :lol: :lol: :lol:
 

gbinga

Well-Known Member
Nov 7, 2008
736
2
Hoschton, GA
oldsparkey said:
gbinga , Don't you just hate it when someone answers a question with more questions.... :lol: :lol: :lol:

Chuck,

It beats the heck out of not getting any advice!

You've given me a lot to think about.

George
 

gbinga

Well-Known Member
Nov 7, 2008
736
2
Hoschton, GA
Here are some more---

Hull completed - first coat of oil finish on the inside, ready to paint on the outside.

DSCF1305.jpg


End view.

[/img]
DSCF1306.jpg


Stem Detail. Kinda pleased with the way this part came out.

[/img]
DSCF1307-1.jpg


Bottom view. for better or worse, she ended up with twin keels to reinforce the bottom and hopefully make her track well.

DSCF1309-1.jpg


She is getting oil/wax impregnation on the interior, and will get Kilz and porch paint on the exterior.[/img]
 

oldsparkey

Well-Known Member
Aug 25, 2003
10,479
123
Central , Florida
www.southernpaddler.com
Might want to put a sharper angle on the ends of those keels or they might act as breaks when you hit a log , inside of just sliding up on it.

If the are the same on the backside and you get between two logs , you will be out of the boat to get it over one of them..... or just stuck there. :lol:

Good looking and will be better when she is done. By the way I noticed you don't have a lot of trees in your back yard. :roll:

Chuck.
PS. If it was mine I would round off those 90 degree edges on the keels , ( if you haven't ) less chance of damaging them when you hit something. ( Just a thought , for what's it worth. )
 

gbinga

Well-Known Member
Nov 7, 2008
736
2
Hoschton, GA
Hey, Chuck-

Yes, I'm thinking about the keels. The leading and trailing ends are at 45 degrees, but need to be eased more. I can still work on that, as I have not started finish work on the bottom.

I should have routed a 1/4" radius onto the edges of the keels before I put them on the boat. That is another thing I can still correct, though. I chamfered the edges a little with a block plane, and can do more of that. Then turn the chamfer into a radius with patient sanding.

Here is where I need some advice - when I mounted the keels, I did so using #6x3/4" brass screws through the bottom of the boat and into the upper surface of the keel. Seemed like a reasonable idea at the time, but it turning into a problem. I misjudged how stiff and hard the wood was. Three of the screws snapped off trying to drive them - and I was driving them by hand, too, not with a cordless. So there are a couple of places where keel isn't quite tight to the bottom of the boat. Only lacks a sixteenth at most, but not acceptable.

This is the kind of gap that would be easy to fill with a caulk gun, but if I was using caulk, what sort? I've seen urethane bubble up when curing, silicone won't take paint, and latex seems inadequate for a boat.

I'm actually tempted to use latex, since it won't be a structural issue, and it will be protected by three coats of paint.

Another way would be to mix up a small batch of epoxy / flour and run an itty bitty fillet, but what is the best way to apply the stuff? One trick I know is to put the thickened epoxy in a ziplock bag, clip a tiny hole in the corner, and then sqeeze out a bead... but that method is not real precise compared to what you can do with a caulk gun.

Ideas from the master??
 

oldsparkey

Well-Known Member
Aug 25, 2003
10,479
123
Central , Florida
www.southernpaddler.com
I'm not one to give advice on keels since I don't have them on my boats.
The keel is considered as a sacrificial item to save the wear and tear on the bottom of the boat and is expected to be replaced at some time .... SO...Here comes the kicker........

BUT......

There are several options you can do , depending on which one you like.

1. Use the latex so later down the road when the keels need to be replaced they would be easier to do.

2. Get a screw remover from Sears and take out the broken screws so replacing the keel is easier and the keel would be pulled up against the bottom nice and tight so all you would have to do is paint them.

3. Use the epoxy and run a bead or fillet along the sides of the keels. If you do that then get a disposable irrigation dental syringe ( Picture below) , clip off a part of the end for a wider opening. Fill the syringe with the fillet and ease it along the side of the keel at the hull for a nice bead.
I use them , small ones for fine work and large ones for the main fillets. They can be cleaned out with acetone and last forever , made 9 boats with the same ones.

MONOJECT-412.jpg


Chuck.
 

gbinga

Well-Known Member
Nov 7, 2008
736
2
Hoschton, GA
Screws broke off too deep, plus they are #6 brass (itty bitty and soft) and probably half embedded with epoxy, so I got about as much chance of extracting them as I do getting on Barack's cabinet. Should have used bronze or stainless and I wouldn't have had this problem. Being a combination of lazy and impatient, I tried to get by with what I had on hand.

The syringe is exactly the answer! You are the MAN!! Where did you get them? I've seen syringes that would do OK at the local boat supply, but they don't have the long curved tip that I see in the photo - that looks really handy.

Thanks again, Chuck.

ps - Now that the keels are on, I kind of wish I'd not put them there. We'll see how they work, though, maybe learn something.
 

oldsparkey

Well-Known Member
Aug 25, 2003
10,479
123
Central , Florida
www.southernpaddler.com
Raka has them ... www.raka.com , accessories section. Plus you might be able to find them at the local pharmacy , such as Walgreen's. Just guessing on the Walgreen's idea but they have almost everything.

I got the small ones from Pygmy Boats when I made there Coho and the large ones I got from Raka.

Chuck.
 

gbinga

Well-Known Member
Nov 7, 2008
736
2
Hoschton, GA
Got the Pirogue in the water yesterday. No pictures; she is still in essentially the same configuration as the last picture I posted, but with primer on the bottom. I got tired of waiting and put her in with just the primer on.

The boat has no trouble turning. In fact, it loves to go in circles :? That has more to do with my lack of paddling skills than it does with the boat, I suspect.

I tried various positions, ranging from just behind the center frame to WAY back... Just behind the center frame seems about right.

Water was pretty flat yesterday, so I can't speak to how she will handle chop.

As for general stability, the boat was perfectly comfortable sitting on a float cushion on the bottom. I intend to build a Sparky seat for it, and I think that'll work fine. Tried getting up on my knees and paddling to simulate a higher position. It was doable, but nervous.

Will post a coulple more pictures when I get the bottom painted with the finish paint.

George