What do you build on? (Seeking ideas) | SouthernPaddler.com

What do you build on? (Seeking ideas)

DJR

Member
Apr 12, 2007
24
0
Melbourne, Victoria, Australia
Hi,

I have just ordered my first set of plans - Chesapeake 17 from CLC - so am the closest I've ever been to actually getting my first kayak underway. Won't be the last, i've already got a list of boats to keep me going for the next couple of years at least :D

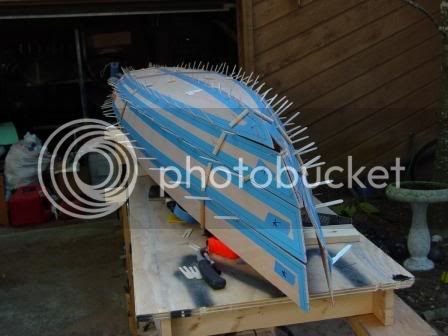
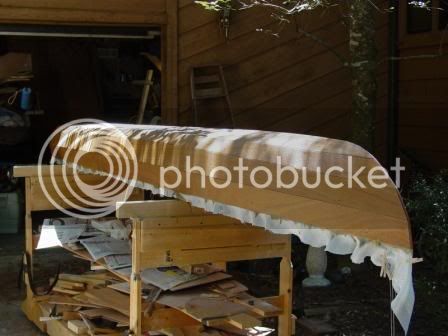
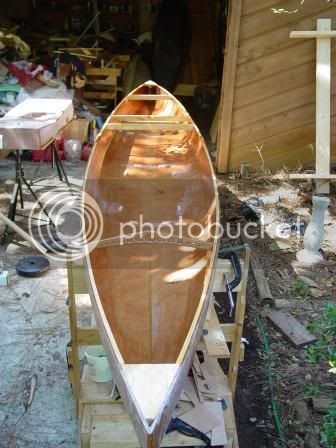
Workshop space is almost completed, and so now my thoughts turn to what I'll use to hold the kayak while building. As it's stitch & glue I don't need a strongback yet, so wanted to get some learned opinion from those here on what constitutes a good building base/table.

Many I've seen are build on 2 saw-horses. Is this the way to go? Would 4 be better? A solid table-top like a couple of old doors on legs?

I'd probably like something I can move, as my workshop is 17' and so is the kayak, but as it's a garage I can move the kayak out a bit to work on it, so was thinking of something on locking castors.

So, that's where my thoughts are at present...interested in what others do/use.

Thanks,
Darren
Melbourne, Australia
 

swamprat

Well-Known Member
Aug 28, 2003
374
0
Venus Fl.
members.findmoore.net
For my last two builds I have used a piece of 1/2" cheap ply cut down the center and butted together on the ends to give me a two foot wide by sixteen foot long work table. I added some 2X4 lumber on the undersides to kinda stiffen things up a bit and put it all up on cinder blocks, 3 high. A couple of pictures will probably explain it better than I can...


file.jpg

file.jpg
 

DJR

Member
Apr 12, 2007
24
0
Melbourne, Victoria, Australia
Hi Swamprat,
Thanks for the quick reply. Looks like a simple but effective building base, and a nice airy workshop too :wink:

I noticed you have the in-progress hull held by cable ties. How do you find these compared to copper wire? I guess you'd need a bigger hole, but then just slice off, sand and paint over. I suppose it wouldn't work for a varnished hull as oyu'd end up with white spots.

Interested in your experience as I'm also debating the pros and cons of the two joining methods.

Thanks,
Darren
 

oldsparkey

Well-Known Member
Aug 25, 2003
10,479
123
Central , Florida
www.southernpaddler.com
I use some 4x8 sheets of plywood on saw horses when I make my boats. No bending of sitting on the floor , most of the work is at waist level that way.

You are going to find out that a strong back is not needed but you will be using several temporary internal frames (supports) on the build unless they have changed how they do it.

As far as putting the panels together , Copper Wires , twisted to hold everything. They require a 1/16 drill bit for the holes and later when fiberglassed over they almost vanish.

I would suggest following what CLC tells you since that is who you got the plans from.
Most of all when you get the information , read it , then reread it and then one more time read and study the steps so you know what is coming up about 3 or 4 steps down the line.
It really makes it a lot easier when you know where you are going and why you are doing that one step at that time and where it will take you.

Chuck.
 

tx river rat

Well-Known Member
Feb 23, 2007
3,043
2
Waco Tx
DJR
If you keep the sawdust from cutting out your hull and sift it you will come out with holes that are not to noticable And I like the cable ties much better. Now these other folks be the masters I just a Rookie here.
Ron
 

hairymick

Well-Known Member
Dec 8, 2005
2,107
2
Queensland, Australia
G'day Darren,

Good post mate and some very good questions. :D

These guys are way better builders than me but I will tell you what has worked for me and why.

My first S&G build was a Swampgirl by Jemwatercraft. I deviated from what Matt advised and had no end of trouble with the build. My trouble was entirely my own fault in that I didn't follow his build instructions and recommendations and I wound upusing a strongback on what should have been a pretty simple build.

My build (warts and all) is here.

http://jemwatercraft.com/forum/viewtopic.php?t=243

Since then, I have built two more multi-panel/chine boats on a strong back and I believe they were of benifiet to me and the way that I do things. the biggest advantage for me is that, the strong back holds everything rigidly in place whaile stitching another panel on.

Having said that, there is a lot of extra time involved in setting up a strongback. (I took 9 hours on my Southwind to set it up)

Here are my Wadefish and Southwind builds.
http://jemwatercraft.com/forum/viewtopic.php?t=667
http://jemwatercraft.com/forum/viewtopic.php?t=1812

Mate, I hesitate to recommend this method as the designers all reckon it is not necessary and a lot of builders here don't use it. But it has worked well enough for me.

For the stitches, I don't like the cable ties at all. They require too big a hole that then becomes too dificult to hide (and there are a LOT ) of them.

I use .9mm galvanised steel tie wire. It is as cheap as dirt and it is all removed from the boat after tacking anyway. Like Chuck says, the 1/16th holes allmost dissappear during the build.

Good luck with the build mate and please share with us lots of piccies. :D
 

DJR

Member
Apr 12, 2007
24
0
Melbourne, Victoria, Australia
Hi,

Thanks again for the tips. This is a great forum and now that I'm actually getting into building I hope I can contribute.

Based on the above, I am considering 4 sawhorses with a ply or similar table attached on top. The extra couple of sawhorses will give me some more stability, and as they have folding legs I can break it down into 2 sections, fold the legs and store when not in use. I'll probably attach castors to one end to allow me to drag it without too much effort - mounted vertically on the legs so a slight tilt will allow it to be moved, but when lowered will be stable.

I think I'll go the wire too. Mick, thanks for the idea of the galv wire...nice and cheap at Bunnings :) . I hope to varnish the kayak so would prefer not to have to fill all the holes if I use cable ties.

Will ensure I post pics of progress (along with asking heaps of questions)!

Regards,
Darren
Melbourne, Australia
 

dangermouse01

Well-Known Member
Sep 8, 2006
312
1
Palm Bay, FL (East coast)
DJR;
I have a table set-up similar to swamprat's, twp 8'x2' sections from one piece of plywood and then another section 4'x2'. Any can be attached end to end, so I can have a 4', 8', 12', 16' or 20' work table, depending on what I am working on. Needed the 20' for my CLC WR18 hull panels.
Here's my JEM watercraft Wadefish 2.0 on the table set up.
stitched-1.jpg

Made a roll around base that I usually have the saw horses I made attached to. Easy to roll in and out of the garage.
The saw horses have a removable top piece, so I can have a solid cross member when I need it.
hullglassed.jpg


Remove the solid piece and I have nylon straps for support when I need them.
bow2-coats.jpg


I use the copper wire method. Tho, stitching the hull with wire is kinda rough on the finger tips. With the copper wire, it doesn't matter if it gets bonded in with epoxy, it sands down easy. On my first boat I left them all in, all other boats I removed all.

DM
 

paddlin4reds

Well-Known Member
Oct 17, 2006
100
0
Lake Ocklawaha, Fl
oldsparkey said:
.....I would suggest following what CLC tells you since that is who you got the plans from.
Mornin';
Hey, OldSparkey's right. I built a Chesepeake 18'. It turned out great. The way CLC builds a boat is a lil' different, then most. Read the directions a few times and goodluck (the DVD makes it easier too). It'll be fun.
 

paddlin4reds

Well-Known Member
Oct 17, 2006
100
0
Lake Ocklawaha, Fl
Mornin';
CLC seems to build their yaks 180 degrees out from Jem. CLC suspends the yak in it's upright postion to true it (stitching it in this postion really sucks......). They don't use any spacers....They also work from the inside out.... After doing both, I prefer Jem's method.....but for a first timer,.... following directions.....trying to change could be a very bad thing. Did you order the DVD? ....if not, I'll look for mine and let you borrow it if you'd like......just don't forget where it came from.... :lol: Also keep us advised of your progress....there's a few steps, that these guys can make easier on you. i.e. End Pours (I've never got the dam method to work....I invert the yak). Also there's ways to save epoxy (you'll wish you did in the long run....) I now try to work a step or two ahead. Then when I mix epoxy, if I have left over....I have another part of the project where I can put the leftovers....instead of just making epoxy hockeypucks. :twisted:
 

DJR

Member
Apr 12, 2007
24
0
Melbourne, Victoria, Australia
Hi,

Thanks for the additional info/ideas.

Dangermouse, I like the idea of sections that can be joined and so are adaptable to different boats. Also, what's all the blue tape on your panels in the picture? Was this to stop tear-out when drilling the holes, or when cutting, or did you mark the dimensions on the tape?

The saw-horses with removable section are a great idea.

Hopefully I'll get to the hardware this weekend to get the bits for my 18' long bench I'll use for scarfing, and then I'll make the stands. Plans should arrive next week so I'm getting excited about actually starting (after about a year of research and procrastination :D :roll: )

Regards,
Darren