Marsh Pirogue ? (Keith, Seedtick? Anyone?) | Page 2 | SouthernPaddler.com

Marsh Pirogue ? (Keith, Seedtick? Anyone?)

beekeeper

Well-Known Member
Mar 4, 2009
1,917
59
Yes, I'll "stick" with epoxy!

Epoxy and wood flour will work. May be the best there is. I use Titebond 3. It works great as a glue, not so well for me as a fairing compond.

[quote It was the pictures in that thread you started, "A New Marsh Pirogue" that got me going on this.][/quote]

"A New Mash Pirogue" is seedtick and Keiths build. My son's boat viewtopic.php?f=10&t=8121 is similar. It has less flair and beam. If you are going to build it by "hand and sight", cut your sides to the length you want, wire them together and spread them to the look you want. Scaling the boats length and width will make it narrow and draft more.

into, there'd be no real impact, nothing that would require a substantial rub rail. Maybe just a 1/4 in. piece of molding on the outside, something just enough to put a contrasting stripe of paint on, mostly for looks
Adding this will add weight and more drag to the boat .

Maybe use 3/8 inch for the bottom? One the other hand, those bottom "ribs" do look more like battens and wouldn't really be in the way. . . I don't know.

3/8" wood be stiffer but much heavier and you may would need an extra sheet of 1/4" plywood, unless you used 3/8" for the whole boat.
You could add "bottom ribs" after you tried the boat, if they were needed.

In fact, I can see where it's possible I might just use one of those "throw-able boat cushions" for a seat. My UJ /8" would be hepirogue seat might be kind of high for seated paddling, won't know 'till I try it. One thing I can say about a fixed seat is that it would make the hull a bit stiffer

If you can stand in the boat, the seat won't be too low. You will probably want it higher.

Food for thought:

24" to 26" wide floor, floor 12' long, Overall beam 36+", 11" to 12" high sides, 1/4" okoume, white oak or pine laddered gunnels, a detachable bench seat( removed for polling, attached to the sides for sitting), rocker = 3" bow and 2" stern


beekeeper
 

FlaMike

Well-Known Member
Jun 20, 2007
624
2
Spring Hill, FL
www.ptponds.com
Great job on your son's boat! Liked what you did with the "ladder gunnel," too. Neat trick! :D

Understand the Marsh Pirogue thread was seedtick's and Keith's build, but it was your post that kicked it off. And you did make some helpful comments in that thread, too. Besides, it might not have happened if not for the "guy on the sidelines holding the check book." :!:

I mentioned a bit of 1/4 in molding " just enough to put a contrasting stripe of paint on," and you said, "Adding this will add weight and more drag to the boat ." What I was talking about was in place of the functional rub rail, usually placed at the top of the sides, on the outside. Not something at the waterline which would add drag.

As for the bottom ribs to prevent "oil-canning," you are right, no reason those couldn't be left off until a need for them showed up. And looking at the 3 bottom ribs in your son's boat convinced me that if they are needed, they won't be a problem at all. Out of curiosity, did those ribs happen to land right about where the bottom was pieced together? Almost turns a butt joint into a spline joint of sorts, doesn't it? 8)

Ii was thinking that 10 inch sides was kind of low. So I went out and took a look at the old pirogue and sure enough, my old Uncle John's has 10 inch sides! And it was about 30 inches across the bottom, too. (I'd forgotten.) I'm pretty sure the sides were cut straight, but maybe these should have an arch cut in the bottom side of the side piece, maybe 12 inches high at the bow, 11 at the stern, and only 9 or 10 inches wide in the middle. And right off hand, I'm not real sure about the stems, come to think of it! I'd have to pull up the plans, and see if they were identical, or if one end of the sides had a different angle from the other. Would that not have made the boat somewhat asymmetrical? Gott'a take another look at it in the daytime. . .

Asymmetry is something I hadn't even thought about. (Don't know if I'm for it or against it!)

Leaving that aside for now, so far it looks like I can go for a length between 12 and 13 feet, bottom width of 26 inches, top width of about 36 inches, all pretty much as you laid it out in your last post, and all done with 2 sheets of ply. Sounds good, so far!

What I do have is some 1/8 in ply that I can use to cut and test fit the sides before I cut the pricey-er stuff, and plenty of scrap ply and other wood to make the templates for the flair. (Building forms or molds.) What I need is floor space in the garage! And that I'll have to get started on, this week.

Am I off-base in thinking I need to cut something of an arc in the bottom of the side pieces? I guess if I use the 1/8 stuff to play with, I could cut them as straight pieces like the UJ was done, and then try them again with a bit of a curve cut in the bottom to see what that does to the rocker. . . I would butt splice the luan for this, but plan on scarfing the marine ply for the actual build. Although, if I do a fiberglass butt splice instead of a wood one, and then put a bottom frame over the joint on the inside. . . Why am I worrying about that now? :shock:

OK, that tells me it's time for beddie-bye again! Got to make an early AM trip up to Wally World (again.) And I'll pull up my UJ plans and fill in some of the blank spots in my memory, too.

Nice "talking" to you!

Mike S.
Spring Hill, FL
 

beekeeper

Well-Known Member
Mar 4, 2009
1,917
59
." What I was talking about was in place of the functional rub rail, usually placed at the top of the sides, on the outside. Not something at the waterline which would add drag.


My mistake. I thought you ment a "false" outside chine log. With out ribs you will probably need a "functional" rub rail. The gunnel(rub rail + inwhale + spacers) will stiffen the sides.

And looking at the 3 bottom ribs in your son's boat
I belive there are only two, and yes they are at the splices in the floor.

What I do have is some 1/8 in ply that I can use to cut and test fit the sides before I cut the pricey-er stuff, and plenty of scrap ply and other wood to make the templates for the flair. (Building forms or molds.) What I need is floor space in the garage!

Build the boat out of the cheap stuff first. You could do it to scale, or if full size then you would have a pattern for the good wood. Just screw it together, don't even have to be glued or finished. It will give you experance, and let you work out all the how to's.

but plan on scarfing the marine ply for the actual build. Although, if I do a fiberglass butt splice instead of a wood one, and then put a bottom frame over the joint

Thought you were not using fiberglass? If you scarf, the fiberglass is not needed. If you are not confident in the scarf, put a wooden backing(bottom rib). I could have used thinner wood.

Food for thought:
You have to decide how you will set the rocker, and shape of the floor befor you start. Without plans or patterns is where the by hand and eye comes into play. On a flaired sided boat the chine log has to be fitted to the changing angle of the sides as the run to the ends of the boat. You will have to cut an arch in the sides to reduce the rocker. How much? = ?

beekeeper
 

FlaMike

Well-Known Member
Jun 20, 2007
624
2
Spring Hill, FL
www.ptponds.com
beekeeper,

I forgot that the rub rail was dual-function. I agree that it probably would be best to make it "full-sized" rather than minimize it like I'd thought about doing. The 2 pieces running full length like that would make it a lot stronger. (2 pieces overlooking the fact that the inside part is actually going to be a ladder rail.)

My bad thinking your son's boat had 3 bottom ribs! No idea where that thought came from.

About the use of fiberglass, I really want to make this one more of a "wooden boat," than a "fiberglass/wood composite boat." Nothing against the latter, my last one was just that, no problem there at all. This time, I do want to make the sides and bottom with a scarf joint instead of using butt splices. Again, just looking to get back to something a little more traditional. I'm not going to be fanatical about it, (not on this particular build, anyway.) After all, I will be using epoxy both as a glue and a wood sealer. When I said I'd make a fg butt splice, I was thinking about the very thin luan, when prototyping the sides.

My "prototype" would wind up being more expensive than the final product, if I decided to keep it and make it functional, I suspect. Most of it is the door-skin thin stuff, and the thicker sheets still have only 2 veneers of wood, and some kind of suspect-looking, maybe wood pulp core. The would almost certainly require ribs, and to last, probably fg cloth inside and out.

What Ii thought I'd do to keep cost down and greatly speed up the process, would be to make the prototype disposable. I think I'd best best off making it a 1/2 sized model, rather that full-sized. Take a single sheet of the thin stuff and produce 2 2X4 sheets, and go from there. Just 6 inches to the foot would be a very easy scale to use, no time spent on producing scarf or butt joints, and the size would be very easy for one person to work with.

It is later than I'd planned, but I wanted to get this posted. Now I am off to Wally World to pick up another week's supply of cat food. If I don't make this trip, it simply won't be safe to even sleep around those critters, much less work around them. . . I'll tell them the 6 ft pirogue is for them. They might like that.

Mike S.
Spring Hill, FL
 

beekeeper

Well-Known Member
Mar 4, 2009
1,917
59
About the use of fiberglass, I really want to make this one more of a "wooden boat," than a "fiberglass/wood composite boat." Nothing against the latter, my last one was just that, no problem there at all. This time, I do want to make the sides and bottom with a scarf joint instead of using butt splices.

That is fine. I thought you were talking about the scarf splices in the okouma. It would not be needed there.

What Ii thought I'd do to keep cost down and greatly speed up the process, would be to make the prototype disposable.

1/2 scale will work. I was thinking full size built( sides, floor, chines, stems, only) screwed together, not completed into a floating boat. Two sheets of luan $20, one 1x4 for chines $5 to $10. No glue,or finish. Unsrew it, use it as a pattern to mark and cut the real wood. You are right it would cost a lot more to complete it into a functional boat.

beekeeper
 

oldsparkey

Well-Known Member
Aug 25, 2003
10,479
123
Central , Florida
www.southernpaddler.com
beekeeper said:
About the use of fiberglass, I really want to make this one more of a "wooden boat," than a "fiberglass/wood composite boat." Nothing against the latter, my last one was just that, no problem there at all. This time, I do want to make the sides and bottom with a scarf joint instead of using butt splices.

That is fine. I thought you were talking about the scarf splices in the okouma. It would not be needed there.

beekeeper

Folks......
Everyone has a different way to make there boats.

Beekeeper has his way and I have mine , it is up to you to do it your way and what ever way that is as long as the boat is completed and floats you have something for your enjoyment. A boat that doesn't float is no fun. :roll:

I personally like to glass over any joints or seams in my boats weather they are a scarf splices or butt joint and even the seams where the sides meet the bottom. Call it an insurance measure since the glass offers a lot more to the strength of the junction between two boards. It even helps to protect them against any water intrusion into the cut ( seams , joints or junctions ) areas.

In conclusion to sum it up.... It is your boat and is made the way you wanted it made. :D

Chuck..........
 

FlaMike

Well-Known Member
Jun 20, 2007
624
2
Spring Hill, FL
www.ptponds.com
beekeeper,

I figure 1/2 scale would be a good size to let me try something one way, then another, pretty much by my self. And at that size, most everything I try out will cross over to the full-size build with much loss due to the "size translation." Half size also lets me play with the side and bottom pieces, altering the shapes and all, without having to join two pieces just to get the correct length.

And by the way, I did find one more thing that contributes greatly to the "look" I'm after, and that is the curved stems. I almost overlooked that little detail. This would have drove me nutz if I'd built it and then realized what didn't look quite right! I did find seedtick's thread on making those.

Old Sparkely Guy,

I hear you loud and clear about the fg. . . I'm just set on taking my own path to Perdition this time. I won't be hitting anything at any speed greater than I can paddle. And I plan on just "geezing along." :D

I'll be using epoxy as a glue, for sure. (Both thin and as a putty with wood flour.) And I guess I'll be using it as a sealer, applying a couple of coats before Ii paint it. I plan on painting the hull some kind of green on the outside, the inside a grey, and rails, breastworks, and seat will be done up bright, (varnish over epoxy.)

*** EDIT *** Forgot to add, I have decided to adjust the target length to 12 to 14 feet. Although I would like to keep it down to 12 feet, it might not be all that practical. But, playing with the 1/2 scale prototype should help me decide on the full-size length.

Mike S.
Spring Hill, FL
 

FlaMike

Well-Known Member
Jun 20, 2007
624
2
Spring Hill, FL
www.ptponds.com
seedtick!!

Just realized I made a mistake in my very first post in this thread! :oops:

The original thread that got my attention was indeed started on Mon Jun 11, 2007, but beekeeper had nothing to do with that one. And that thread is the one that the pictures no longer load. The links to them are no longer working.

There was a second thread that beekeeper DID start, and that is the one that the pictures DO work in. That thread was a little more recent, Sun Nov 21, 2010. Those are the pics I keep going back to.

I would be surprised if you still have any, but do you have any pics from that thread? The part I did get right was that the pirogue in question was being built for Ducks Unlimited.

The pics of the marsh pirogue in the more recent thread are great! But if they are still around, I would like to see some of that earlier one.

Oh well, think I'll watch that Pirogue Builder video a couple more times to day. . . :roll:

Mike S.
Spring Hill, FL
 

seedtick

Well-Known Member
Jul 22, 2006
1,161
7
Denham Springs, LA
I've got all that we took during that build

Be happy to burn you a DVD of them and any other pics you might want

Easier to do that than try to resize and send via email

PM me your address and I'll get it in the mail next week
 

FlaMike

Well-Known Member
Jun 20, 2007
624
2
Spring Hill, FL
www.ptponds.com
seektick,

PM sent, I think. Well, I think I sent it, but it shows up in my OUTBOX, not my SENT box. Maybe it stays there until you log on and then it lets it go.
No idea. :?:

Well, if nothing gets in my way, I seen no reason I can't start work on the half-size model, Monday. At first, I think I'll just wire it together, just the sides and some forms until I get the flare, rocker and width more or less settled, then establish an actual length. After that, a more complete model, if I think I really need it.

Life is GOOD! :D

Mike S.
Spring Hill, FL
 

beekeeper

Well-Known Member
Mar 4, 2009
1,917
59
Started this earlier, but had to stop. See your back on track with seedtick. I'll post anyway. Shame to waist all this pecking. :roll: I hope he will correct any errors on my part.

Part of the marsh pirogue's style is the spread of the sides (at the gunnel), near the ends of the boat. The sides hold their flair as much as possable befor attaching to the stems. I belive the word "tortured" was mentioned. If you make the stem pieces per seedtick they will spread the sides when they are attached to it. The breast plates will add to the flair and hold them open. I also think their boats are are fish form. Seedtick's or Keith's post may show this. Take care trying to reproduce this with luan. It is brittle and could break. Don't ask how I know.
12' to 14" = probably can get the look you want with either.
12' = easier to load, carry, etc.' better in close turning, handier, but probably less capacity, room, draft, speed, etc.
Your 1/2 scale model will show you the look you want. Picking the other features, that are best for you, will have to be decided befor you start the real boat.

beekeeper
 

FlaMike

Well-Known Member
Jun 20, 2007
624
2
Spring Hill, FL
www.ptponds.com
beekeeper,

I never suspected you were such a mean man! :evil: Here I am, recovering from coronary bypass surgery, and you've got me thinking about BIG BREASTWORKS! :oops: I'm not sure the old ticker can take this. . . Just when I thought I was gonna' make for certain, too. :shock:

OK, trying NOT to think about THAT any more. . . :roll:

I'm thinking I've seen a picture of seedtick measuring the angle at the bow on one, and getting a reading of 55*. So, the stem would be made with a pair of cuts with the blade set at 27 1/2*. A couple of movable jigs can ensure the 35* flare, then with a pair of "substantial" breastworks in place, that amount of flare can be carried quite a ways foreward and aft, and held there.

And then the other little mystery, you used the term, "fish form." I think I've read that one somewhere around here. . . An asymmetrical hull, with the larger end at towards the bow, rather than the Swedish form, with the smaller end forward.

Did I get that one right? (And do I win anything if I did?)

Of course, just before I could post this and head off to the bed room, I just had to remember one more thing. :cry:

In the "New Marsh Pirogue" pictures, I can see the arc cut in the bottom of the side panels, but it also looks like I see kind of a parallel arc cut in the top edge of the side panels, but maybe just at one end?

Uh. . . WHAT?!!? :roll:

And to think, I was wondering what I'd have to worry about, tomorrow. . . :lol:

Mike S.
Spring Hill, FL
 

beekeeper

Well-Known Member
Mar 4, 2009
1,917
59
I'm thinking I've seen a picture of seedtick measuring the angle at the bow on one, and getting a reading of 55*. So, the stem would be made with a pair of cuts with the blade set at 27 1/2*.

You will have to check his post on how to do the stem. I have one I copy and then plane it to fit my boats sides.

A couple of movable jigs can ensure the 35* flare, then with a pair of "substantial" breastworks in place, that amount of flare can be carried quite a ways foreward and aft, and held there.

Yes, but understand a 26" wide floor and a 35deg. flair will not give you a 36" beam with 12" sides. It may give you the looks you want and the results may work for you, but it won't be the 36" you specified in your specifications. Not saying one is better, just pointing out there is a lot to consider. Plan and choose your goals and features well.

And then the other little mystery, you used the term, "fish form." I think I've read that one somewhere around here. . . An asymmetrical hull, with the larger end at towards the bow, rather than the Swedish form, with the smaller end forward.

Did I get that one right? (And do I win anything if I did?)

Yes, but, again you have to decide if that is best for you. I'm guessing these boats evolved as working boats carrying most of the load in the front, and the other gains the design has to offer. You will have to decide, if that is best for you or if that is what you want.

In the "New Marsh Pirogue" pictures, I can see the arc cut in the bottom of the side panels, but it also looks like I see kind of a parallel arc cut in the top edge of the side panels, but maybe just at one end?


I spoke with Keith this week about the form (flowing lines) of the sides of his boats. The top is not parallel with the bottom edge. You will have to study their post to figure how to do those.

Food for thought:
Make a list of the visual aspects you want and the design features it will take to do that. Then make one for performance requirements. Compair the two, compromise if needed and then build it. The scale model will help with this process.

beekeeper
 

FlaMike

Well-Known Member
Jun 20, 2007
624
2
Spring Hill, FL
www.ptponds.com
On this build, it is a combination of form and function that will dictate the dimensions. I definitely have have a size range in mind, but not a specific size. That range is 12 to 14 feet, looking towards the shorter end of the scale.

The beam at the bottom panel will not be less than 24", I'd like to see 28", but will settle for 26" in order to make things work.

The top beam will be whatever it can be, given the amount of flair and the width of the side panels.

The most often quoted size for a pirogue that I've seen has been 10 inches wide. But when we are talking about cutting an arc out of the bottom side of the panel to help set the rocker in the range of a marsh-style pirogue, and perhaps some sort of arc out of the top of the side panel, to affect the appearance of the boat's profile look, that 10 inches starts to look a little small. So I thought I'd start out with the widest side panels I could get out of a 2 panel design, which would be *almost* 12 inches.

That 36" figure I mentioned earlier did come from a post I'd read, and in retrospect, I doesn't sound quite right to me either.

What I am working towards is a pirogue approximately 12 feet long, with the looks I've seen in the marsh-style.

Now, if the weather will work with me just a little bit, I'd like to get two "generic" side panels cut out, about 6 feet long by 6 inches wide, so I can approximate a bow & stern on them and wire them loosely together and put a 35* form in between the pair so I can get a starting point and see the possibilities.

Mike S.
Spring Hill, FL
 

FlaMike

Well-Known Member
Jun 20, 2007
624
2
Spring Hill, FL
www.ptponds.com
All day rain today, and the garage is no where near ready for any kind of work going on. :oops:
But, I did get the sides drawn 1\2 scale on a piece of the thin luan and will will get it cut tomorrow, along with some flare templates and probably be able to start another thread with some pics posted.

I did draw out a midships cross section on some graph paper, however. Now, this wouldn't be all that accurate, in that its a drawing of a straight side, and without allowing the bottom to bow (producing the rocker.) But it does look like with a 26 in bottom, 12 in sides at a 35* angle, the width at the top of the sides looks to be about 40 inches. Way too wide! :shock:

Of course, that graph paper drawing doesn't take several things into account, but it gives good argument to building that 1/2 scale model. . . :wink:

And then I can "plug in" as many variables as I can think of. Including the angle of the stems, how much arc to cut in the side panels, how much flare and how far forward can I carry it. . . Whatever else I can think of.

Sounds like fun.

Mike S.
Spring Hill, FL
 

FlaMike

Well-Known Member
Jun 20, 2007
624
2
Spring Hill, FL
www.ptponds.com
I decided to keep this thread going a while longer.

I did at least get a start on the 1/2 scale thing, enough to convince myself it is the way I want to go, anyway.
So, the following is NOT some new, weird kind of "smilely," it's a "test flight" of the model. :lol:

scale01.jpg


It does look more like a smiley that anything else, except maybe something you'd serve a banana split in! :oops:

I cut a pair of 6'4" panels out of a sheet of "doorskin" luan, maybe 3mm or so. (Full scale, those side panels would have been 12'8".) I wired the ends together and put a former in between that produced a 35* flare and a scale width where the bottom panel would be of 26 inches.

scale03.jpg


This gave a maximum beam (top of the side panels,) of 40", since the actual measurement was 20 inches, at the top of the side panels and 14 at the bottom.

Oh, but wait, it gets worse! :)

I had been thinking that with the greater flare angle that I'd need to change the angle of the stems. Now I think I should have left them the same as my UJ pirogue, 45*, and started changing thing ONE AT A TIME. (When you change more than one thing at a time, you never quite know what change did what.)

scale04.jpg


One of the changes, the increased flare or the stem angle, gave the model a ridiculous amount of rocker! Almost 4 inches on each end. That would be 8 inches at full size. I know that a 28" bottom on a 12' pirogue would normally give a pretty good amount of rocker if nothing was done to compensate, but I think this one got way out of hand.

scale02.jpg


Well, it is kind of boat-like, anyway. And this is an experiment for me, after all. . . So I'm happy with this so far. :D (No, really!)
At this half-scale, I can get 4 sets of side panels out of a $9 sheet of luan. This can keep me from seriously screwing up a $50 sheet of the good stuff, later on. Now, I can re-cut the ends, then cut an arc in the bottom of the side panel, and quite a few other things until I get it just like I want it, then start on the full-size build with a certain amount of confidence.

Like I said, this IS getting to be fun! :mrgreen:

Mike S.
Spring Hill, FL
 

beekeeper

Well-Known Member
Mar 4, 2009
1,917
59
Short on time,but food for thought:
You have not yet cut the arc from the bottom edge of the sides. That will lower the middle of the sides and reduce the rocker. I have not built a boat using this method(did experiment with scaled model), but I think you can put the model on a flat table. Measure down at the ends the amount of rocker you want. Scrib a line onto the side between these two points and that will give you the arch to cut out.
I think a marsh pirogue's stems(curved) are more vertical, than what you have. I use 8" on 12". 12"on 12" would be 45deg.
Looks like you have the spreading jig mid way. This would be symetrical form. If you want the fish form look you will have to use two jigs and adjust them fore and aft along the sides to get the widest part of the floor in front of center.
You need to get the stems', and bottom's shape worked out befor scribing the arc.
You have made a good start. Haven't even wasted a board yet.

beekeeper
 

tx river rat

Well-Known Member
Feb 23, 2007
3,043
2
Waco Tx
IM001610.jpg


IM001621.jpg


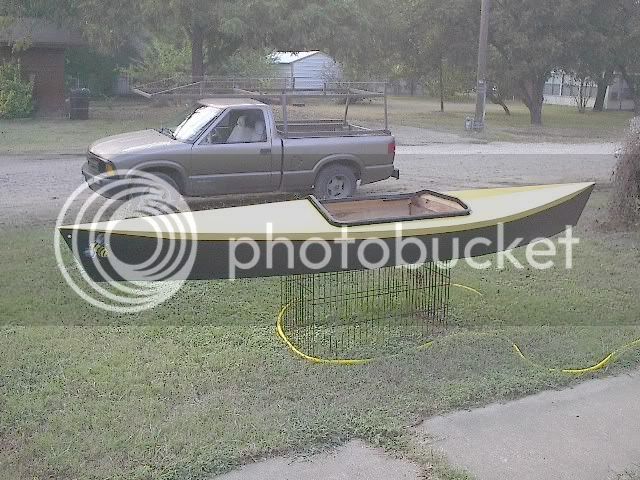
This is my grandaughters boat, 12 ft long 28 inches at bottom 32 inches at the top. they get up and swap sides it is a heck of a stable boat.

I started at middle drew an arch from there to 6 ft with a 3 inch rise (bow)

Started at middle and drew an arch with a 2 inch rise at 6 ft
drew these top and bottom of the sheets.
I left the ends loose stitched it together on the sides. These let me flair the sides to get the look I wanted I then cut the ends. This boat had 2 inch rocker in the front 1 inch in the back.
Now I dont like the wide flair so my sides are probably straighter than yours will be.
Ron