New pirogue .....hybrid build | SouthernPaddler.com

New pirogue .....hybrid build

jdupre'

Well-Known Member
Sep 9, 2007
2,327
40
South Louisiana
Well, it's been a while since I built a pirogue and I'm ready. Beekeeper and I have been burning up the phone and email lines figuring all the best ideas. I ordered the epoxy and ring shank nails. I have glass cloth left over, but I won't need much. I guess you could call this a hybrid build because I'll use epoxy and glass sparingly for strength in the butt joints, scarfs and for glueing the stems together. The bottom will be held on by chines and nails. I'll probably put a bit of glass on the bottom 2 feet, bow and stern. Probably use epoxy fairing for around the chines for a smooth hull. I just can't go a full glass boat anymore.

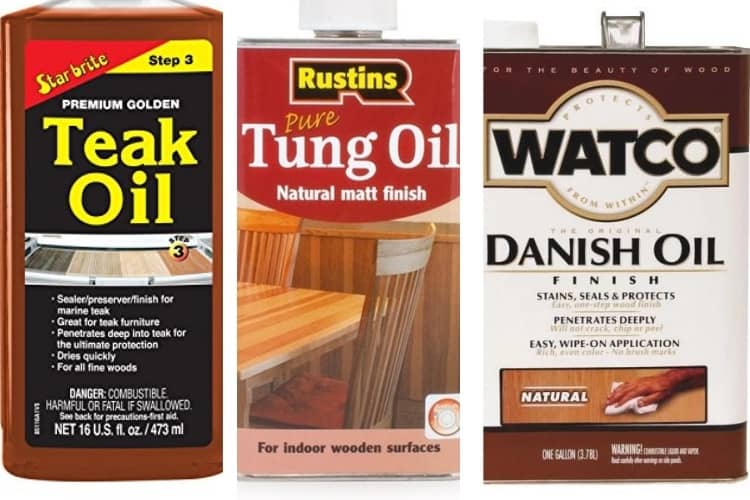
I just added another 8 foot section onto my 8 ft work table and penciled a center line. I found some really nice sinker cypress pieces that someone threw in the dump. Imagine......threw good cypress away! I processed them and planed the scarfs ( only 6 feet long) for the gunnels. My plan is to paint the bottom up to a little above the waterline . I may also paint the inside floor up to about the same point, just for something a little different. May do a Danish oil type finish for everything else or might just go wild and get some good varnish.

Specs: 15.5 feet x 24-25" bottom, 25 degree flair, 1 to 1 1/2" rocker, rounded stems, sanded pine ply, tapered gunnels, maybe some fancy wood breasthooks. As most of you know, these are just speculative specs. ALL are subject to change as the mood strikes. :D
 

beekeeper

Well-Known Member
Mar 4, 2009
1,917
59
something a little different. May do a Danish oil type finish for everything else or might just go wild and get some good varnish.

A link to some oil finishes comparisons.


Did you choose "Danish" for a particular reason? I like the idea of spray on, or rub on and then wipe excess off with a cloth. 2 or 3 coats and you are finished.
 

jdupre'

Well-Known Member
Sep 9, 2007
2,327
40
South Louisiana
Good info, Bee. I used my version of Danish oil on the little 8 ft bateau I built a few years back. It goes on easily and sinks into the wood. No sanding between coats. You can slather on a coat over the whole boat in 10 minutes. No brush streaks, no hairs caught in the surface, no flies or dust stick to it. The only con I've found is that it doesn't give that luscious, glassy smooth surface of 5 coats of varnish. Even with 3-4 coats, you will still feel the grain of the wood. It's protected, just not silky smooth. It enhances the wood color and grain, but is not glossy.
 

oldsparkey

Well-Known Member
Aug 25, 2003
10,479
123
Central , Florida
www.southernpaddler.com
I have a wooden Indian ( American ) flute. To protect it I soaked the inside of the flute and the inside of the mouthpiece and chamber with Tung Oil. It does a great job of protecting the wood from the moisture in my breath that will collect inside the chambers.
 

jdupre'

Well-Known Member
Sep 9, 2007
2,327
40
South Louisiana
Jack, actually many varnishes contail linseed oil. By itself it's not the best. When combined with mineral spirits and varnish, it becomes a much better product.
 

jdupre'

Well-Known Member
Sep 9, 2007
2,327
40
South Louisiana
Quick experiment. Pine ply sanded to about 80 grit. Equal parts boilded linseed oil, Helmsman varnish and mineral spirits. Flooded surface with about 6-8 tablespoonsful. Wiped it around and allowed it to puddle on the surface. Dropped a big pinch of wood flour on the still-wet surface.(2nd pic) Walked away for 10 minutes. Wiped surface of remaining oil and ALL traces of wood flour ( easy). Surface dry and not sticky. Pressed all 10 fingers onto surface several times. No fingerprints, no stickyness, no dust, (1st pic) So, about 2 tablespoons each of linseed oil and varnish sunk into the wood......not on the surface.
unnamed - 2020-04-08T170808.335.jpg
unnamed - 2020-04-08T170751.412.jpg
 

jdupre'

Well-Known Member
Sep 9, 2007
2,327
40
South Louisiana
Jack, it was just a "worse case scenario" to show how fool proof the application is. No fussing around with special brushes, apllying with the grain,etc. No worries about flies or dust or stray brush hairs in the finish. Can you imagine what a pinch of sawdust would do to a freshly done standard varnish finish? Horrors!

I'll slosh on a couple more coats, let it dry for a few days, and nail the varnished and the unvarnished pieces to a board and leave them outside in the elements. I'll wet them down every day when I water my bonsai. We'll see how they hold up.
 

jdupre'

Well-Known Member
Sep 9, 2007
2,327
40
South Louisiana
Houston, we may have a problem. Went plywood shopping this morning and the quality has really slipped in the last several years. The sanded pine ply I came to love is really nice on one side and, well, not so nice on the other. The last ones I bought were basically clear on both sides. The ones I saw today at Lowe's and Home Depot were not. I'll keep looking.
 
Last edited:

jdupre'

Well-Known Member
Sep 9, 2007
2,327
40
South Louisiana
I did find some pretty decent pine ply in Pierre Part..... about a 1/4 mile from where Troy Landry and his gator hunting crew take off in the morning.

I drew and cut out 2 pieces that will make one side of the pirogue. As soon as my epoxy order comes in, I'll join those two pieces and use them to make a copy for the other side. I sanded all the ply with 50 grit and then 80 grit so it'll be easier to finish sand when the boat is all together.

I spent an enjoyable hour making a template for the curved ends. I settled on a shape pretty close to the one on the pirogue made in 1945 in "The Last Pirogue Maker".

Second pic is my sanding block. The design is from an old carpenter I worked with WAY back when. It's a little fiddly to ge the measurement right, but it works flawlessly. The scalloped top pushes the sanding belt down and tightens it so it won't spin. You can change belts in 20 seconds. A 50 grit belt after a few passes of the plane will take wood down to a pencil line in no time.

unnamed - 2020-04-10T175258.252.jpg
unnamed - 2020-04-10T175316.280.jpg
 

jdupre'

Well-Known Member
Sep 9, 2007
2,327
40
South Louisiana
It's custom made for the particular sanding belt you have. I think this one is 2" x 18".....so the block is 2" wide. The block ends are similar in size to the rollers on your particular belt sander. I sanded both sides of 2 sheets of plywood with 50 grit then 80 grit in about 30 minutes. Crazy as it may seem, I LIKE sanding IF the block is comfortable and the sandpaper cuts well.
 

Kayak Jack

Well-Known Member
Aug 26, 2003
13,976
171
86
Okemos / East Lansing Michigan
Thanks, Joey. Fitting the block to the belt is a good idea. I’ve been doing it t’uther way around. Sometimes when puzzle solving, a different approach pays dividends. Just try walking into a room backwards sometime!
 
Last edited:

oldbuffpilot

Well-Known Member
May 13, 2014
629
34
80
Central Kansas and Central Texas
I did find some pretty decent pine ply in Pierre Part..... about a 1/4 mile from where Troy Landry and his gator hunting crew take off in the morning.

I drew and cut out 2 pieces that will make one side of the pirogue. As soon as my epoxy order comes in, I'll join those two pieces and use them to make a copy for the other side. I sanded all the ply with 50 grit and then 80 grit so it'll be easier to finish sand when the boat is all together.

I spent an enjoyable hour making a template for the curved ends. I settled on a shape pretty close to the one on the pirogue made in 1945 in "The Last Pirogue Maker".

Second pic is my sanding block. The design is from an old carpenter I worked with WAY back when. It's a little fiddly to ge the measurement right, but it works flawlessly. The scalloped top pushes the sanding belt down and tightens it so it won't spin. You can change belts in 20 seconds. A 50 grit belt after a few passes of the plane will take wood down to a pencil line in no time.

View attachment 1349View attachment 1350
Thanks for the idea I've been buying rolls a sandpaper Harbor Freight and stapling them to a board I like this better. Another one to pass to the next generation
 

jdupre'

Well-Known Member
Sep 9, 2007
2,327
40
South Louisiana
Well, one more quality aspect of finding and using decent plywood. I cut out the four halves that will be the pirogue sides. I stacked them together, lined up the corners and planed and sanded the reverse chine curves together to get mirror images. No problem. I went to lay them out like they would be on the boat and sighted down the 16 foot length. HOLY MOLY! The factory edges looked like a roller coaster. I restacked them and lined up the bottom reverse chine curves and checked the top edges (factory edges, remember) and they were WAY off. Not " hit it a couple licks with a plane" off, but "strike another chalk line and plane almost a 1/4" off" off.

Not only that, but the factory corners where not square. You could always count on at least square corners and straight sides on plywood, but no more.
 

Gamecock

Well-Known Member
Jul 17, 2012
161
6
Well, one more quality aspect of finding and using decent plywood. I cut out the four halves that will be the pirogue sides. I stacked them together, lined up the corners and planed and sanded the reverse chine curves together to get mirror images. No problem. I went to lay them out like they would be on the boat and sighted down the 16 foot length. HOLY MOLY! The factory edges looked like a roller coaster. I restacked them and lined up the bottom reverse chine curves and checked the top edges (factory edges, remember) and they were WAY off. Not " hit it a couple licks with a plane" off, but "strike another chalk line and plane almost a 1/4" off" off.

Not only that, but the factory corners where not square. You could always count on at least square corners and straight sides on plywood, but no more.
Hey Joey, back in 2006 I drove flatbed for TMC," to much chrome", for awhile and hauled several loads of plywood out of a plant in Mississippi. It was awful looking stuff, all dimensions in every stack. I strapped it down and carried it to Oklahoma to a BIG place where they built storage sheds and sold lumber. I guess they squared it up there. Those plywood plants are something to see and smell with 100's of workers. Dave. PS I like your sanding block too.
 

Kayak Jack

Well-Known Member
Aug 26, 2003
13,976
171
86
Okemos / East Lansing Michigan
I realize that purchase price per sheet is cheaper for that plywood. And you have a chance to save money. But my personal preference is to buy top quality wood the first time, and be done with it.
And It pleases me to work with the stuff. Pleases me.