Been thinking for a while now about how to obtain a rudder. I don't need one, I just want one because other people have one and it will help later on with a plan for a sail I have brewing. Could have bought a rudder kit but then I s'pose I could have bought a boat too. That just isn't me. It all hinged (bad pun intended) on sourcing a two-way pivot. Been racking my brains and believe me they need racking, on what to use that was: A, simple, like me, and B, cheap... also like me. :| Considered various bits of plastic plumbing, hinges, fabricating stuff that would enable a two-way pivot but that kind of endeavour would require work. (not at all like me )
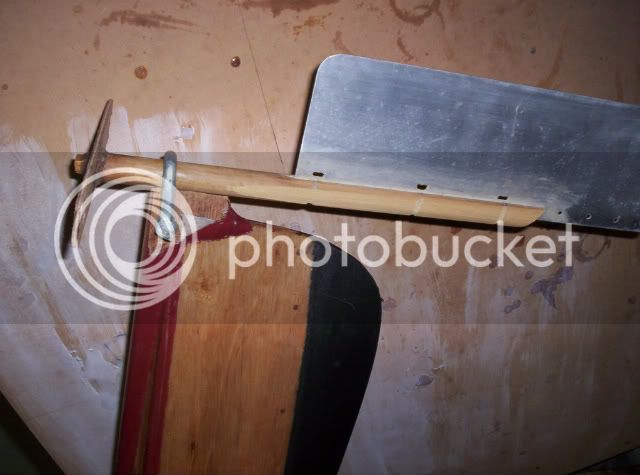
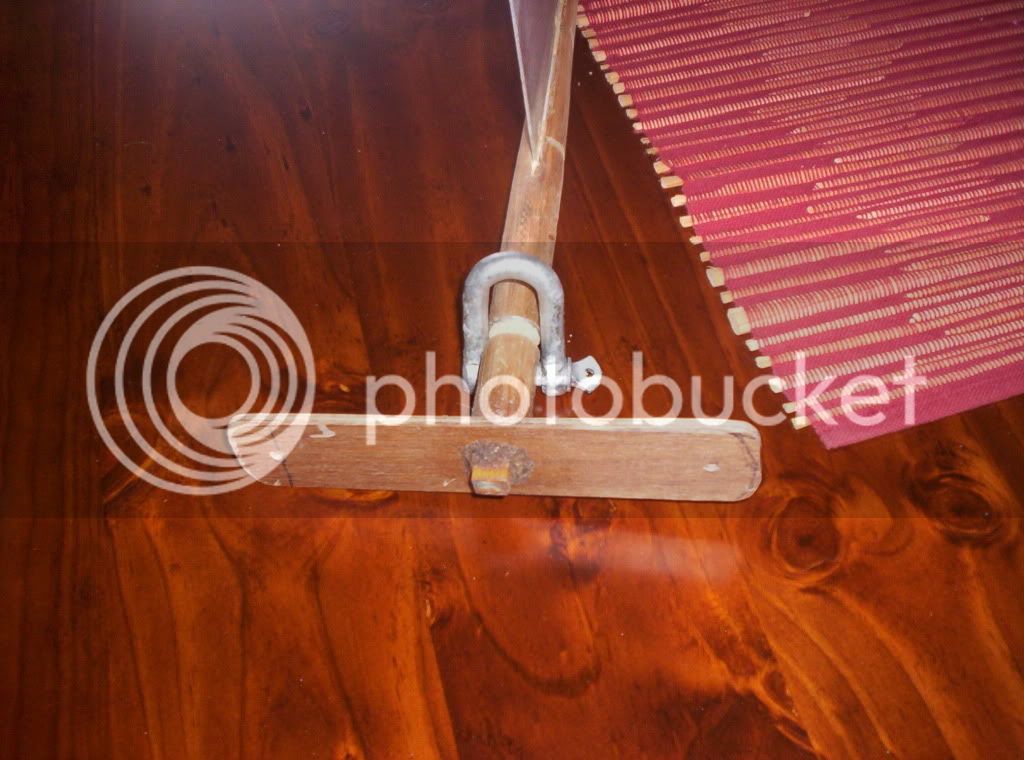
Wandering around a hardware place dreaming about my two-way pivot when I came across a D shackle. HMM! As soon as I saw it I saw my two way pivot!
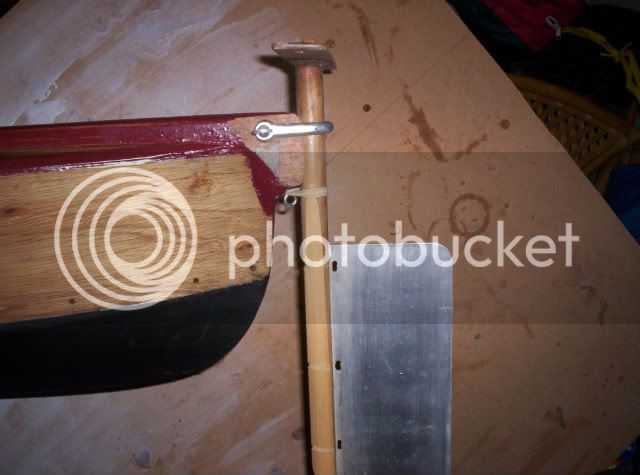
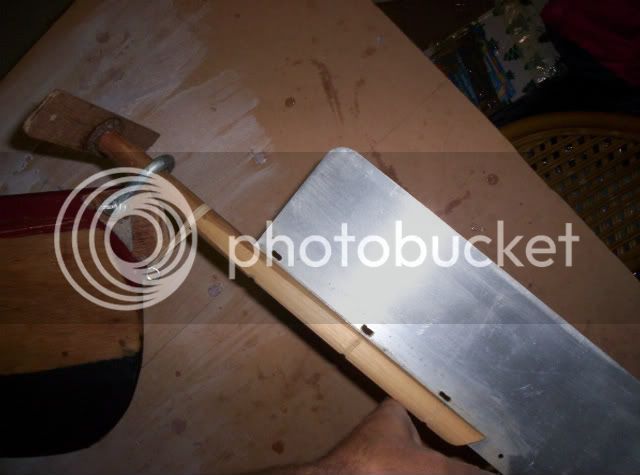
Criteria for it were twofold (another bad pun). It had to receive a mop handle which was always going to be the shaft of the rudder, and be of a size where the piece of wood I deliberately built into the stern of the boat would also be 'connectible'. The post at the stern of the boat will next be squared off vertically, narrowed a little and a groove cut vertically down the end to receive and restrain the mop handle, above and below the shackle. Then rounded off suitably at the top to allow an upward pivot. The tension bit I have worked out already. The whole thing will pivot on the shackle pin to retract/deploy.
You'll get the idea by now that my investment in componentry was not going to be huge. Shackle cost $3.00. If successful, or when rust appears I will upgrade to a stainless steel shackle. The mop handle piece just means my wife will have to lean forward a bit to mop the floor, hey she's not that tall. Grooves for shackle and cable ties cut with a round rasp. I cut the slot for the aluminium with a dremel cut off wheel, to the depth it would reach. Very tight fit, probably does not need cable ties to secure it but I will put them on anyway. The piece of aluminium I "acquired" on my travels. The only other outlay will be for 3 cable ties, one screw, suitable cordage, all of which I have, and a couple of rubber bands which will be the single most important part of my rudder setup. The whole wooden bit will be painted with polyeurethane paint, and where/if, the shackle wears on the shaft I'll just put a bit of linseed or cooking oil now and then. If I need to replace the mop handle part I'll just buy my wife a kneeling pad to do the floors with. :lol: Having seen the pic on the big screen I shoulda used my glasses when cutting the slots. I'll get the dremel out again. Things always look better without my glasses lately. :roll:
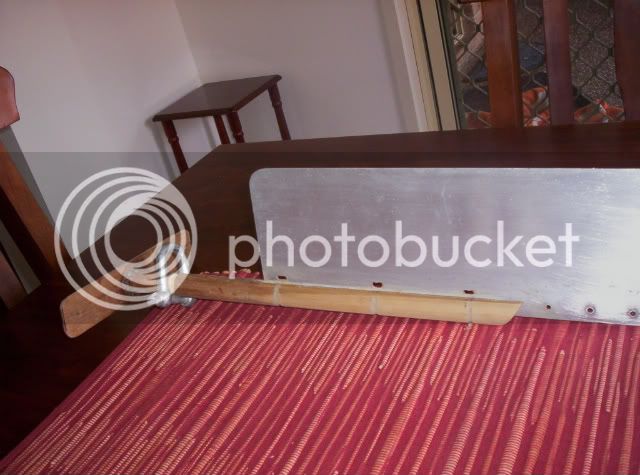
Still at the early stage of development and requires cleaning/tidying up a bit.
I reckon "Joel" nobucks would have loved this.
Ps The whole thing will be easily added and removed by unscrewing the shackle pin, for transporting
Cheers john
Wandering around a hardware place dreaming about my two-way pivot when I came across a D shackle. HMM! As soon as I saw it I saw my two way pivot!
Criteria for it were twofold (another bad pun). It had to receive a mop handle which was always going to be the shaft of the rudder, and be of a size where the piece of wood I deliberately built into the stern of the boat would also be 'connectible'. The post at the stern of the boat will next be squared off vertically, narrowed a little and a groove cut vertically down the end to receive and restrain the mop handle, above and below the shackle. Then rounded off suitably at the top to allow an upward pivot. The tension bit I have worked out already. The whole thing will pivot on the shackle pin to retract/deploy.
You'll get the idea by now that my investment in componentry was not going to be huge. Shackle cost $3.00. If successful, or when rust appears I will upgrade to a stainless steel shackle. The mop handle piece just means my wife will have to lean forward a bit to mop the floor, hey she's not that tall. Grooves for shackle and cable ties cut with a round rasp. I cut the slot for the aluminium with a dremel cut off wheel, to the depth it would reach. Very tight fit, probably does not need cable ties to secure it but I will put them on anyway. The piece of aluminium I "acquired" on my travels. The only other outlay will be for 3 cable ties, one screw, suitable cordage, all of which I have, and a couple of rubber bands which will be the single most important part of my rudder setup. The whole wooden bit will be painted with polyeurethane paint, and where/if, the shackle wears on the shaft I'll just put a bit of linseed or cooking oil now and then. If I need to replace the mop handle part I'll just buy my wife a kneeling pad to do the floors with. :lol: Having seen the pic on the big screen I shoulda used my glasses when cutting the slots. I'll get the dremel out again. Things always look better without my glasses lately. :roll:
Still at the early stage of development and requires cleaning/tidying up a bit.
I reckon "Joel" nobucks would have loved this.
Ps The whole thing will be easily added and removed by unscrewing the shackle pin, for transporting
Cheers john