
Okay people, go get your favorite libation and sit in a comfortable chair. This is going to be a lengthy report on my piro build(complete w/pics!).

I decided to add the deck back to the first rib and then to make them airtight. Added the port hole in both ends of the piro. This also gives me a dry place to store my cell phones, fishing license, fish finder and camera. The blush is from sanding the resin because the decks had all kinds of bugs stuck to it. I had to sand the whole inside and both decks because I finished painting the resin late in the day and it didn't cure enough before the creatures of the night came out. I learned a lesson there. The trails and tribulations of a rookie boat builder!
[/img]
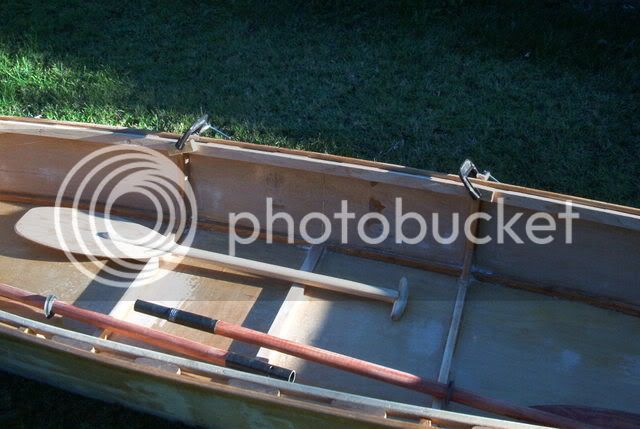
The blush marks on the sides are from sanding the resin where I got it a little thick and had runs. The dark stain mark is from the initial butt splice that glued the plastic sheet to the plywood and I had to peel the plastic sheet off. The outer layer of veneer came off. I probably will paint the interior over the winter to cover this. The single paddle is made from a piece of closet rod pole and a piece of scrap plywood. That will be my backup paddle. The clamps are holding the inner gunwale in place while the glue sets.

The inner and outer gunwales are made of fir (cut from a 2x 8), the only wood I could find that was 16 ft long. The spacers are made of black walnut, and should be a nice contrast to the fir. Not shown in any of these pics is the handholds (not complete yet)which will be made from black walnut also and mounted on the bow and stern decks.
The double paddle is made out of a closet pole and scrap plywood. My niece was here on a visit and stained the double paddle for me. She is only 8, but she did a pretty fair job, and the paddle has a very interesting texture and finish! Afterwards, I decided to cut it in half so I could put drip rings on the shafts. So, I added a carbon ferrule.
I also added a rib on the floor where the buttsplice is to strengthen this area.
[/img]
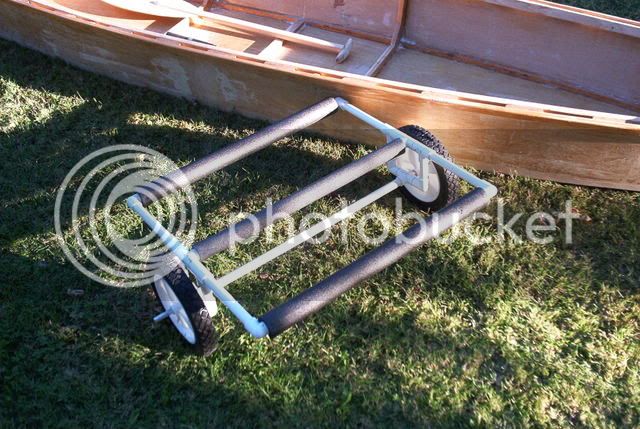
This pic shows the cart I made today. It was from a lot of PVC pipe I picked up yesterday. I used 1 length of pipe and a few tee's and ell's. I have 32 lengths of pipe left over. Went to Home Depot and bought an aluminum shaft and a pair of wheels. The foam over the PVC is used for insulation. I wanted to use a noodle, because they are stronger, but couldn't find one. The swimming season is almost over here and swimming equipment is hard to find.

The pics were taken very late today, so they don't show a lot of detail or color, because of the angle of the sun. Tomorrow, I am going to add a keel and put the last coat of resin on the piro, also finish the handholds and bolt thru the deck. I also have to put some cotter pins on the axles for the cart. I hope to get it in the water next week.
[/img]
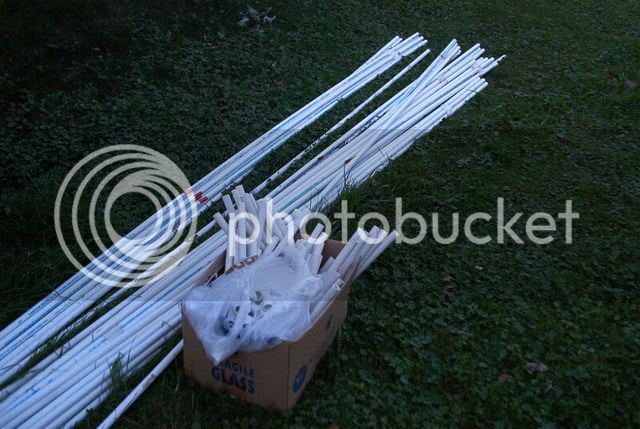
This is the pile of 1/2" PVC pipe that I bought to build the cart to wheel the piro down to the beach. I have 32 pcs left plus fittings and don't know what to do with them. If someone would like to have a cart similar to what I have put together, I would be glad to cut up the PVC and send them to you. You will have to glue them together and purchase the wheels and axle yourself. First tho', I want to finish the piro and then I will put together a kit after I figure out the dimensions, because I made this cart without too much thought to reproducing it. I pu it together as I went along. I will have to figure out how to make the width fit the width of the persons piro or canoe. Anyway, when I get the bugs worked out, I will be happy to send the cut pieces to anyone who wants them. I have enough PVC to make about 20 or 25 carts. The one in the photo only took one 10 ft length plus 8 ell's and 8 tee's.
By this time, you must be out of your libation, so that's all for now folks! I will post more (and better) photos when I get the keel, handholds and last coat of resin on.
JC
(Jim)
Chuck:
I hope these photos are the right size. I couldn't remember what size I was supposed to make them. I hope they aren't too big.
I decided to add the deck back to the first rib and then to make them airtight. Added the port hole in both ends of the piro. This also gives me a dry place to store my cell phones, fishing license, fish finder and camera. The blush is from sanding the resin because the decks had all kinds of bugs stuck to it. I had to sand the whole inside and both decks because I finished painting the resin late in the day and it didn't cure enough before the creatures of the night came out. I learned a lesson there. The trails and tribulations of a rookie boat builder!
[/img]
The blush marks on the sides are from sanding the resin where I got it a little thick and had runs. The dark stain mark is from the initial butt splice that glued the plastic sheet to the plywood and I had to peel the plastic sheet off. The outer layer of veneer came off. I probably will paint the interior over the winter to cover this. The single paddle is made from a piece of closet rod pole and a piece of scrap plywood. That will be my backup paddle. The clamps are holding the inner gunwale in place while the glue sets.
The inner and outer gunwales are made of fir (cut from a 2x 8), the only wood I could find that was 16 ft long. The spacers are made of black walnut, and should be a nice contrast to the fir. Not shown in any of these pics is the handholds (not complete yet)which will be made from black walnut also and mounted on the bow and stern decks.
The double paddle is made out of a closet pole and scrap plywood. My niece was here on a visit and stained the double paddle for me. She is only 8, but she did a pretty fair job, and the paddle has a very interesting texture and finish! Afterwards, I decided to cut it in half so I could put drip rings on the shafts. So, I added a carbon ferrule.
I also added a rib on the floor where the buttsplice is to strengthen this area.
[/img]
This pic shows the cart I made today. It was from a lot of PVC pipe I picked up yesterday. I used 1 length of pipe and a few tee's and ell's. I have 32 lengths of pipe left over. Went to Home Depot and bought an aluminum shaft and a pair of wheels. The foam over the PVC is used for insulation. I wanted to use a noodle, because they are stronger, but couldn't find one. The swimming season is almost over here and swimming equipment is hard to find.
The pics were taken very late today, so they don't show a lot of detail or color, because of the angle of the sun. Tomorrow, I am going to add a keel and put the last coat of resin on the piro, also finish the handholds and bolt thru the deck. I also have to put some cotter pins on the axles for the cart. I hope to get it in the water next week.
[/img]
This is the pile of 1/2" PVC pipe that I bought to build the cart to wheel the piro down to the beach. I have 32 pcs left plus fittings and don't know what to do with them. If someone would like to have a cart similar to what I have put together, I would be glad to cut up the PVC and send them to you. You will have to glue them together and purchase the wheels and axle yourself. First tho', I want to finish the piro and then I will put together a kit after I figure out the dimensions, because I made this cart without too much thought to reproducing it. I pu it together as I went along. I will have to figure out how to make the width fit the width of the persons piro or canoe. Anyway, when I get the bugs worked out, I will be happy to send the cut pieces to anyone who wants them. I have enough PVC to make about 20 or 25 carts. The one in the photo only took one 10 ft length plus 8 ell's and 8 tee's.
By this time, you must be out of your libation, so that's all for now folks! I will post more (and better) photos when I get the keel, handholds and last coat of resin on.
JC
(Jim)
Chuck:
I hope these photos are the right size. I couldn't remember what size I was supposed to make them. I hope they aren't too big.
