Beginning a UJ Pirogue for the 1st time - Again! | Page 3 | SouthernPaddler.com

Beginning a UJ Pirogue for the 1st time - Again!

Slammer

Well-Known Member
Feb 16, 2006
63
1
South Texas
'Shine........Man does that bring back some memories. Wished I had a steady supply of it.

I remember back in the day....High school..........There were some guys that would come to Tx to hunt from West Virginia. They brought some Apricot shine every year for us. Oh boy was that some good stuff.

Then.....in college............. :roll: :lol: :shock:


Good 'shine.....great stuff........bad shine...........still good.
 
  • Like
Reactions: FrankAS

VTFogg

Well-Known Member
Jan 14, 2007
73
1
Rutland, Vermont
My epoxy order from Raka arrived today. From Florida to Vermont in just 4 days is pretty good service! It's finally snowing here, so me and the two older boys are headed up to the mountain for some skiing tomorrow morning. My oldest boy, Sam, is 13 tomorrow! Hmmmm I planned to ski, then chores, then start the epoxy. Mother may have different plans.
 

VTFogg

Well-Known Member
Jan 14, 2007
73
1
Rutland, Vermont
Well I mixed up 3 ounces of Raka epoxy last night and coated all three ribs, the ends of the four side boards (3 inches in from the end), and a bit on the stem & stern. Tonight, I took the big step and did my but joints. This is nerve racking - I hope I did this alright!

I mixed some maple flour in and drizzled it between each of the boards with a popsicle stick (what do you guys use?), pushed the boards together and covered it with 2 sheets of waxed paper. Since there's such a curve to the luan, I weighted it all down nice and level with paint cans, tackle box, an old table, a bucket of cat litter, and everything I could get my hands on. I know I'm going to have quite a bit of epoxy to sand down in the joints because drizzling it in with a popsicle stick certainly wasn't precise. If it turns out ok, I plan to put fiberglass mat on top of one side of the joint on Saturday.

I probably won't sleep a wink tonight just thinking about it. :?

VTFogg
 

Kayak Jack

Well-Known Member
Aug 26, 2003
13,976
171
86
Okemos / East Lansing Michigan
Foggy,

You may have weighted it too much. Epoxy is a "space filler" glue, and you need to allow it to nave some space to fill.

I clamped the coaming onto a kayak to tightly once and had a glue starved joint. It popped free at an embarrassing time.
 

VTFogg

Well-Known Member
Jan 14, 2007
73
1
Rutland, Vermont
Hi Jack,

When I was drizzling the epoxy the gap was about the thickness of a popsicle stick. I did push the boards together before covering w/waxed paper and adding weight. My luan had a strong curl to it, so my intent with the weight was to get the boards to lay flat. Maybe I over did it. Heck, I even put my wife's sewing machine on top! I'll check it tonight. How will I know if it is glue starved? How wide of a gap should be left between the boards?

Thanks for all your help and suggestions. Lord knows I'll need them to build this. - VTFogg
 

VTFogg

Well-Known Member
Jan 14, 2007
73
1
Rutland, Vermont
I was heading off to work when I wrote that last post, but after reading Jack's warning I couldn't help myself and checked the joints. Removed the weight, peeled off the waxed paper and... The joints look great! A nice little even gap between the boards and filled with epoxy.

Hey, I think I can do this! I can't wait to mix up another batch tonight to apply the fiberglass cloth. Now how am I supposed to think of anything else at work today? :)
 

Kayak Jack

Well-Known Member
Aug 26, 2003
13,976
171
86
Okemos / East Lansing Michigan
A simple test is to grab the boards (parent material) and see if you can pull them apart at the joint. DON'T destroy the joint, just give it a chance to come apart. If the wood bends and the joint doesn't break, it's good.

When you weigh down or clamp a joint, just get it together firmly and don't try to compress it. Say, about the pressure you could generate by hand at max exertion. You'll be OK

Other builders may well have some more words on this too. Listen to them.
 

VTFogg

Well-Known Member
Jan 14, 2007
73
1
Rutland, Vermont
Jack, I tried your test and all seems fine. I just mixed up 3 ounces of epoxy, but glass cloth so that it covers 5 inches out from the joint and tried my first fiberglass splice. Many thanks to Mick for pointing me to the JEM Watercraft site with instructions on how to do this. I think it turned out pretty good, but wish I had put down just a bit more epoxy to better wet the cloth. I saw a few areas that don't seem fully wetted even though I squeegeed the air out of them with a plastic paint scraper. Those spots are pretty minor though. A couple more questions please?

1. I've been using epoxy in the evening as you guys recommend due to getting colder (even though its pretty chilly in my basement) and still get air bubbles. The epoxy is pretty thick, so should I heat it or use mineral spirits to thin it?

2. How do you post pictures to this site?

Building this is addictive. Darn - now I have to wait until tomorrow to do the other side!
 

Kayak Jack

Well-Known Member
Aug 26, 2003
13,976
171
86
Okemos / East Lansing Michigan
OK, Foggy, I have some questions & comments now.

1. Is there a reinforcing block on the other side of those joints? You can't just butt the ends together and glue them; you need a piece of plywood about 3" wide across the side of the joint that will be inside the boat.

2. Does that basement have a door at grade level out of which you can carry a finished boat?

3. Bless your heart for involving those kids. Wise move on your part.

I used to work with Boy Scouts. We would over-train them so that on the 50 mile afoot or afloat trips, they knew how to do everything that needed to be done. They could rescue us adults if need be. Main duty we had was overall safety of them on the trip - and getting them to bed at night and up next morning. What we learned was that you can't over train them. Keep on teaching, training, educating, and leading them

Teaching: facilitate learning
Training: teaching a skill - either physical or mental skill
Educating: teaching them how to learn, and how to think for themselves.
Leading: inspire them to do more than they would without your presence.
 

hairymick

Well-Known Member
Dec 8, 2005
2,107
2
Queensland, Australia
Heya Foggy,

Looking good mate.

As Jack sais, ya need some sort of re-inforcing on the butt joint. Jack likes a butt block, I prefer to lay fibreglass matt for about 6 inches either side of the join on both sides of the panel. Both methods work very well.

I wouldn't worry too much about the little air bubbles, just sand em out before the next layer of epoxy.
 

VTFogg

Well-Known Member
Jan 14, 2007
73
1
Rutland, Vermont
Hi Jack and Mick,

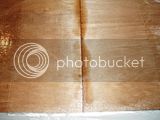
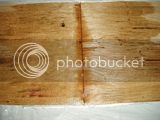
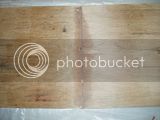
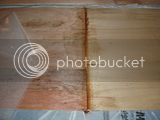
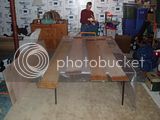
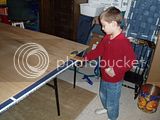
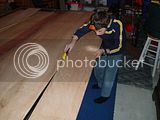
Thanks for keeping an eye out for me. The top 3 pictures above are the outside of each of the pieces, and show the joint after laying fiberglass mat on top. I was planning to do the same (no plywood block) on the inside of the sides and bottom. Is that ok? In your first reply to me Mick you were kind enough to point me to the instructions on the JEM Watercraft site. That showed reinforcing with only glass cloth, and I thought they meant I could do that for both sides. I have to go teach a skiing class in an hour - just enough time for me to go put glass cloth on the other side.

If I'm wrong it means Jack will never let up with the story of the banker that forgot there were two sides to a boat!

Unfortunately my basement is partially below grade and does not have a door or hatch. My friends have already started in on me with having to blast in order to get the boat out. There are two double hung windows side by side and I plan to remove the upper and lower sashes on one instead. Yes, I measured.

The boys are really excited about this even if they are not yet highly involved. I'm hoping to build a couple of these so we can all go out together. I grew up spending the summers on Lake Chargoggagoggmanchauggagoggchaubunagungamaugg which is the longest name of a lake in the world. Lots of time in old Lineman wooden boats, and fiberglass canoes. Unfortunately, spending summers there seemed to rule out boyscouting, but I spent a lot of time hunting, fishing, paddling, and sailing. Like Jack, my dad always stressed preparedness and learning about what we were doing outdoors. Now it's time to prepare the next generation for their adventures. Too bad so many kids' experience is limited to video games.

It's a beautiful & sunny 2 below zero day out there! - Brian :D
 
  • Like
Reactions: FrankAS

Kayak Jack

Well-Known Member
Aug 26, 2003
13,976
171
86
Okemos / East Lansing Michigan
You're fine w/ glass on both sides. In the back, dark and sinister, corners of my mind, I thought about mentioning glass as I was writing about plywood. Then, in my olde age of cantankerosity, I forgot it.

Yes, glass on both sides seems to be OK. The one time I tried it, I was unsuccessful in the roll-over procedure to glass the other side. I heard that ominous "CRACK" sound, followed very closely by an involuntary, "Oh $#it!" from close nearby. I returned to using plywood.

Were I to use glass, I would likely put two layers on, offset a bit to provide both wider load bearing area, and double coverage over the joint proper. I'd do that on both sides of the joint.

But, I'm a fussy olde farte who uses boats roughly, and hull integrity is worth a lot to me. Whilst on the water, I do not - ever - want to hear that "CRACK" sound. That's like flying in an aircraft, having the engine fail, and then asking, "What's all that quiet about?"

In both cases, it's nothing good gonna come of that.
 

oldsparkey

Well-Known Member
Aug 25, 2003
10,479
123
Central , Florida
www.southernpaddler.com
Well to uphold tradition since everyone says that Jack and I can never agree on anything , (most of the time they are right) :lol:

All of the boats I have made , I have made a few of them , the butt joints were glassed on each side with one layer of glass and none of them have broken , cracked or sunk on me.
You have to remember the glass that joined the joints together were glassed over when the boat was fiberglassed , so that makes for a double layer of glass over them , inside and out.

I like to use the glass for one simple reason ... it works. OK .. two reasons , when the boat is together then there is not any overgrown ridge , speed bump , uneven surface , or anything to distract from the seam in the boat or to cause any discomfort to the paddler if he or she is sitting in the area of the seam. Besides it was the way I was taught to put the seams (joints) together. :roll:

The upper deck (on a decked boat or kayak has the block or strip of wood under the deck part of the seam , including the side seams where the deck joins , even after I have glassed them together. Main reason is the seam is usually in the area where a paddler will place his hands and push on it to help get in or out of the cockpit of the boat. Anyway that is how this old , worn out , decrepit paddler gets in and out of his kayaks if there is not a wrecker or chain hoist to help me get out. :lol: :lol: :lol:

I understand Jack has a better system , he just rolls his kayak over , slips out and swims or wades to shore , no problems trying to get up an out of it and he gets a bath at the same time. :p

Chuck. ( boy I am in deep trouble with Jack .... now )
 
  • Like
Reactions: FrankAS

Kayak Jack

Well-Known Member
Aug 26, 2003
13,976
171
86
Okemos / East Lansing Michigan
It's OK, Chuck. You were in the dog house anyway. :lol:

I think the glass as a reinforcing block is an OK thing to do. Next boat will likely have that technique. Except, maybe the two center panels where an impingement on submerged obstacles seems most likely. Hull integrity is important when you misuse boats like I do.
 

VTFogg

Well-Known Member
Jan 14, 2007
73
1
Rutland, Vermont
Well I ran out of time to do the flip side this morning, but as soon as I got back in from skiing I jumped on side 2. My wife is starting to think I'm going off the deep end, as I grabbed her hair dryer and let it run on high for 30 minutes to warm the basement! I also used it directly on the joint areas of the wood. Just finished applying the cloth to side 2, and I think it looks like a very good job. I used a bit more epoxy this time prior to wetting the cloth and that really helped to eliminate air pockets. Then I just squeegeed out the excess.

Jack, I think you make a convincing argument and I may put a thin wood block on top just to be sure. Although when looking at Mick's and Chuck's boats it really is nice to not see the block.

Hmmm let's see what's next? I know I have to sand down the joints a bit, then cut the ends of the sides at 45 degrees and coat them in epoxy. Then screw them to the stem and stern which I have already epoxy coated. Then screw ribs on to the sides with two screws per side, right? Do I then put on the rub rail? Or does the rub rail come after the bottom is on? I think it was Chuck that wrote a post recommending the use of a medicine syringe with epoxy, loosely screwing the bottom to the ribs, then injecting a bead of epoxy under the ribs and sides. That sounds like a great idea.

This is more than a great project. It's an adventure!

Thank you all - Brian :D
 

oldsparkey

Well-Known Member
Aug 25, 2003
10,479
123
Central , Florida
www.southernpaddler.com
Rub rail on one side of the side boards ( either in side or outside) before the bottom is put on , if you don't do that then when you pick the boat up you stand a good shot at it flexing and breaking a rib. Something you do not want happening. :twisted:

Chuck.
PS. I usually do the outside one at this time since it does not need to cut or notched to fit the inside tops of the ribs.
 

hairymick

Well-Known Member
Dec 8, 2005
2,107
2
Queensland, Australia
Hi Brian,

I would dry fit everything, before you start applying glue to the stems, rubrails or joints, just to make sure every thing is right.

Screw in the centre rib then place the ones one either side. If the ribs are in the right place, put a small pencil line against the edges of the ribs, on the ply, then unscrew the THAT rib, apply the glue and re screw. Then go on to the next one. By moving the two end ribs forward and back, you can slightly change the shape of your boat and eyeball it till it looks about right for what you want.

Likewise with your rub-rails start in the middle of BOTH of the side panels at the same time and alternatively work out towards the ends so that you are applying even pressures to both sides of the boat at the same time.
 

VTFogg

Well-Known Member
Jan 14, 2007
73
1
Rutland, Vermont
Another question: Before assembling the pieces, should I apply a thin coat of epoxy with a roller to seal the wood? I think it would be a lot easier with the pieces laying down on the table.