Building an Abenaki | SouthernPaddler.com

Building an Abenaki

TX_yakker

Active Member
Sep 23, 2008
26
0
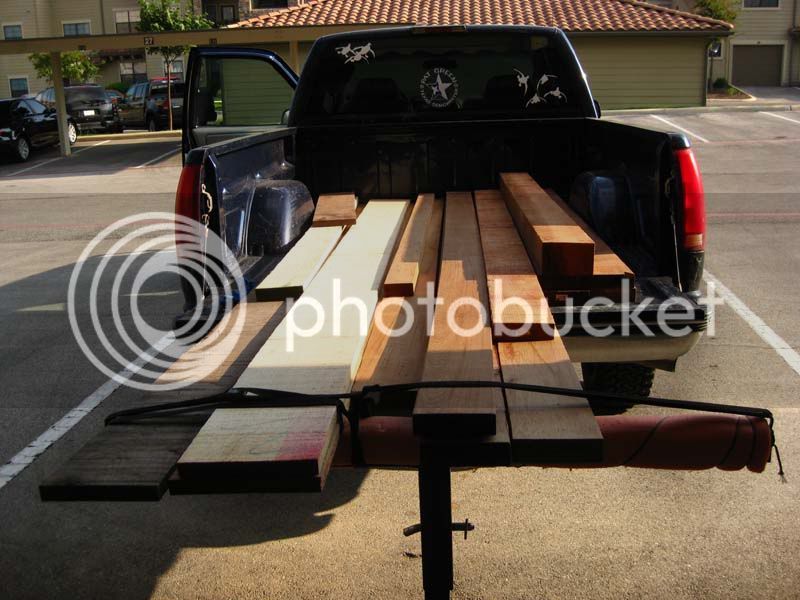
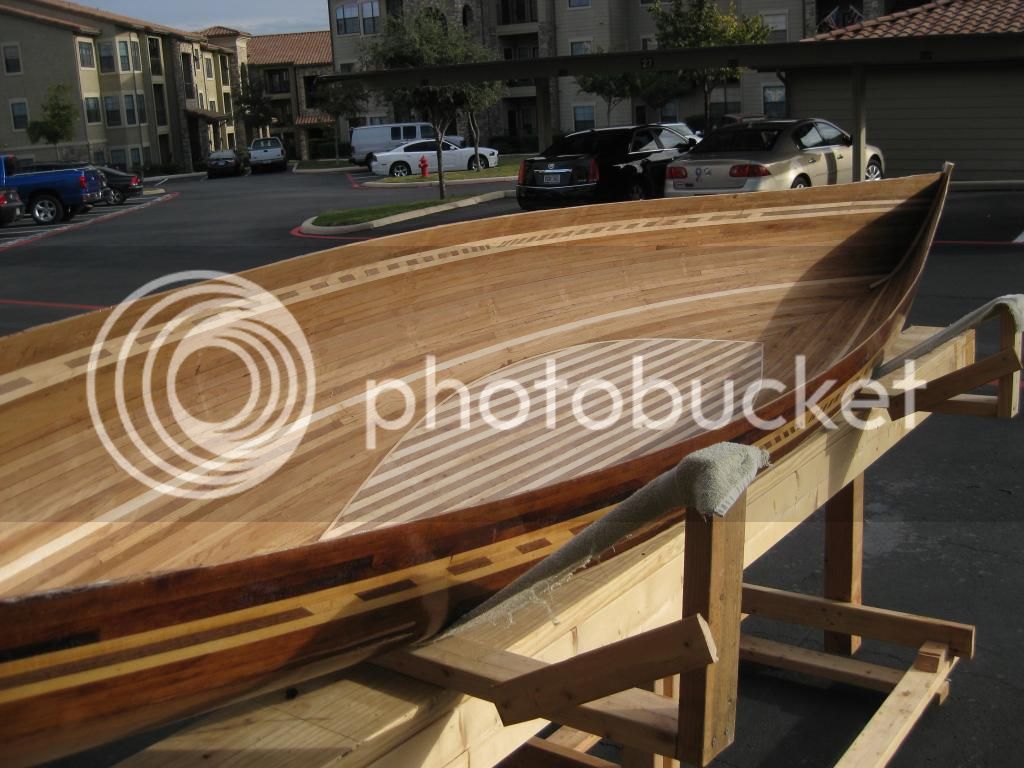
So I got started on this boat building sickness from this very site, building an UJ Piroge. I enjoyed building that boat so much, I knew I had caught the bug. I've always wanted a canoe so i could take a girlfriend out, or take a river camping trip with buddies and the likes. I looked and looked, and read and read about building strippers, and I finally made the plunge about a month ago. Got the plans, started wood shopping, and well..............i'm knee deep in it now. Here goes...

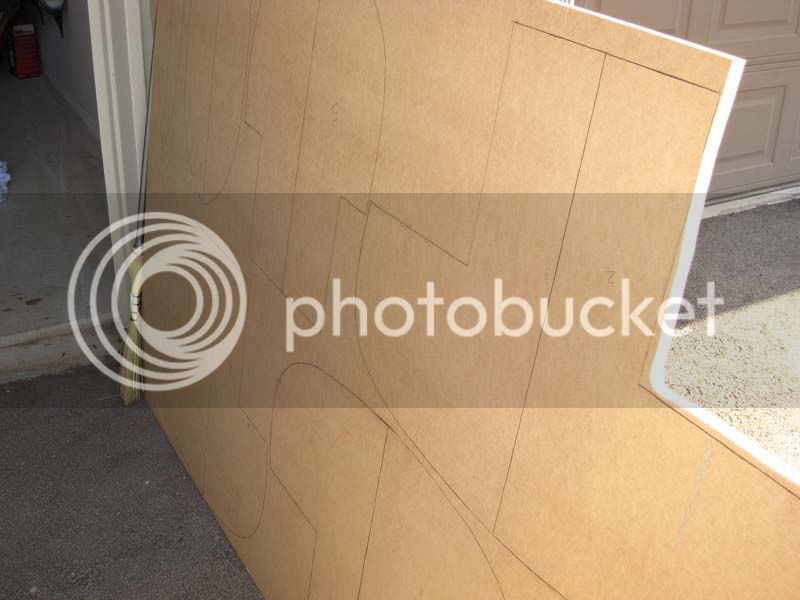
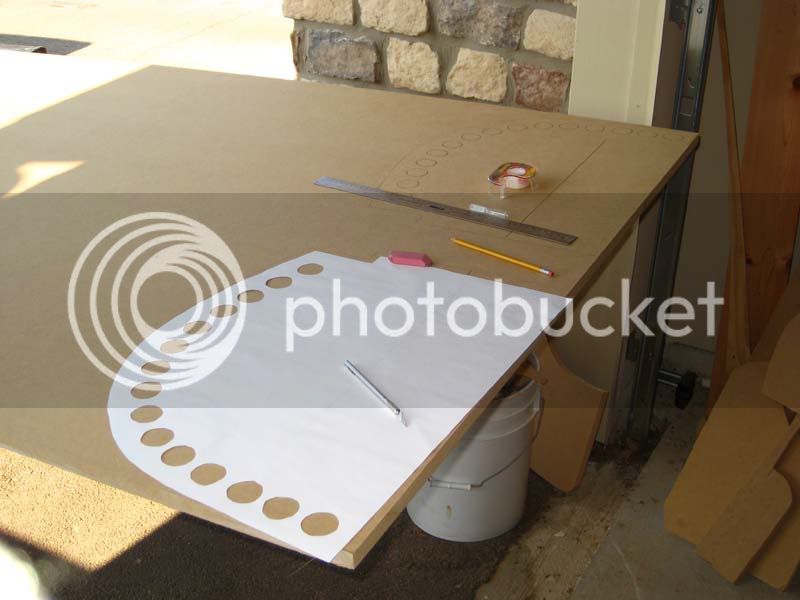
My plans came in, and I needed something to make the forms from. I went with (i think) 3/4" MDF, and let me tell you, that stuff is HEAVY. I read about other folks getting copies of the plans made and then cutting out each form, but every said how surprisingly expensive that was. I ventured for a more cost effective method, so i tracked down one of those large white paper flip charts, the kind that you'd put on a stand and use for a presentation or something of the sort. I found one where the paper was pretty transparent, and I went to town tracing each half form. Now that I had my paper versions of each full size half form, I cut them out. I was going to put these straight onto the MDF, but I caught wind of another idea along the way to make templates for all the forms. I found this thin fiber board stuff at Lowes that served my purpose nicely, so all my paper forms were attached to this thin board and then cut from there. I'll have to go back and get a picture of my "templates", as i realize now that I dont have one. Anyway, took these half form templates and traced them onto the MDF
formsneedcutting.jpg

makingstems.jpg

moreforms.jpg


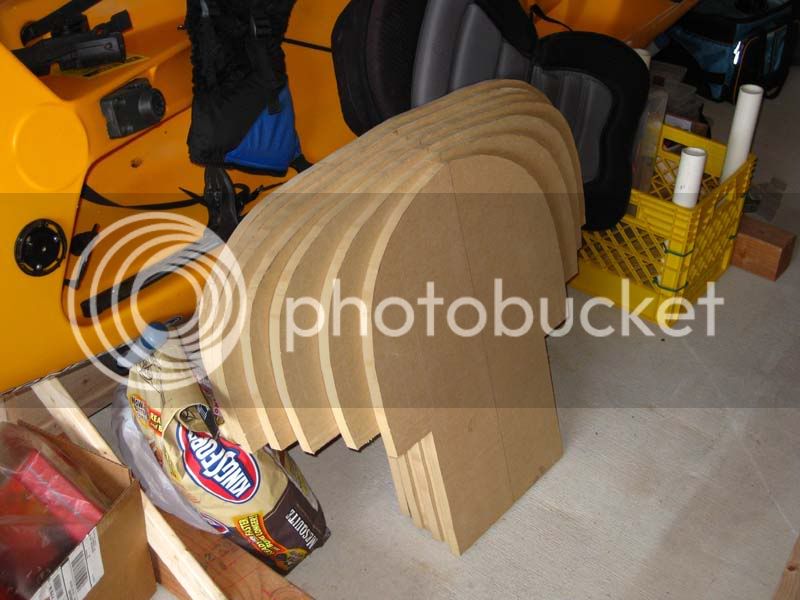
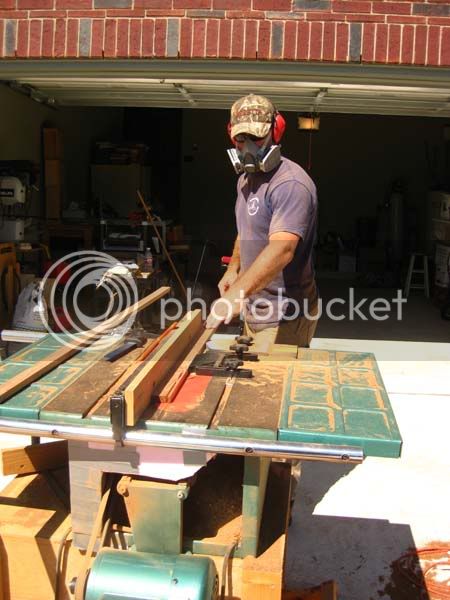
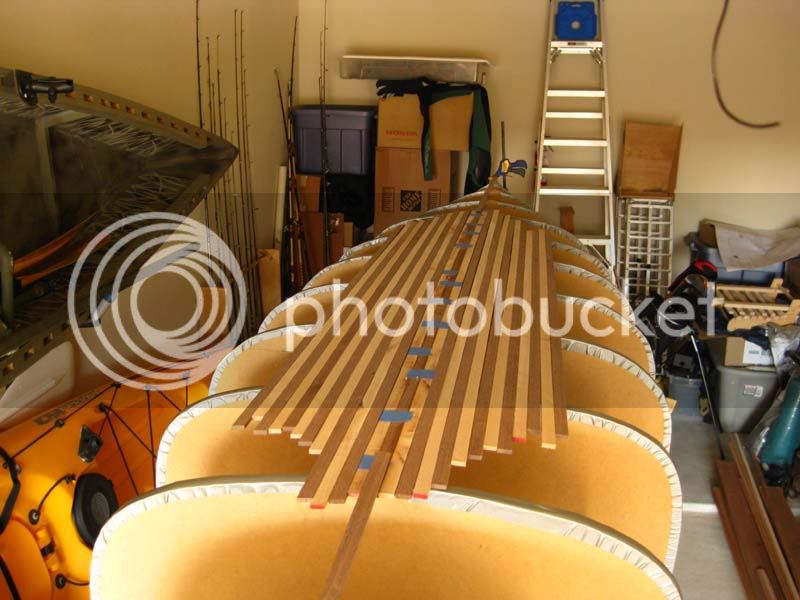
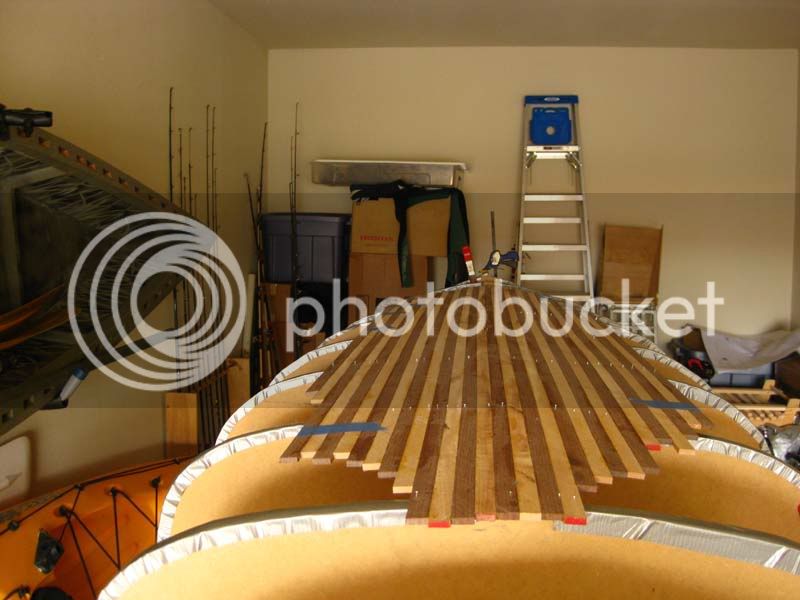
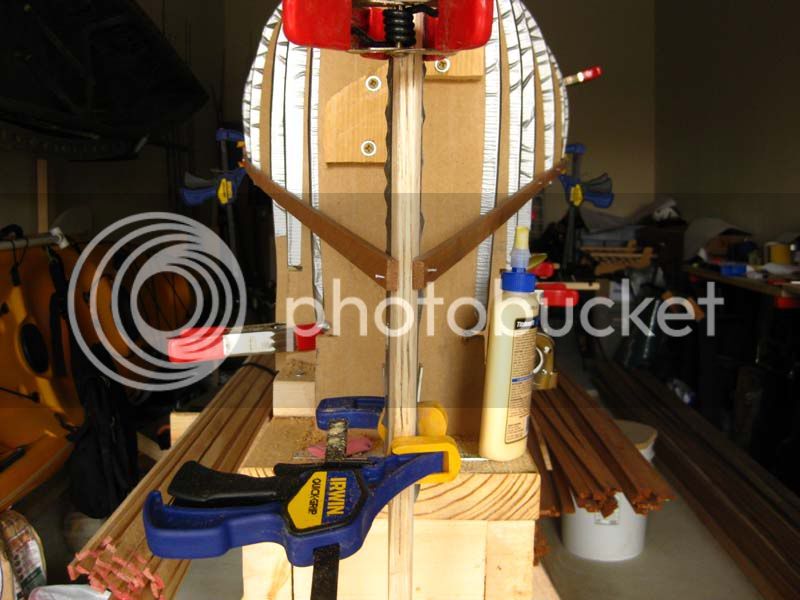
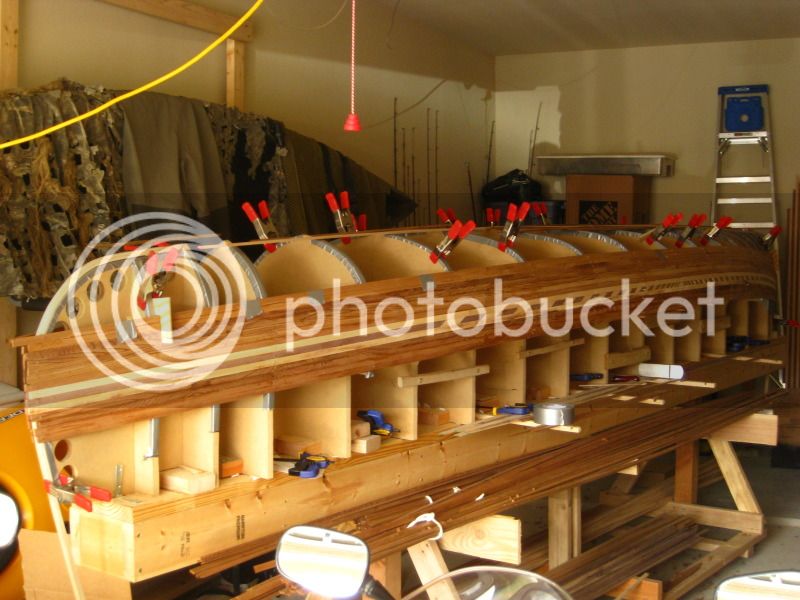
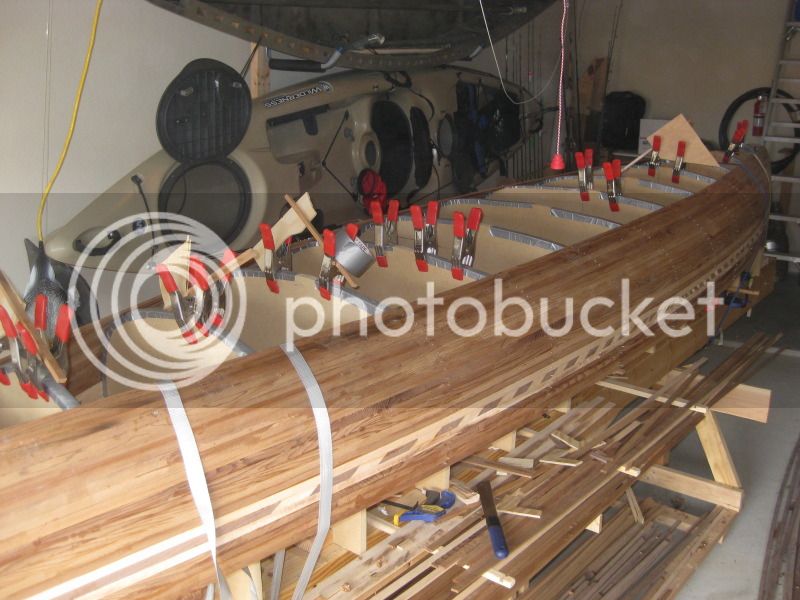
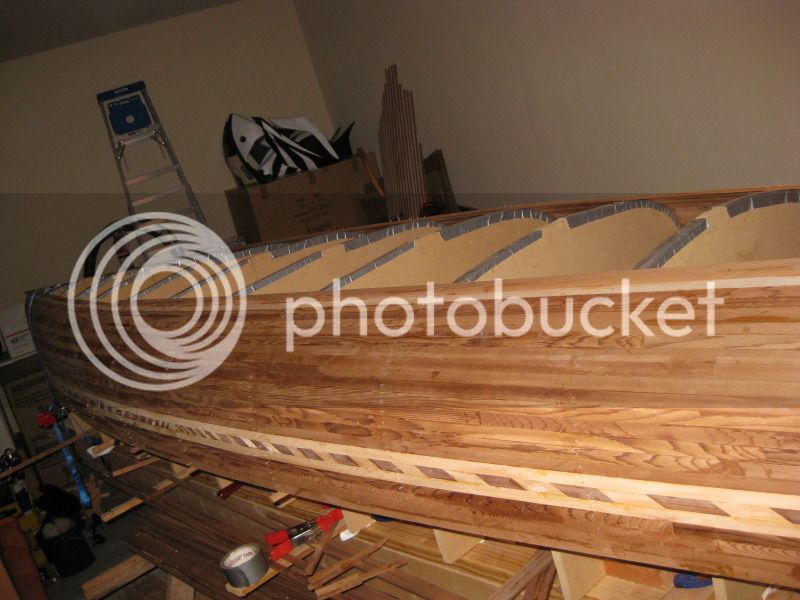
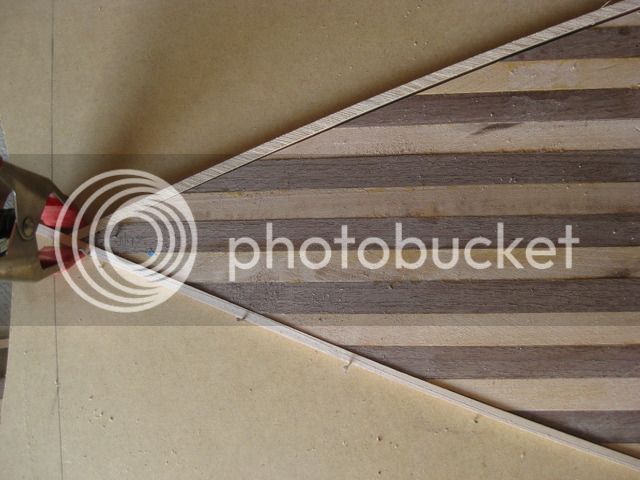
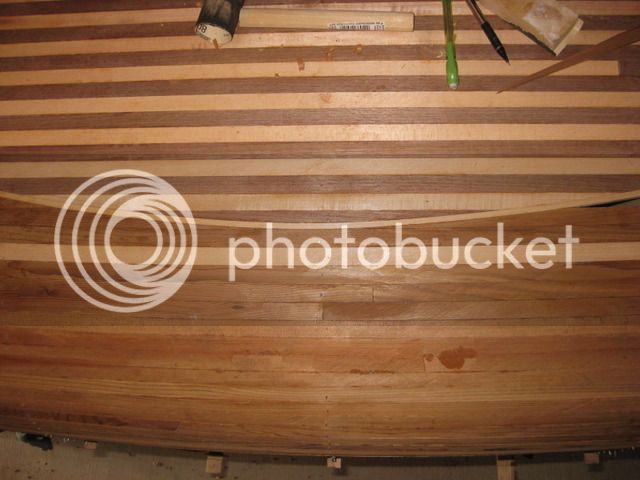
Since all I had was a jig saw, I cut as carefully as I could. Looking back, I wish i had cut a little further outside the lines and then gone back with my palm sander to get nice round forms. We'll see how "bad" my forms actually are once i start stripping. I'm planning to use staples, as I dont mind the look of all the little pin holes and theres the chance of those closing up when i wet out the boat prior to putting down the epoxy anyway. Hopefully, my strips will fit the forms and get stapled down and I wont have too many strips that stand proud of the form.

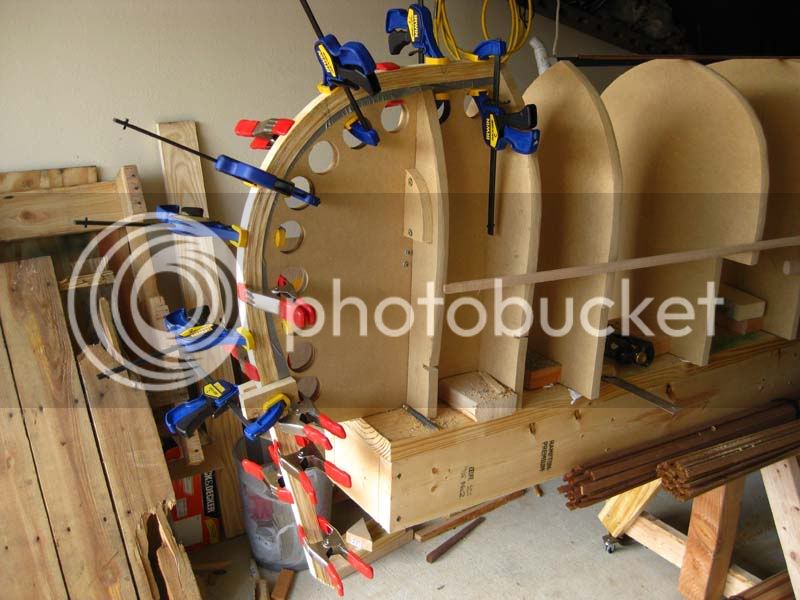
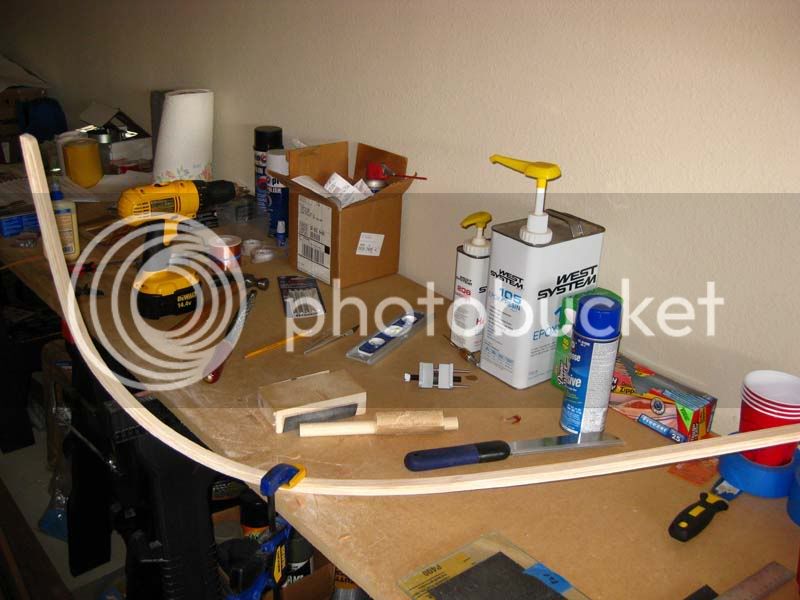
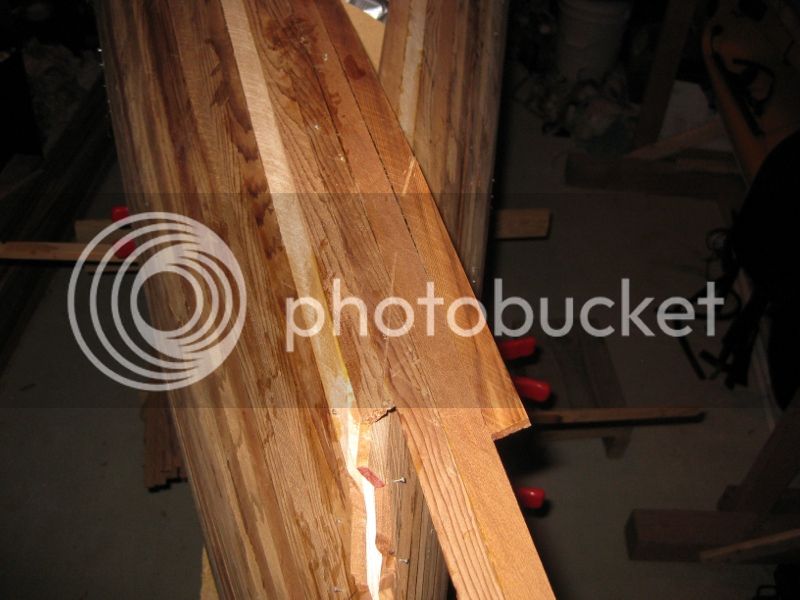
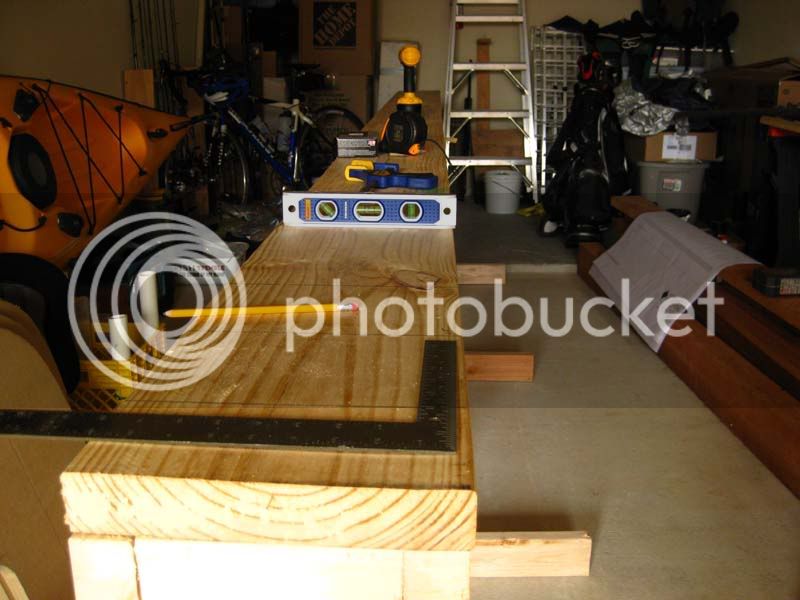
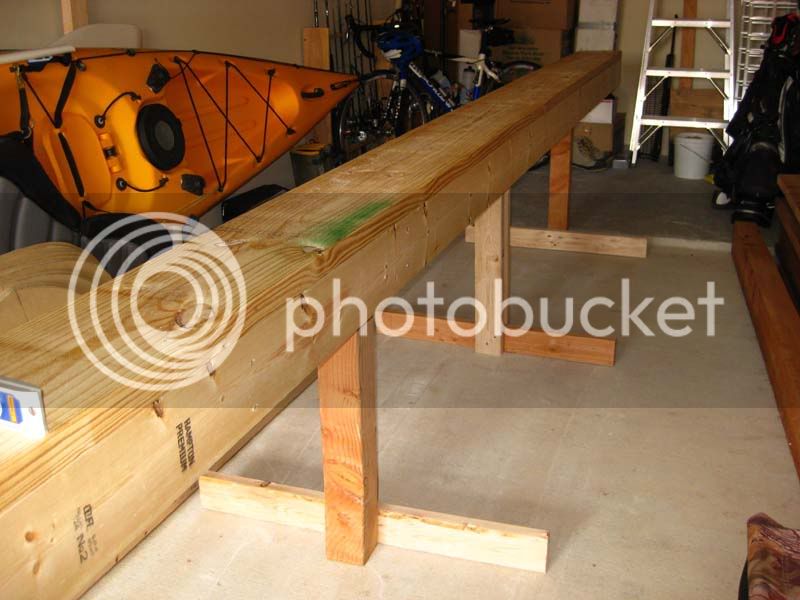
Next step was to get the strongback built. I was going to go with a 2x6 for the top, but when i started fitting it together I didnt like my original idea so i went back to the drawing board. I shifted gears to having a 2x10 on top, with the 2x6 boards hanging from the sides. On the underside I've got some 2x4 boards cut to fit as cross braces.
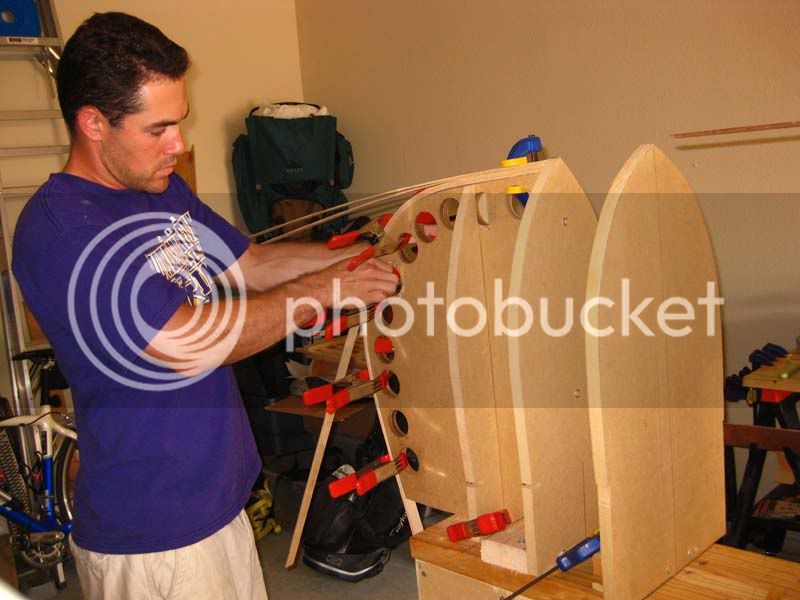
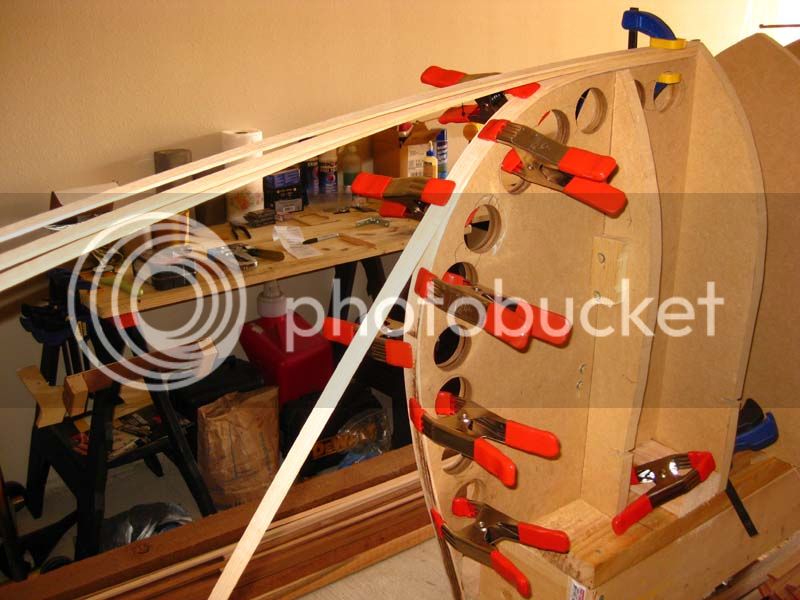
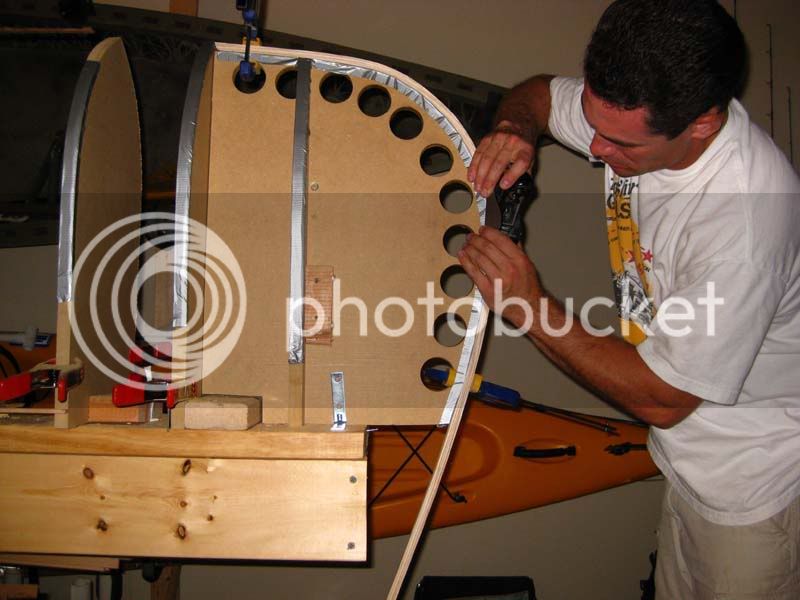
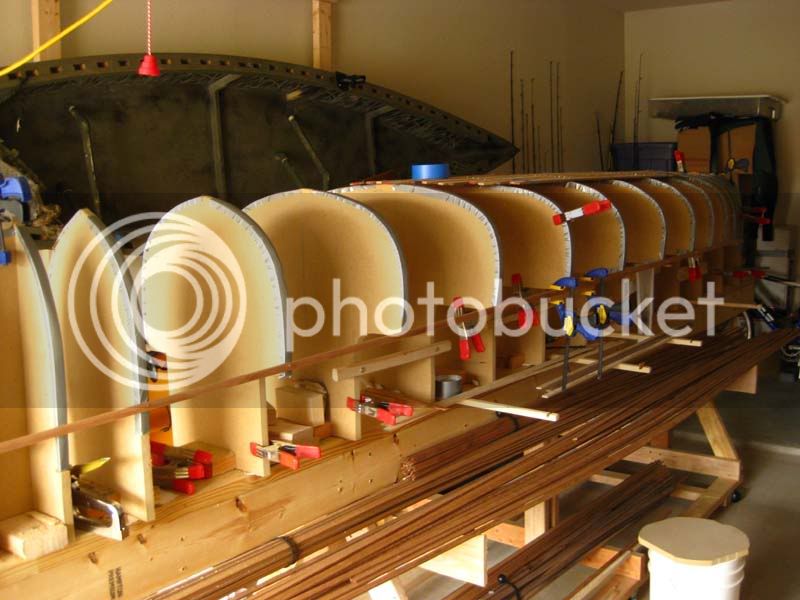
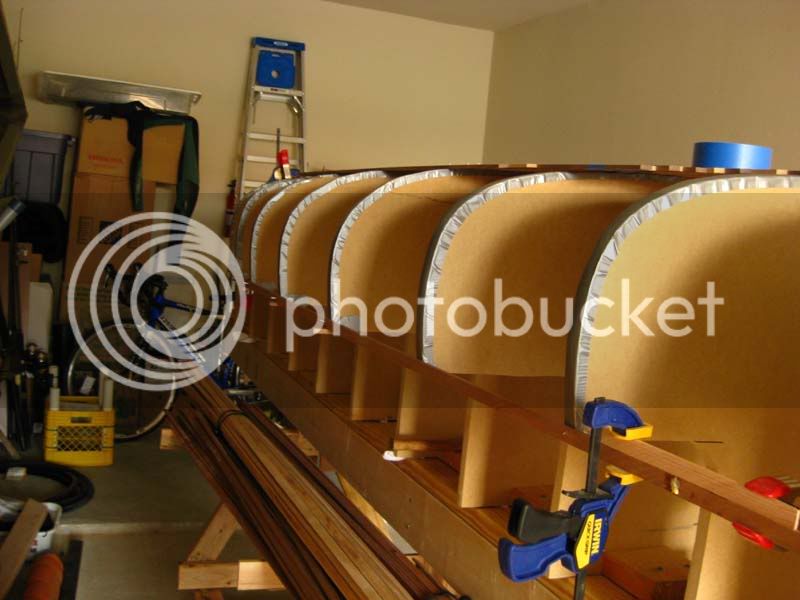
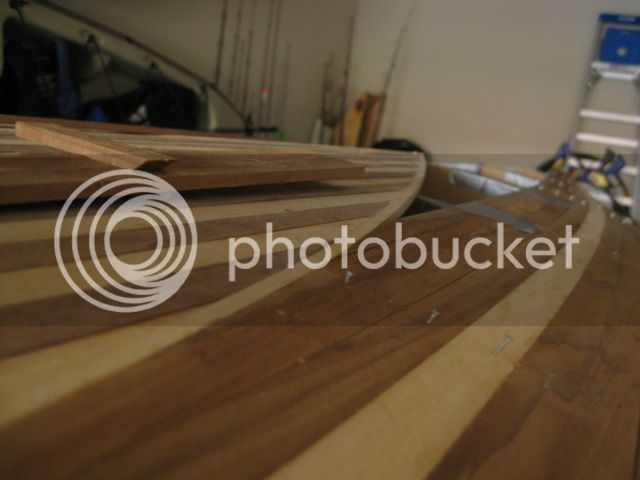
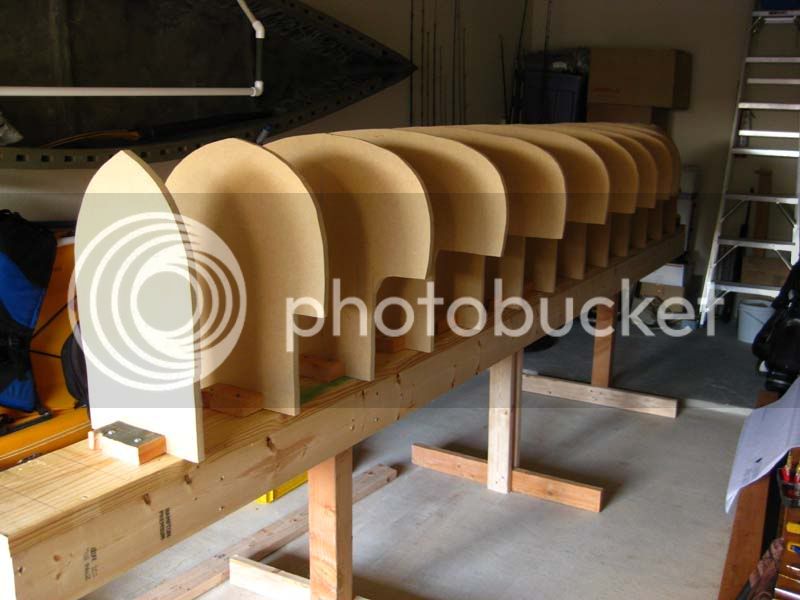
From there, it was time to mount the forms. Going with the standard single block attached to the form, then attaching that to the strongback, I have to say isnt the most sturdy method. Since this picture I've taken some boards and tried to shore up each form to make them more "move resistant". This was suggested to me from another builder, stating that when you start to sand everything down, you dont want things moving around on ya. Made sense to me! I also went back and made sure all the forms were square and level, which was quite the pain! Detail now though saves the boat later on down the road, so its worth the time to do it right first.
emptystrongback.jpg

strongback.jpg

forms.jpg
 

TX_yakker

Active Member
Sep 23, 2008
26
0
I've since gone back and modified my strongback a little, making it more sturdy and adding "accessories". I'll have to snap some pictures here soon.

Got held up a little once that was complete because i had my cedar but nowhere to cut it. Then i found out a co-worker had a table saw, planer and a joiner!! I was in business again! I loaded up and headed over to his place on a saturday...
startwiththis.jpg


Then we started doing this!
meplaning.jpg

planer.jpg


And that pile of boards in the back of my truck started turning into smaller boards just like magic
gettingsmaller.jpg


I know a lot of stripper builders use 1/4 x 3/4 strips. In my reading and research around the web and in a book i bought, Strip Built Canoe, I read about using slightly smaller strips and how they bend and shape easier. Being a completely green and rookie stripper, I had no good/evil building goblins sitting on my shoulders telling me that i should or shouldnt go with smaller strips, so I drank the kool-aid and decided on strips that are 5/8 by 7/32. I havent actually finished cutting them yet, but all my boards are sitting on the ground at 5/8 thickness, waiting to be cut into strips. Hopefully that step will be taking place in the next few days here.

In getting started on this build, I got the chance to get my hands on some new tools that I previously knew nothing about. The main one so far has been the block plane. I picked up a Stanley at Lowes and thought cool, now i have a block plane. Well, little did i realize it needed some TLC even though it was fresh from the package. "You mean, I still have to sharpen it even though its fresh from the store..........but, but, i thought the STORE sharpens it?" Nope. More learning needed to take place, so i researched about sharpening these things since I had never handled one before. I read up on this whole "scary sharp" thing, and I went at it. Got me an angle guide, sandpaper sheets from 80 grit up to 1500, and a piece of glass and got to work polishing the back side of the blade, then putting an edge on it. I've tried sharpening pocket knives, and I can honestly say I've never made anything as sharp as I got this blade. It was able to cut the hairs from my hand with ease, and I've always wanted to be able to do that with a pocket knife.

Well, I'm at a standstill now until i can get back over to my co-workers and start ripping strips. I'll update once things get moving again.
 

Kayak Jack

Well-Known Member
Aug 26, 2003
13,976
171
86
Okemos / East Lansing Michigan
Save all those wood shavings, to be used (after screening), as wood flour. And GET THAT SHOP MESSIER! That's an order, mister! :wink:
I hate guys with neat, organized shops sigh

You are on a grand adventure. You will have trials, tribulations, and triumphs. And - it's all YOURS. Good on ya!
 

TX_yakker

Active Member
Sep 23, 2008
26
0
Saturday was a productive day, got all my strips cut! Went over to my buddy's house and got started around 1030 and worked till the sun went down. Finished up just as the sun was setting so finally, i had strips to start messing with. Loaded up and headed home

ripping.jpg

strips1.jpg

strips.jpg


I know the shop in the background is waaaayyy too clean. Normally, I'd let it get saw dusty but it isnt my garage, so I dont know how this guy likes to keep his place so I decided to err on the side of clean. After all, he was being helpful letting me borrow these fine power tools!
Got home and threw the strips on my shelves i added to the strongback. Keeps them nice and out of the way while not being used, and since my garage is a one car set up in an apt complex, i dont have all the space in the world.
stripstorage.jpg


This morning I went out and started messing with the strips figuring out how they'll fit around the forms, how much I'll need to shave off each form, and how the stems are gonna go together. My Shinto gets here wednesday so I'm looking forward to that. Then i'll really be able to get down on those forms. Trying to plane MDF is just a pain, and really not worth the effort. I did a dry fit on the stem forms with the ash pieces

dryfitstem.jpg

dryfit.jpg


Then it was time to break out the epoxy and glue it all up!

stemdrying1.jpg


With the stems on the form and drying, I'm back to waiting. I'm going to put this thing on some kind of frame with wheels so I can roll it out of the garage to give myself more working room, and perhaps attract new neighbors. That'll be my project for tomorrow...
 

TX_yakker

Active Member
Sep 23, 2008
26
0
Been busy this past week or so making good progress. With the stems dry, it was time to start shaping them

stemshaping.jpg

stemshaping2.jpg

stemshaping1.jpg


My Shinto came in the mail which was pretty exciting, so i finally got to shape my forms and give them a nice taper. That thing will really take some wood off!!
formshaping.jpg


Now that the stems were nice and tapered to flow with the strips, it was time to start stripping!!! I started with the football because i figured it would be easier for me to start there. I'm doing an alternating stripe pattern that should look nice sitting in the middle of the cedar. Here's the dry test fit, and a follow up
footballdryfit1-1.jpg


Rather than post 4 or 5 pictures having a few strips added each time, here's the final product
football4.jpg

Glue is still drying on the last strips so i'll let it sit until tomorrow before i pull the staples and take it off. While those strips were drying, I was struggling with getting my shear strips long enough and actually staying together in a nice straight line. I tried gluing them using about a 45 degree scarf joint. It seemed to hold, but then sighting down the strip when i tried setting it, there was an ugly kink in the strip where that joint was sitting. Not liking that, since this is going to be along the gunnel and I want it to be nice and smooth all the way along there. Made a cut on either side of the scarf joint, and then tried gluing the strips using a butt joint. That only half worked also, with the same result. I was out of ideas, so i took 2 scraps and clamped them on each side of the joint temporarily. I figure once i get another strip on top of the shear strip, I'll get the same result of holding these 2 together nice and smooth. Anywho, got my shear strips on there and ready to go!
shearstripstem1.jpg

shearstripfit.jpg

shearstrip.jpg


You can see the clamps that show was i was talking about, trying to keep that shear strip nice and straight. I'm making good time now! I'll slow down a little once i start working on the accent stripe, but it'll be fun so i'm not worried about slowing progress. It was a little nerve wracking getting those shear strips on there because i mean, what if they're not perfect?! I just had to take a good look, take a deep breath and say self, they look good, glue.....staple, and move on. Gonna be doing a few strips pretty much each day if i can, so who knows where i'll be at the end of next week!
 

TX_yakker

Active Member
Sep 23, 2008
26
0
Well, famous last words from my previous post "making good time now". That crow sure tasted bad, 2 years later, haha! Progress has certainly been made since that last post, but its not quite done yet. Life did a nice job of getting in the way for quite a while there but I'm back to working.

Here's the accent stripe. I made the angled pieces from a combination of basswood and black walnut. I was given plenty of advice about the difference in hardness between these two woods, and to watch out when sanding them. I will say this, it wasnt TERRIBLE working with the two side by side, but I do wish I had ensured that each of the pieces were closer in uniform thickness as I glued them together. Would have helped in the long run in some spots. Also lesson learned, I wanted to use these two woods to get a nice dark/light contrast. Looking at it now, the cedar I have is plenty dark enough and the walnut did stand out nearly as much as I thought it would. Cest la vie....

IMG_2241.jpg

IMG_2463.jpg

IMG_2477.jpg


On the bottom there, I had plenty of basswood remaining so I put in one strip on each side, just to mix it up a little. Then it was to the football, since i started that part first. I wanted a light stripe around it, to set it off from the cedar. So, I made some small basswood strips, and test fit them around my rough football to get a nice oval shape. I traced an outline using those strips, then took everything off to cut away the excess
IMG_2479.jpg

IMG_2490.jpg
 

TX_yakker

Active Member
Sep 23, 2008
26
0
Not that i had an oval shaped football, I received some advice to put my light basswood strip around this football BEFORE putting the football on the boat, so I took heed of the advice.

IMG_2497.jpg

IMG_2499.jpg

IMG_2507.jpg


And then it was time to put that bad boy in and get to fitting strips around it! Lots of "guess, cut, check, sand, check, sand, check again, sand a little here, check, GLUE!".
IMG_2520.jpg


As those pieces were coming together, I was also working on the stem ends as strips began overlapping. This gave me some stress, being my first build. I think I probably messed up with my inner stems a little, and granted in the end everything worked out fine, but during the process I had to do a lot of checking and thinking and consulting to get comfortable enough to proceed.

IMG_2526.jpg

IMG_2544.jpg


I decided on going the herringbone route instead of having both halves come together along a central seam. No real reason for that decision, just picked it.

IMG_2553.jpg


The work continued and the holes started closing up!

IMG_2572.jpg

IMG_2594.jpg

IMG_2595.jpg


And then she was done! The feeling of having that mile stone complete was pretty cool, and kind of sad. It had taken me a while to get all that done since life kept interjecting itself, but it was fun project to keep working on! On to the next steps...
 

TX_yakker

Active Member
Sep 23, 2008
26
0
Fitting the external stems didnt go as smoothly as I would have liked. Like other things with this build, it all worked out later, but during this part I was frustrated with it. I think part of my frustration came from my strips not all fitting exactly to each form (especially towards the bow/stern). When I trimmed the ends to fit the external stem, the boat was a little wider than the stem towards the bottom of the boat, as seen here. Not a HUGE issue, because I filled the space with thickened epoxy after gluing the stems in place. Just one of those minor details that really only the builder knows about when its all said and done.

IMG_2604.jpg

IMG_2610.jpg


And finally, she gets to take a trip OUTSIDE of the garage since the build started. No way in the world I was going to do any sanding inside my garage and get everything in there coated with sawdust, no way no how. So, you start sanding and pretty soon she'll be looking nice and smooth...

IMG_2624.jpg

IMG_2629.jpg

IMG_2632.jpg


Didnt take many pictures of shaping the stems... guess I started and just got carried away. So i had some viking looking screws holding the stem on while the thickened epoxy set. When those came out, i went back and slightly enlarged the holes. I then filled them with a small syringe and epoxy thickened with some dark saw dust, so it kind of looks like wood plugs filling the holes.

Now, what everyone wants to see when building a boat.............what it'll look like when complete. Next, i wetted the boat out to get a glimpse of her final look.

IMG_2635.jpg

IMG_2636.jpg

IMG_2640.jpg


Yup, that was a pretty fun day!! One note here, I had a few gaps between strips and in my rookie ways, i thought putting wood glue between the gaps would be fine. Turns out, thats a terrible idea. Live and learn... So i had to go back and try to dig that stuff out (it helped trying to do that while it was wet). I went back and filled the gaps with wood filler instead. Then it was on to the glass!
IMG_2674.jpg
 

TX_yakker

Active Member
Sep 23, 2008
26
0
That went on fairly painlessly. That was 6oz, and then i put a second layer of 4oz just covering the bottom surface. I trimmed away the excess that hung down along the sides.

IMG_2680.jpg

IMG_2682.jpg


Once that was done, it was time to start working towards getting her off the strongback and into a cradle!

IMG_2689.jpg

IMG_2695.jpg


Since that last picture, I've been sanding the inside and actually glassed most of the inside. I'll have to get pictures uploaded to photobucket and then bring them in here. Hope you all enjoy the pictures so far!
 

Kayak Jack

Well-Known Member
Aug 26, 2003
13,976
171
86
Okemos / East Lansing Michigan
WOW! You have a lot of tenacity. My congratulations on sticking with it. And, your boat looks good.

Frankly, the difficulties you worked so diligently to overcome, are the very reasons I've stuck with stitch and glue. A stripper is more hydrodynamically clean, once it gets into the water. A buddy of mine also took a few years getting his stripper completed. In the meantime, my stitch and glue boats had been on several trips with me. It's a trade off, and strippers have the edge on appearance and streamlining.

Maybe, in the spring or fall, you could bring that nice looking craft to join a Geezer Expedition in Michigan or Canada?
 

Kayak Jack

Well-Known Member
Aug 26, 2003
13,976
171
86
Okemos / East Lansing Michigan
OK, now I have to ask. I went back and reread, but could not locate - what is an Abenaki (Abnaki) canoe? Google says they are an Algonquin speaking tribe, but didn't mention a canoe design. Or, is it the name of a canoe model from a planner?
 

TX_yakker

Active Member
Sep 23, 2008
26
0
Yup, Mike beat me to it. Thanks! As to building one in two weekends........ :lol: Maybe if you were retired (no offense to those who are, you have plenty of time to do hobbies!!) and built it from a kit. Since I made my own forms, they werent precise as they could have been had I ordered them from the company. They CNC cut theirs, laser beams and all that fancy stuff. Thus, my strips didnt touch every form like they should have. If they HAD, I could have stripped the hull much faster because ya glue the strip, pop staples on each form, and do the next strip. Eh, it was a good project and cool conversation piece (still is!).

As to bringing it up to Michigan or Canada, as much as I'd love to thats just too far of a drive. Texas is a mighty long way away...... though boats like this deserve the beauty that you guys have up there. I've paddled the BWCA as a boy scout launching out of Ely and wow, just wow. I wanted to go back up there one summer to be a guide, but life kept going and I never made time to do it. Starting dental school this summer, there certainly wont be time to be a guide up there now. One day I'll be back up there, but not in this beauty. I dont think they allow canoes to be checked on airplanes........ :lol:

I'll make sure to update this more often since I'm back to actually building. A 2 year break in updates is a little much......

Casey
 

mike

Well-Known Member
Jun 29, 2009
694
9
TEXAS!
Howdy, Casey!

What part of Texas do you call home? I'm in Spring, a 'burb on the North side of Houston.

Mike
 

TX_yakker

Active Member
Sep 23, 2008
26
0
Well, I grew up in Clear lake, opposite side of town from you. I currently live in San Antonio.
 

TX_yakker

Active Member
Sep 23, 2008
26
0
Oh, and Chuck, I blame this site for getting me into this awful disease known as boat building. I wanted to make something to duck hunt from a few years back, and I stumbled onto this site. So many UJ's pirogues built on here so I put one of those together. Had so much fun doing it that I wanted a canoe also, for two person river trips, camping trips, etc, and so i launched into the stripper here. So yes, my name is Casey, and I'm a boat building addict. I built a pirogue and thought I could be done with it, but no, i needed to build another. Naturally, I had to go more complicated, but......but.........ah whatever. This stuff is fun! :lol:
 

oldsparkey

Well-Known Member
Aug 25, 2003
10,479
123
Central , Florida
www.southernpaddler.com
You are not alone , we have lead many astray into the wonders of boat building and made drastic changes in there lives. For some reason the smell of epoxy and sawdust is addictive and after being exposed to them a body just can't get away from them.
It's sort of like eating a potato chip , no one can eat just one. :lol:

Chuck...
 

Kayak Jack

Well-Known Member
Aug 26, 2003
13,976
171
86
Okemos / East Lansing Michigan
While aromas of epoxy and sawdust aren't all that great for me, watching a nondescript pile of boards take shape as a three-dimensional object does. And, when that object is finally a boat - that I built myself - and that boat is loaded for a Geezer Expedition, and is actually on the water - now THAT'S a helluva good feeling.

Guys I paddle with like Verlen Kruger's boats - what's to NOT like? As we pass fishermen on lakes and rivers, those $3,000 craft slide right on by with just a mere greeting from the fisherman. But - my wooden boats almost always draw admiring comments. (They often compliment the extraordinarily handsome paddler too. :wink: )

Only a beautiful woman surpasses the beauty of a wooden boat, (or that of any plane.)