Building an Abenaki | Page 2 | SouthernPaddler.com

Building an Abenaki

TX_yakker

Active Member
Sep 23, 2008
26
0
Its been a while since I've posted on this one! Made some good progress since my last post so here goes!

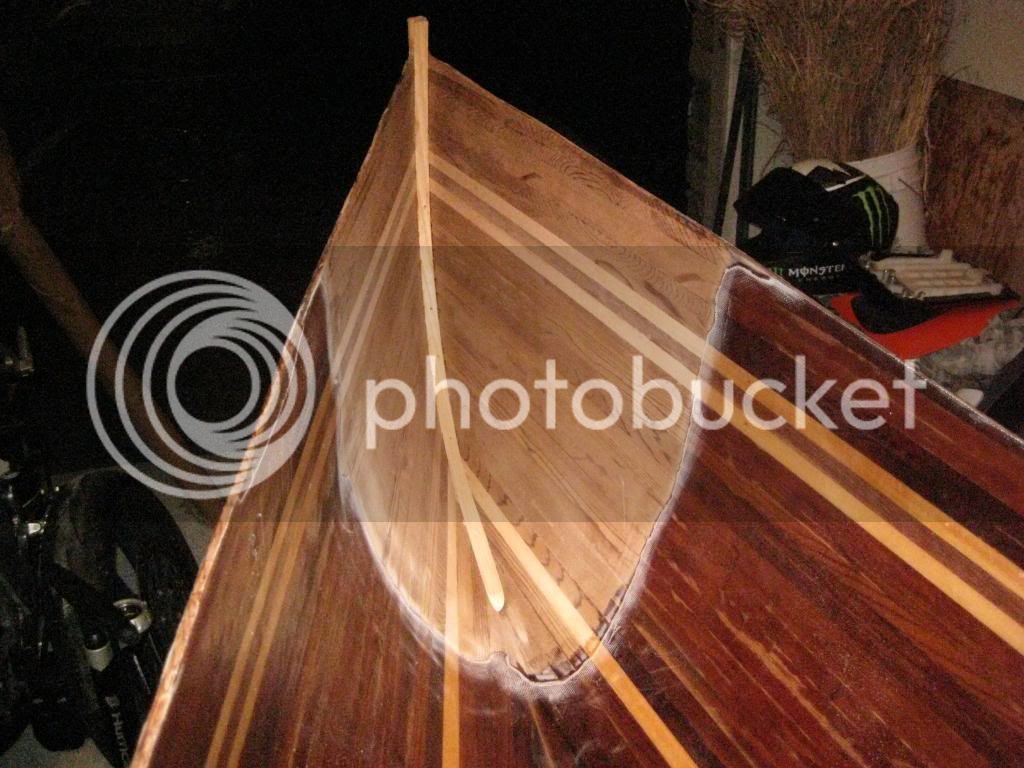
Last picture I had up showed the inside as bare wood I believe. Here she is with the second layer of glass going down on the inside. Of course that means a FIRST layer of glass had to go on first :lol: I put that on and actually cut it , maybe 24" short of each end. Made it easier to handle when I could take my time on each end.


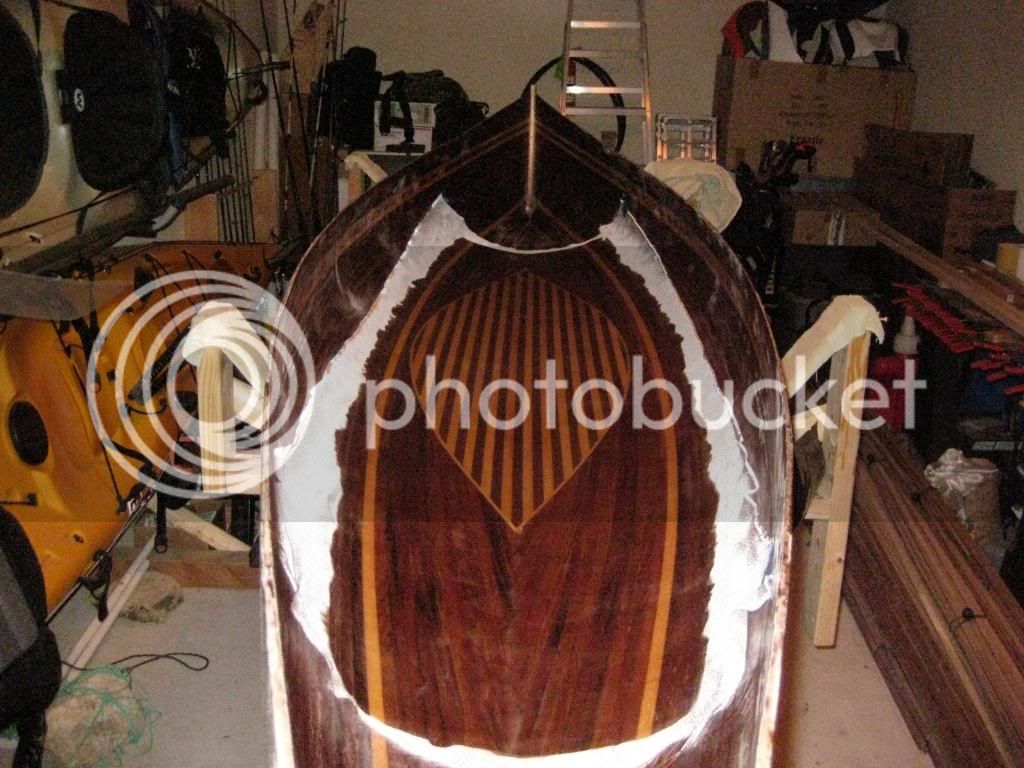
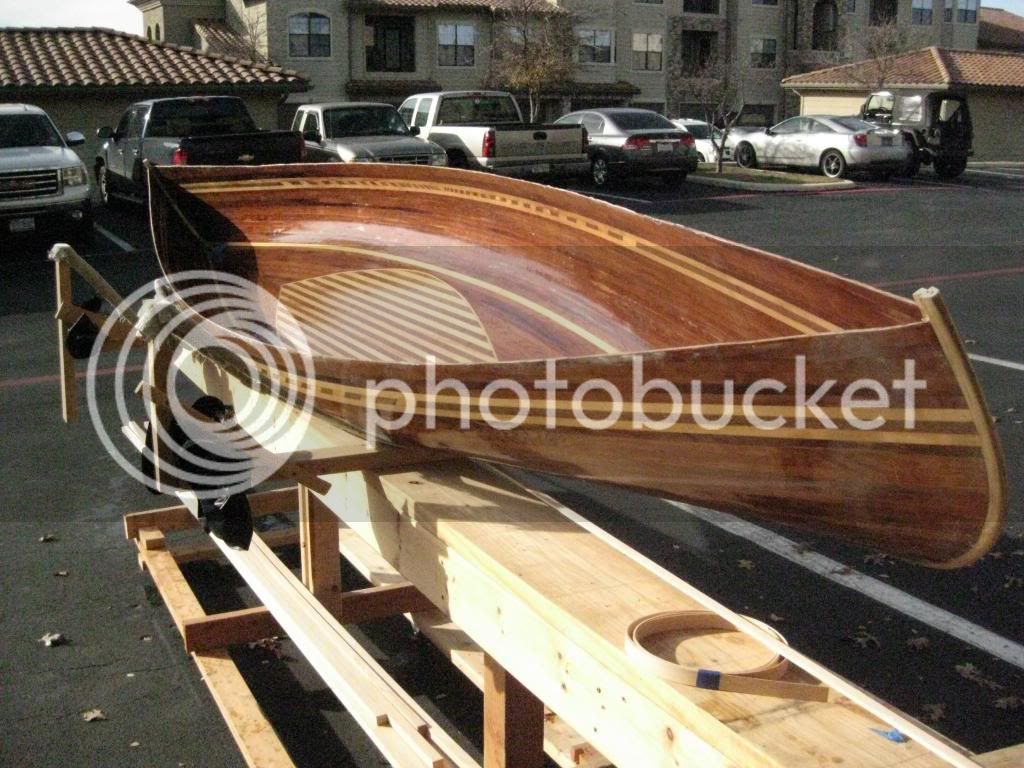
Here she is sparkling in the sun!


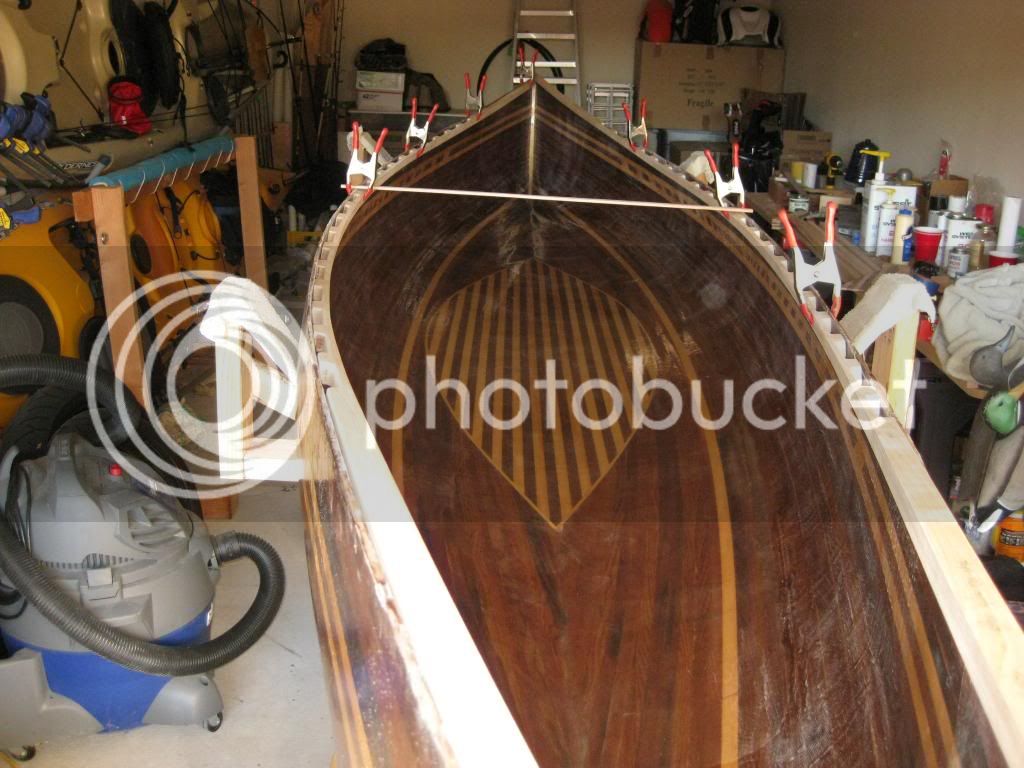
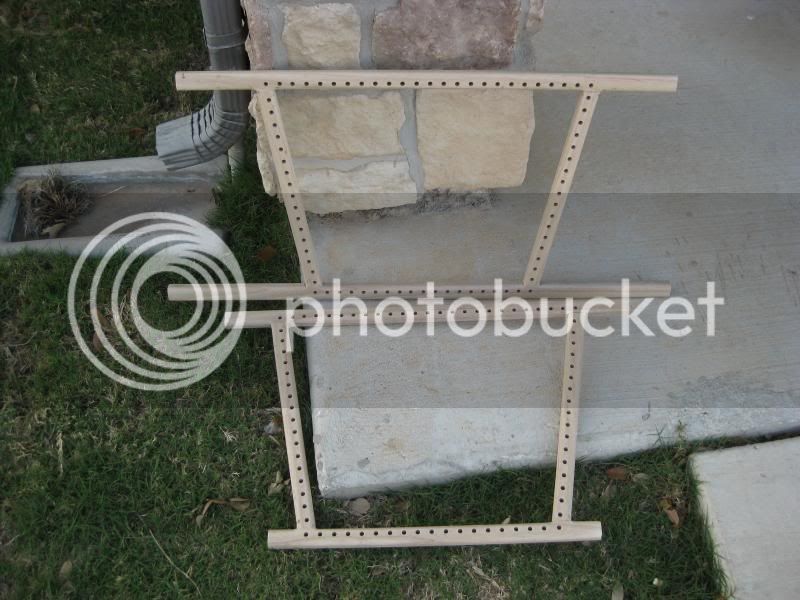
Then it was on to the trim work....inwales/outwales/seats/yoke, etc. Made a jig to router out some scuppers on the inwale and got to work. Scary stuff!! Put a nice round edge on those puppies and test fit them in the boat.


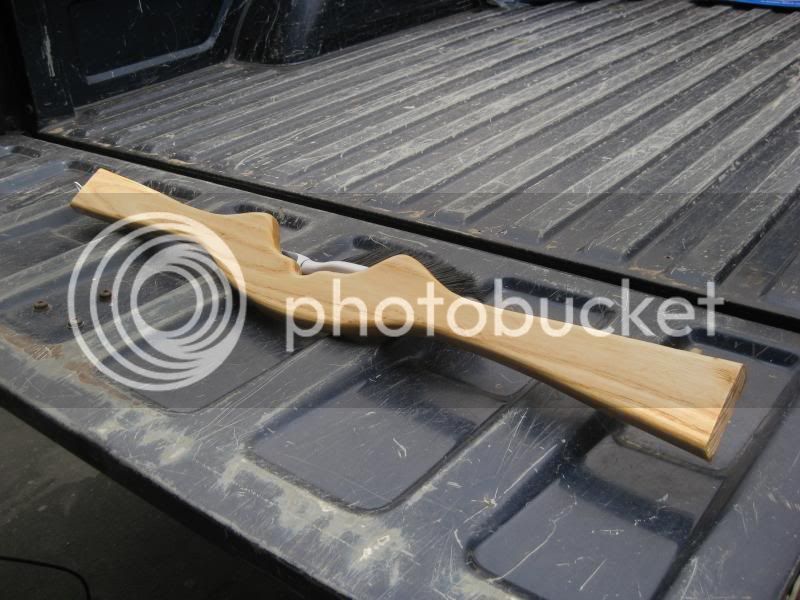
Meanwhile, I cut up a yoke and some seats to work on the side


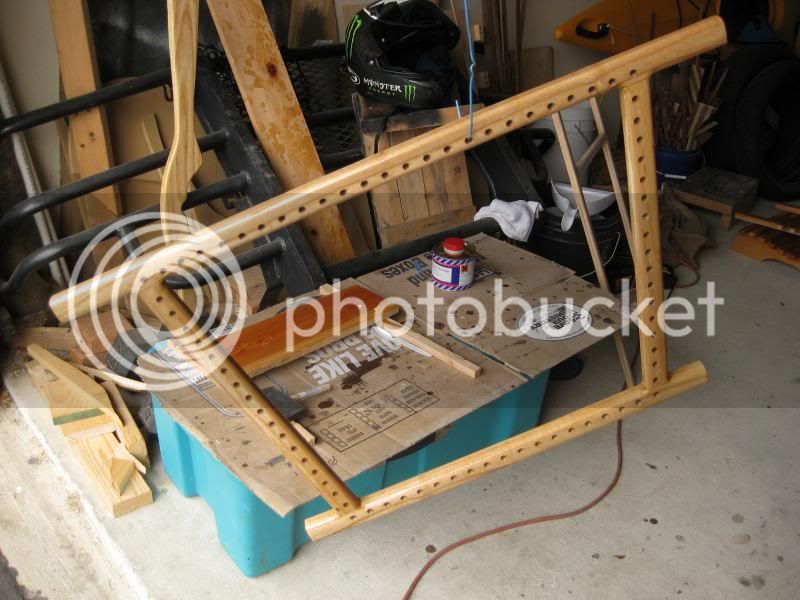
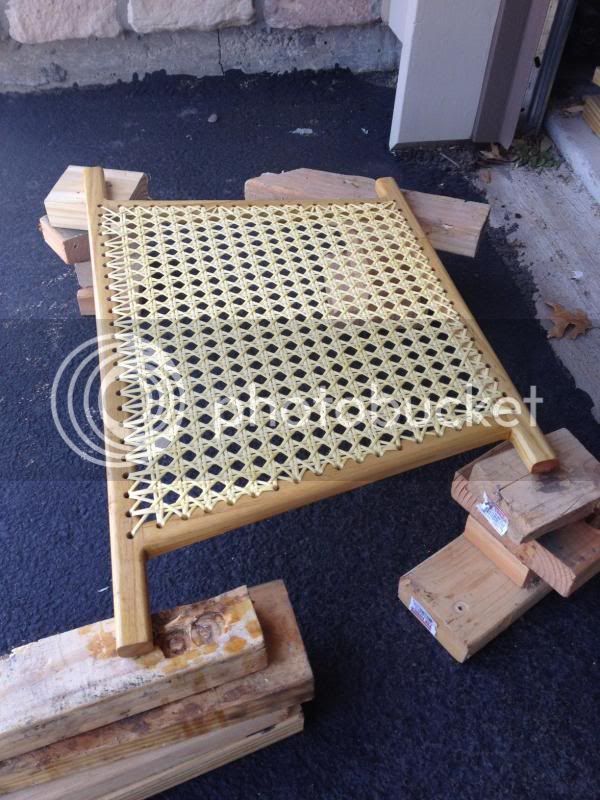
The seats and yoke have been epoxied, along with the scuppers on the inwales. Hopefully will be test fitting those this weekend again (to double check which side faces down into the boat) then I'll be putting epoxy on the rest of the inwale and installing them! One seat has its first coat of epifanes varnish on it, drying right now. My first time working with the stuff so we'll see how it goes!
 

FloatingBear

Well-Known Member
Aug 10, 2012
55
0
Hot Springs Arkansas
Tx just a thought for a future build that would be quicker and lighter but also a lot of fun to build. SOF / Skin On Frame Canoe. A good referance to start said journey is Kudzu Craft run by Jeff Horton. I just finished a SOF lake kayak that is 18'2" and weighes all of 30lbs. Woodman on the kayak and pirogue sections of this forum has built several of Jeff's designs.
 

TX_yakker

Active Member
Sep 23, 2008
26
0
I have to apologize for not updating this. Boat is almost finished!! Lets see, where did i leave off…. seats!
seat_zpseb4e926d.jpg
[/URL]

Got those inner gunnels attached on there too. Made these out of cypress, even though I know its a softer wood.


Putting my decks together. They are cherry on the outsides, with a piece of cypress down the center


I put together some carry handles just for kicks, made of walnut and basswood.


And here they are varnished up


Glueing on the outer gunnel!


TX_yakker

Active Member
Sep 23, 2008
26
0
And we continue!!

Gunnels on, carry handles in there, decks in place. Ready for me to start cleaning her up


Jimmying things around to figure out where to put my seats


Got my varnish on the outside of the hull!!


I need to go find my camera to download the rest of the pictures. I moved a few months ago and it got packed somewhere. As she stands right now, I've got the yoke in, the inside has been varnished, and I just need to varnish the decks and gunnels. Then hang the seats, and last but not least, test her out!!
 

TX_yakker

Active Member
Sep 23, 2008
26
0
So I didnt have as many pictures as I thought on the camera that weren't already moved to my computer. Lets go with accessories fisrt. Who builds a canoe and then doesnt want his own custom paddle to move around with right? :)


Yoke is installed, inside has varnish. I didnt get any detailed pictures of yoke install, got too carried away and then suddenly it was done I guess :(


Next step is to mask off the hull so that I can varnish the gunnels and decks. Gotta go find a newspaper or something to lay down on the inside...


Once I get this little detail all varnished up, i'll be hanging my seats. I still need to come up with some little blocks to hide my hanger bolts...

So, the inside of my boat is varnished and I'm done with it. I can't say that I'm pleased as punch, but as my first build, I had trouble with the inside of the hull. Sanding didnt go as well as I guess it could have, or my strips didnt fit together perfectly or something. Laying the glass and epoxy on the inside initially, i learned a few lessons the hard way. I apparently didnt do that step as temperatures were dropping, so the boat outgassed (i think thats the term) on me and i wound up with a handful of air bubbles. I cut away the cloth and just proceeded forward. I had runs of epoxy along the bilge area, I assume due to my lack of constant attention as I completed that part of the build. At this point, I've accepted the little things and I've moved on, haha. I do have some questions about "mistakes" that i dont fully understand, so I want to get some knowledge and learn what these mistakes are and how to prevent them next time.

Here's one: This white spot isnt a reflection of light, its straight up a white looking spot that doesnt come off. Its been varnished over at this point. Is this the amine blush that I've read about, but honestly had no idea what people were talking about? The varnish seems to be every bit as set over this spot as the rest of the boat, so it doesnt seem to have affected anything other than looks. I'm just trying to understand what it is and how to prevent it next time.


Another one is the glass showing through in spots. These are two little areas that you can clearly see, the white of the fiberglass shows through. In the "non-stem" picture, you can see how some areas of the boat you see no glass, and then there are the little white patches. Are these just spots that I rushed and didnt get enough epoxy down into the glass? Kind of an esthetic bummer, but at this point I'm over it and ready to go paddle a canoe, haha.


Being my first stripper, I've certainly learned a lot of things. As meticulous as I am, I still rushed through some steps and I'm a little mad at myself for doing that but I know better for next time. These are all just little things that I'm probably the only one who pays any attention to, as I still get loads of compliments any time someone sees me working on it. However, as you all know being boat builders, we are our own worst critics! Its still going to paddle great, catch fish, and look darn sexy on the water!!
 

oldsparkey

Well-Known Member
Aug 25, 2003
10,479
123
Central , Florida
www.southernpaddler.com
There is no greater critic then the builder of the boat , he will always find all the mistakes while the casual observer will look on with wide eyes and be awed by the beauty of the boat. :D

i like what you did in the middle of the canoe , I did the same thing in the center of the Swamp Girl to add some contrast to it. The hull was 1/8th inch wood so the additional strips in the weight bearing area reinforced it while helping to keep the weight down.
 

TX_yakker

Active Member
Sep 23, 2008
26
0
Had some great weather here for varnishing so I had to get after it! First up, prepping the inside to protect it from varnish drips…


I'll come back tomorrow and sand on that stuff a little, and then most likely put the final coat on there.
 

TX_yakker

Active Member
Sep 23, 2008
26
0
Got a little more free time and did a trial fitting of my seats. Pretty excited, but then after they were both in I realized a little mistake. I cut "temporary spacers" to figure out what distance away from the gunnels I wanted the seats, and I cut all of them the same length. Didn't account for the slight curvature of the gunnels, so the seats probably aren't level. Haven't put a level to them yet so we'll see. Also plan to measure the seats height from the bottom of the boat and adjust from there before i actually cut the "real" spacers and start preparing those. But, pictures are still fun!!


TX_yakker

Active Member
Sep 23, 2008
26
0
Well, I have to say its been a long build but Its pretty much done! I still have spacers to make to cover up my carriage bolts, but those are petty details. I had some issues with the front seat, but i finally ironed those out and got the front seat installed. That makes for a ready to paddle canoe!! Haven't actually taken it out yet though, I just installed the seat and we start school back tomorrow after spring break.

I got on the bathroom scale to check how much she weighed. Being a first build, she's a bit heavy but I think she's pretty, haha. Came in at 57 pounds. Not sure of the accuracy of a bathroom scale, but it is what it is.


Kayak Jack

Well-Known Member
Aug 26, 2003
13,976
171
86
Okemos / East Lansing Michigan
Beautiful work! I notice that - "ahem", how do I say this gracefully? - the rear seat is larger than the front seat. Since it's YOUR boat, that means you captain it. Which means you sit in the rear. Which means, . . . . . Momma has a slimmer seat requirement than the captain.
 

TX_yakker

Active Member
Sep 23, 2008
26
0
Thanks guys! I think the seats are actually the same size, but visually it does look smaller now that you mention it. I can't recall the actual dimensions off the top of my head, I've got too much pharmacology running circles through my brain. Exam coming up on friday! :shock:

That front seat was more of a pain than I anticipated. Since I didn't measure properly when it came to cutting my scuppers, I was missing the necessary wood where I should have been placing my carriage bolts. Thus, the little bars that the seat rests on. Hung those, and then attached the seat to the bars. I sheared two screws and partly cracked the end of the seat frame in trying to attach the frame to those little bars, even though I pre-drilled my holes! Frustrating to say the least, but its in there and ready to rock!
 

TX_yakker

Active Member
Sep 23, 2008
26
0
Its been a while, but I remembered that I needed to update my post here. I've launched the boat, once so far. Had a good paddle mothers day weekend last may (yes, I know that was a long time ago, haha).

My folks came in to San Antonio and we took the boat up to Canyon Lake for a test run. Had to christen it right of course...


Paddled great, and it was a great day! I need to get it back out on the water so I can actually slime it now :lol: