Strange and unorthodox builds. | SouthernPaddler.com

Strange and unorthodox builds.

Oyster

Well-Known Member
Dec 5, 2008
254
0
OBX North Carolina
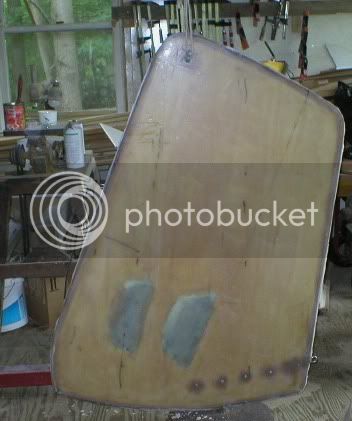
This is my build on a 23 foot Skipjack of my own design using reclaimed lumber and creative building technique working around dumpster wood that I used from a local lumberyard that sells home building materials. The thread will be loaded with photos but hopefully will not cause much harm for the dialup guys.

I will organize some posts detailing the build that will show that all things are possible if you only believe and in some cases discount the purists and naysayers. But be warned try this at your own expense as I do not recommend this for the first timers.

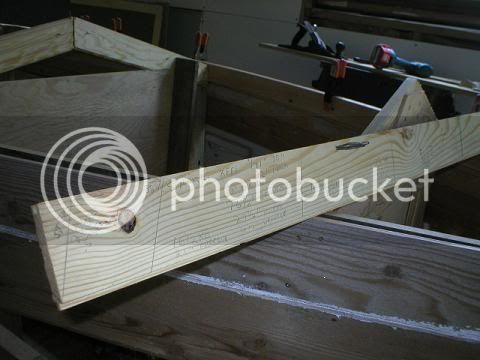
I built two hulls out of reclaimed wood, a 20 footer and a 23 footer from the scraps that was not fit for use in the 20 footer. This evening I will do a few more tidbits as I have time.

plans

plansforspritsail.jpg


This is the 20 footer finished. I used the leftover cypress and resawed it for the deck veneer, bookmatching for each side and did a runabout style enlay since the lengths was too chort for the traditional kingplank style decking. More later.

20 footer finished
fulldeckspritsail-1.jpg


This is the 23 round stern skipjack for shallow water sailing under sail. This boat is now four years old and still going strong with Ace Hardware paint and Kilz il base used for the primers of all the parts, Interior stuff too. I have also been using that under most all oil based paint since the late 1980s. I also se it over epoxy fairing compounds too in glass layups. Its wonderfull and quick buildup for blocking out before the shine goes on.

messaboutsailing.jpg


I use a brail line and raise the sprit up when I want to beach it and hope out or my wife does and go clamming and shelling. :wink:
angledeepwater.jpg
 

oldsparkey

Well-Known Member
Aug 25, 2003
10,479
123
Central , Florida
www.southernpaddler.com
You need to retire like John Depa did.

Right now he is on his 19 footer (sail boat , sleeps 4 ) out sailing around.
He left New Jersey and came south. He stopped by and visited us when we were on the St.Marys River run , then he stopped by here in Titusville , Fl for a while to visit and is aiming for Ft.Lauderdale to see customs and then over to the Bahamas.

After that back over here and around the Keys for a while. He said he has no itinerary except to use up 6 months out sailing and then back to New Jersey.

I think your boat is a work of art that a person can have a good time on and John would fall in love with it. He is a paddler and sail boat enthusiast. He even sails his canoe's when not hunting , fishing , camping or traveling around this world.

Chuck.
 

Paddlin'Gator

Well-Known Member
Feb 2, 2008
148
0
Tequesta, FL
Nice work!!!

After many years in the business of building 28'-44' ocean cruising sailboats, then sportfishermen, I have often thought of building a maximum trailerable size (maybe 23-26') sharpie for cruising the shallow waters of the Keys and the Florida gulf coast. It may be one of those projects that I will never get around to, but I continue to kick around design ideas in my head.

Keep the pictures coming.

Joe
 

Oyster

Well-Known Member
Dec 5, 2008
254
0
OBX North Carolina
Thanks guys. They are just functional and fun hulls for poking around the shallows. I have detailed shots of the constrution which I will provide later as I really enjoyed the builds. Paddling Gator, we do the Cortez show in the early spring time and sailed all across the flats where all of those expensive flats boats with novice operating them attempt to go and leave digs in them thinking that they are deep enough for them to run in sometimes.

Gotta run as I am working on my other non-conventional power boat hull. Retired??? Yep, but in my case, thats the reason I dig in dumpsters for woods. :lol:
 

oldsparkey

Well-Known Member
Aug 25, 2003
10,479
123
Central , Florida
www.southernpaddler.com
Oyster said:
Gotta run as I am working on my other non-conventional power boat hull. Retired??? Yep, but in my case, thats the reason I dig in dumpsters for woods. :lol:

As I like to say , most of us are Retarded in place of retired. It seams we work harder at having fun , building boats , paddling , fishing , camping or just goofing off more then we did when we were working.
If I knew retired life was this hard . :lol: .... I would of done it a lot sooner so I guess I was slightly retarded for not doing it.
After all who wants to work when you can have a 365 day vacation. :roll:

Chuck.
 

Oyster

Well-Known Member
Dec 5, 2008
254
0
OBX North Carolina
:lol:
I also can sleep four very comfortably in decent weather. I fabricated a hardtop convertible so it would be easily accessible under the short bow. I also created inserts long the centerboard and slatted seating for split boards that store away foward easily. There is actually two shelves foward for gear thats keeps everything dry thats important.

Popsicle bunks

insertbunks.jpg


foward sleeping Popsicle

DSC01348.jpg


More to follow
 

Oyster

Well-Known Member
Dec 5, 2008
254
0
OBX North Carolina
Then I made mast crutches so I could stand up and also made some that are just above the cabin top if I am by myself or just two on just an overnigher along the barrier island. I use the mast which is easily removed by pulling the pin out at the tabernacle which also steps the mast to the keel. I reinforced both ends in the framing in the bottom and at the ends of the trunk so I would have no obstacles in the way fore and aft.

mastsupportpopsicle-1.jpg


I had some ash but do not like it for clear finishes as the wood always ends up with black places in it. But I used it because of the coarse grains too and trimed the topsides out with mahogany, the only wood that I purchased on the boat and then I painted the ash and also enjoy the wood grain look through the paint as it is a wooden hull. If you look closely, I also let some of the inner stem come up through the decking and then I mortised the 8/4 bowsprit of honduras mahogany on the back side and fastened it from the underside so I have no exposed fasteners and no side stays to get in the way foward and look horrible, IMO. Its rigid and my forstay for the mast goes to the end and my jib is secured to the stem area. I use side stays to steady the free standing mast under sail and have no backstay for the gaft type sail even though its a sprit rig.,

bow popsicle ash enlays

23bowbarewood.jpg
 

Oyster

Well-Known Member
Dec 5, 2008
254
0
OBX North Carolina
Now for some details of the two builds rolled in one thread. I used western red cedar siding which got a lot of chuckles from the purists as it was house siding that could not be sold since some of the edges of the laps were broken. BUt what the heck, wood is wood you know, or at least I do.
Of course the siding can be knotty. So what I did with the culls from the 20 was to rip the siding into along the vee grooves and then make planks for the sides of the round stern planking it vertically which I will show later. If you look closely, you will see a wedge on the planking. What I did in the 20 footer, I sawed most of the lap off and then planked the boat using full planks and shiplaped them.
red cedar siding
This is the bottom of the 23 footer.
cedarsiding.jpg


This shows the planking end grain on the 20 footer. I shiplaped the upper ones and the bottom one I lapped=shiplaped the edges and this gave me a nice lap joint and an area that does not ever open up when sitting on the trailer. SO don't let anyone ever tell you that you can't own a wooden hull that does not reside in the water most of its life.

20 footer planking
f6d1ab63.jpg


What I did too was to solid veneer the transom on the 20 to seal the edges and then painted the edge making it look like the plank ends.

20 transom veneered

P5100015.jpg
 

Oyster

Well-Known Member
Dec 5, 2008
254
0
OBX North Carolina
Round stern planking was done with strips of the cedar fastened to longituals simular to cold mould construction methods. The strips were from the two sections of the siding, the transom was from the narrow side and the sides were from the wider section. I used a lot of the narrow stuff in the foward bottom area which will be another post.

The bottom is a constant deadrise fore and aft finishing off the a flat bottom at the transom. Now that was a real hair pulling experience, not withstanding also a vertical transom transending from a suttle flare along the hull sides.

round stern planking

PA030001.jpg


PA040002.jpg


Popsicle side planking

PA170012.jpg


I then resawed 1/8" to 3/16"planks and veneered the sides. After that I sanded them smoothe. I also used the lap feature along the bottom veneer plank.

veneer long ways

laminatedskin23roundstern.jpg


This is the 20 being framed after the bottom was done, which is another feat.
sideshotupright.jpg


I will post the bottom work maybe tommorrow night if I don't get a chance in the am. Thanks for your patience. :wink:
 

Oyster

Well-Known Member
Dec 5, 2008
254
0
OBX North Carolina
Well I guess I will finish my blogging. :wink: Hopefully this will help someone reading down the road.
On both the centerboards I used old plywood, a nono from the standpoint of purists and by all building practices since its not really strong from the side stresses. So I glassed it with 1808 Biaxall on one side and around the round edges after I glued Polypropulene rope to the edges. What this does is to protect the board when hitting rocks and running up on the beaches or sandbars.
I then turned it over and routed out an area and enlayed tire wheel weights in it using a slurry mix of thickened epoxy resin. The reason for this you need what is known as a downhaul for the board and use only a line to retrieve it. In some cases in lieu of this , two lines or a wedge to jam it between the trunk will keep it from floating up but will not come up if you encounter anything quickly. In some cases, the board will jam harder and you cannot get it out. Then I glass over the complete side and its ready for use.

wheel weights centerboard
wheelweightscenterboard-1.jpg


On the 23 footer, I did a version of the above. I used fishing weights and melted them in a flat broiler pan on my outdoor grill burner till it was wafer thin and cut it in half and enlyed them in the board. If you also look closely, you will see holes or spots with a dark substance behind the glass. I actually drilled these half way through and cleaned the wood to the glass layer and laid in thickened epoxy filled with wood fibers and then inserted bronze sleeves in the glue and let set up. Then I groudn down till flush and glassed over them.

I also did the same at the pin pivot position and installed big fender washers large enough to fit the side of bolt used for the pin. This keeps any moisture from intruding and wear down or egging the holes. The smaller ones are for setting board positions depending on how much you need or the depth of the water too.
centerboardandweights.jpg


Now on to the bottom planking on the next post.
 

Oyster

Well-Known Member
Dec 5, 2008
254
0
OBX North Carolina
On these bottoms, they have a constant deadrise from bow to stern, even though the bottoms are tucked up. The transition to maintain this creates a building nightmare for people that have never done this before. In the foward area where the deadrise is, this is the shape and how I did it.

IN some cases, people will use big chunks of wood and shape with a plane or grinder to archieve it. In this method that I have used, I then cap the planking and keel until it gets back to the centerboard trunk and this also makes a nice shoe to sit nicely on the beach too.
invertedbow-1.jpg


veeentryprimed-1.jpg


I start by fitting rough strips of 3/4 x 1 1/4 tacking these in place. I let the bedding dry and then sand it smoothe.

stackedbowsteps.jpg


finishedstep-1.jpg


I continue doing this untill I get back a ways and then use flat planking.

But in cross planking, a flat plank will not lay flat along the keel and chine in this style contruction methods. So we are required to remove wood creating a "twisted plank". When installed, we just sand the highs down untill we have a smoothe bottom.
In many cases in the larger boats, we use chunks a bit thicker. To make the trun to the wider area though when using thinner planks, we cut the planks in a japanese fan shape. This keeps helps the plank to lay better without removing too much wood and gradually allows you to plank right angle to the keel line.

f770ed2c.jpg


f770ed2f-1.jpg


In the round stern area, narrower planks are needs as the bottom also flattens out as it narrows and gradually looses the deadrise to the flat bottom at the round transom..
bottomplanking-1.jpg
 

bearridge

Well-Known Member
Mar 9, 2005
3,092
4
way down yonder
Whew....dang.....what a mind boggler that wuz! I bet Keith 'n Seedtick will copy some of the stuff ya posted 'n show up wearin' navy blue blazers 'n a captain caps down at the Bayou Douche Yacht Club. So, have ya put a fire engine cab on one of yer boats? :mrgreen:

Dang good on all of ya'll!

regards
bearridge

* There is no truth, only what people believe to be true.
* Control people’s perceptions of the world and you can control their beliefs.
* A big lie is as believable as a small one.
* Tell people what they want to hear; give them simple solutions to complex problems, enemies on whom they can blame their discontents, and promises to satisfy their narrow aspirations.
Joseph Goebbels
 

Oyster

Well-Known Member
Dec 5, 2008
254
0
OBX North Carolina
Heck that crowd has forgotten more than I will ever pretend to know.
One last one before I go kiss Ms. Santa Claus goodnight, for the regular side framing and longituals I used fir sawn from thrown away window sills, since nowadays folks use plastic for almost everything. I used heartpine for all the centerboard framing and structual woods including the mast steps.

fir window seal for framing
firwindowsealresizedframing.jpg
 

Oyster

Well-Known Member
Dec 5, 2008
254
0
OBX North Carolina
I guess this is as good of a place to put this as I know.. A great Christmas gift this year included a simple teeshirt, fitting I guess. I got a real kick out of this one.

DSC04643.jpg
 

Oyster

Well-Known Member
Dec 5, 2008
254
0
OBX North Carolina
I used the PL window, door, and Siding sealant. At the time it was 3.88 a tube. It does takes some getting use to as far as drytime and curing times. I like it because it cures under most situations in a day unless its really cold as long as the caulk tube has been kept warm. It does not like to flow in really cold days. But you need to let it cure before you paint it. I can clean it up with mineral spirits and its twice as flexible and pliable as 5200 and just as good, especially when fasterners are used to seal seams.

I also cut splines in the bottom and stern planks with a simple pass on the table saw of the full cut planks before I cut them to size and installed them. This also created a caulk spline and I have yet to have any problems with this method.

The only down side of using this is that the shelf life for the caulk which can be purchased at most chain big box stores that sell lumber, is that its been a slow mover and some have replaced it with a less than perfect caulk by some other manufacturer and the stuff will not cure hard, creating an issue with painting.

Also for almost twenty years I have used the Kiltz for priming, oil base that is, the red letter on white can that clearly states that its an interior primer for stain blocking and have of yet had any issues with it under any type of enamel paint, even when using the Brightsides after the primer fully cures.

Brightsides is funny as it does like its own primer so the lighter colors do not mildew. But with the Kiltz it does not. Kiltz by itself does mildew if left uncovered. But on wood, there seems to be none better especially since it costs about ten bucks a gallon, a real selling feature for this guy anyway.