
I've been lurking around the site for awhile now, and finally decided to get out of the lazyboy and into the shop! I got the UJ kit and some 1/8 cedar ply to start. I'm going to put a 1/4 bottom on my build. Figuring on a 1/4 by 3/4 strip at the side bottom to make a more solid glue point and additional strength. I'll put fore and aft decks out of the cedar ply and maybe even some foam flotation under the decks. I'll be using epoxy with 5 oz. glass inside and out, and graphite epoxy mix on the underside, (of the boat)! I'll be checking out protected salt water paddling to get a feel for it, before venturing into canals and streams that aren't so good for swimming. I haven't made the first cut yet, but it should happen tomorrow. I'll be building this in my school shop, (I'm the teacher) and I hope to get the excitement going for some parent/student builds in the future. I'll update the build and add photos when I figure out how! :shock:
New Builder in Honolulu
- Thread starter Tiki37
- Start date
You are using an out of date browser. It may not display this or other websites correctly.
You should upgrade or use an alternative browser.
You should upgrade or use an alternative browser.
You in Hawaii? Then you have got to outrig that sucker.
Here's a good ama plan: http://homepages.paradise.net.nz/garyd/quikama.html
Here's a good ama plan: http://homepages.paradise.net.nz/garyd/quikama.html
Tiki:
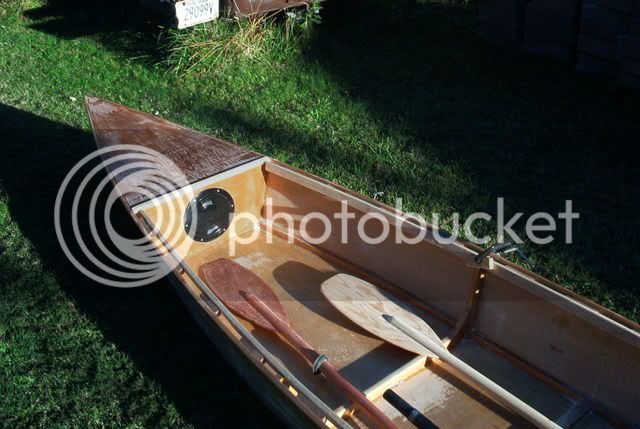
Welcome to the group. Here is a photo of my piro showing a hatch in the bow. And also one in the stern. It is basically a watertight compartment. I use it to store my cell phones and cameras. You may want to consider doing this instead of using a block of foam for flotation. My piro will support me even when the boat is totally swamped. The compartments make the boat virtually unsinkable. Plus, you gain additional storage space.
Just a thought for you to consider.
JC
Jim
This is a repeat story. One of the neatest boats I saw, was at our boat show here at Michigan State University. It was made of 1/2" plywood and 2 X 4's. Had hammer marks and saw cuts all over it. It was nailed together. Probably weighed 150 pounds. One seat had a decided tilt. I asked the fellow with the exhibit for the story behind the boat.Tiki37 said:...I'll be building this in my school shop, (I'm the teacher) and I hope to get the excitement going for some parent/student builds in the future.
"My 5th grade shop class built it. Then, I took each kid out fishing in it, one at a time." with a sly grin.
I replied, "You sly dog. You HOOKED every one of those kids - didn't you!"
"Yep."
I like the idea of the hatch openings, I've seen 'em on some others on the site. My foam will go just under the deck for added support and to help carry a rounded top profile. There will be an open area beneath and I'm debating whether or not to seal up the compartment or leave open access. My trips will be in flat water so I'm thinking I'll leave the space open. Last summer my class built 10 inch long hydroplanes. I have a lot of freedom in the projects I build with my classes. The problem with a large project is that not everybody gets to take it home! This one is for me, but when I build it at school everybody get to see it being done. I did a project with parents and their kids building gravity powered cars. It was fun, but it sure took a long time for all 14 teams to finish the job! 8)
where do those hatches come from? I want some.
Welcome Tiki, I'm a new arrival as well building in Canada
Welcome Tiki, I'm a new arrival as well building in Canada
Tiki, I'd beware of trying to "seal" up a wooden compartment. If you are successful, it will oil can with changing air pressure outside and inside. Eventually it will self destruct by forming a leak.
If you are unsuccessful, it will breathe and accumulate moisture.
If a compartment has a pinhole to breathe through, and an optional opening for vent and drying during non-use, you can get the beast of both worlds.
Otherwise, I'd leave a drain at the bottom so water can exit if it enters.
Just my 2 cents
You can buy those hatches at a store like West Marine. They are called deck plates. I built my pirogue the same way. I followed the advice given to me here and drilled a very small hole in each plate. The tiny hole will let air move back and forth but will only let a tiny bit if any water in the compatment.
Just store your boat with the covers OFF. I have been thinking about making the holes in the covers biger and putting strings in them so they don't get lost.
Now THERE'S a capitol idea! A knot on both sides of the panel will retain the string, allow air to flow, and prevent liquids from passing. BINGO!redfisher said:Just store your boat with the covers OFF. I have been thinking about making the holes in the covers bigger and putting strings in them so they don't get lost.
Some time ago I was paddling Fiberglass kayaks and we had a vent that had to be opened every time we put into the water , since the change in temp would cause the compartment to contract. Imagine the same would hold for a wood boat. I'll keep your tips in mind when I get to that stage of the build. I was told to completely seal the foam to avoid having it "waterlog" over time. Kinda like an old surfboard with dings will eventually go bad if not repaired. the thicknes of foam I'm using is 2 inches, and it will be tapered out on the edges to hold the deck shape. The deck temp should not be affected by water temps I hope. 8)
Tiki, if I had a compartment with foam like that, I would definitely have it either open, or could be opened. I'd suspect that a small hole with a string will not provide anywhere near enough ventilation.
Bellybuster:
I bought the hatches you see in the photo above, in a canoe & kayak shop. They are 8" and cost $8.00 each (USD).
JC
Jim
I bought the hatches you see in the photo above, in a canoe & kayak shop. They are 8" and cost $8.00 each (USD).
JC
Jim
This afternoon/evening I got into the shop for the tablesaw work. I cut the sides from a single sheet, (1/8 cedar ply). I was able to find repeating patterns and worked around them so they will butt up to each other lengthwise. I was pleased to end up with both sides having nice matches in the grain. I hope to make this a "pretty" as well as usable ride. I used a single sheet of 1/4 inch for the bottom and took a piece at 8 feet by 26 and a half inches for the center. The remaining strip of 21 inches was cut in half, 48 and 48. These two pieces will go on the ends. I'm hoping the two joints will work okay, (I saw this done on another build on the site). I had all sorts of fun making the scarfs with a 3 inch belt sander! I got the ribs glued and clamped. Tomorrow I'll get the sides and bottom glued and glass the joints. 