
The tumblehome panel needs to go all the way to the stem to make a point. If you did this on your current boat it would be too low at the ends because your sides are the same height at the stems as mid ship. Had you cut the side arc out of a board or panel the stem height would be greater than midship. You formed a panel out of strips with parallel sides. I shaped the sides on my "Truck Boat" build like that and the TH panel did not come to a point. Resembled the shape of yours. https://www.southernpaddler.com/community/threads/truck-boat.9289/
One function of the TH panel is to raise the height of the sides at mid ship.
If the depth of your boat is 10" with the TH in place the ends should be that or a little more depending on your taste. Hope this will help:
A Plank Pirogue
The "Plank " part may not be technically correct. More like "solid wood panel". I did not have any suitable planks so I am making/using shorter boards jointed and glued into panels. For sometime I have been buying any "clear/solid" cedar fence boards I ran across. There is some waste and...www.southernpaddler.com
SS&G No Plans Again!
- Thread starter oldbuffpilot
- Start date
You are using an out of date browser. It may not display this or other websites correctly.
You should upgrade or use an alternative browser.
You should upgrade or use an alternative browser.
Thanks JD, I appreciate your taking the time to help me understand the interrelationships of the boat parts. I have made the cutback on straight top panels on an uncle john type, but there weren’t any tumble homes to deal with. Just before I Got your response I had figured out that the side of the boat needed to change to reduce the tumblehome curve, you really clarified that. Won't be a problem on this build, but good knowledge for the future. Thanks. No work today. Rained all day,needed to work outside with the planer and sander. hopefully more tomorrow.
Andy
Andy
Thanks JD, I appreciate your taking the time to help me understand the interrelationships of the boat parts. I have made the cutback on straight top panels on an uncle john type, but there weren’t any tumble homes to deal with. Just before I Got your response I had figured out that the side of the boat needed to change to reduce the tumblehome curve, you really clarified that. Won't be a problem on this build, but good knowledge for the future. Thanks. No work today. Rained all day,needed to work outside with the planer and sander. hopefully more tomorrow.
Andy
This build is coming off a weather delay, three days of rain and another day of husband stuff! I have spent a bunch of time playing with the tumble home angles, width,length, and any other thing associated with them. That was the fun (learning) part. In this picture I was experimenting with changing the form tumble home angles.
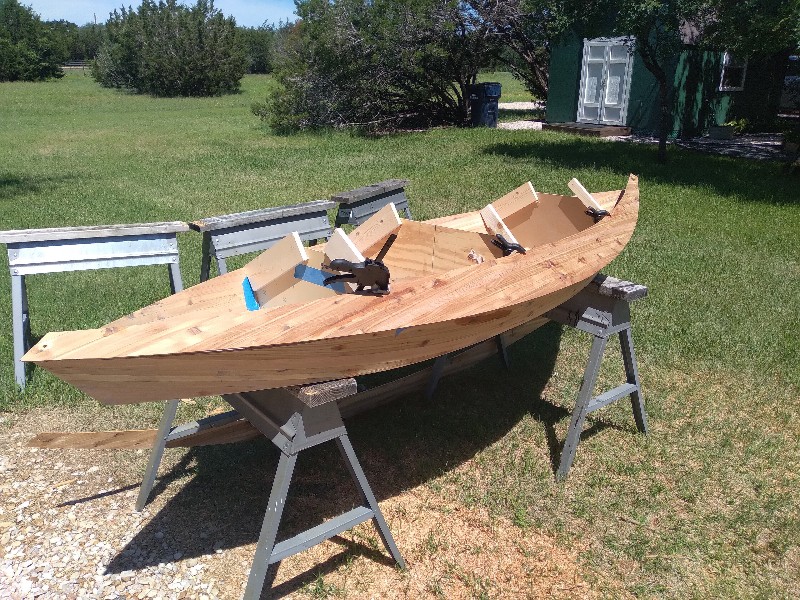
Finally on to some work you can see. The saturation coat on the inside. The good part is that it can cure while I sleep! If you look closely in the background you can see the 17Lb camo pirogue I built a few years ago. It is now my Brides project.
Moving forward again!
Andy
Glad you are back to the build. Have you decided on an angle for the TH panel?
Mine usually are more than 90 deg. The flare, side height, and the depth of the (cockpit) hull determine what it needs to be. The more vertical the panel is the less support (stiffness) it adds to the side. The more vertical the more depth.
Mine usually are more than 90 deg. The flare, side height, and the depth of the (cockpit) hull determine what it needs to be. The more vertical the panel is the less support (stiffness) it adds to the side. The more vertical the more depth.
Thanks JD you sure full of knowledge. Thanks for sharing and taking the time to respond. I am not sure for the angle ended up I will measure it next time out there. I mostly Was going by how it looks. I hadn't considered the effect on side stiffness That is some good information something to seriously consider.
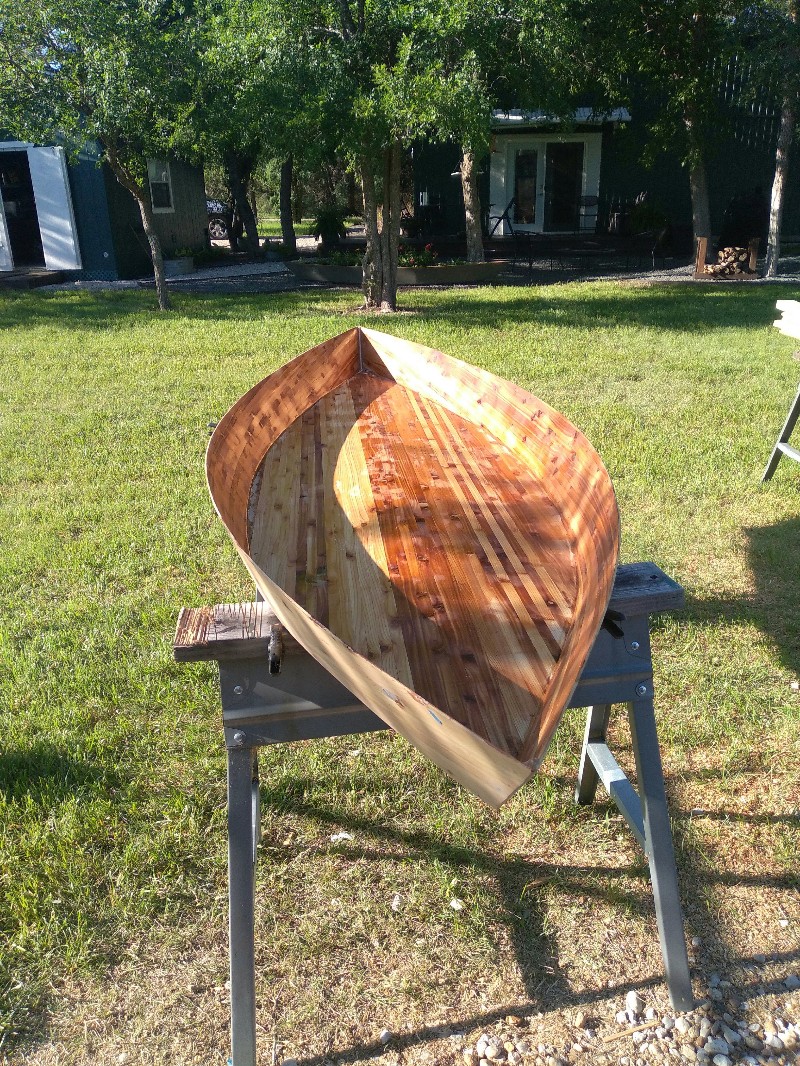
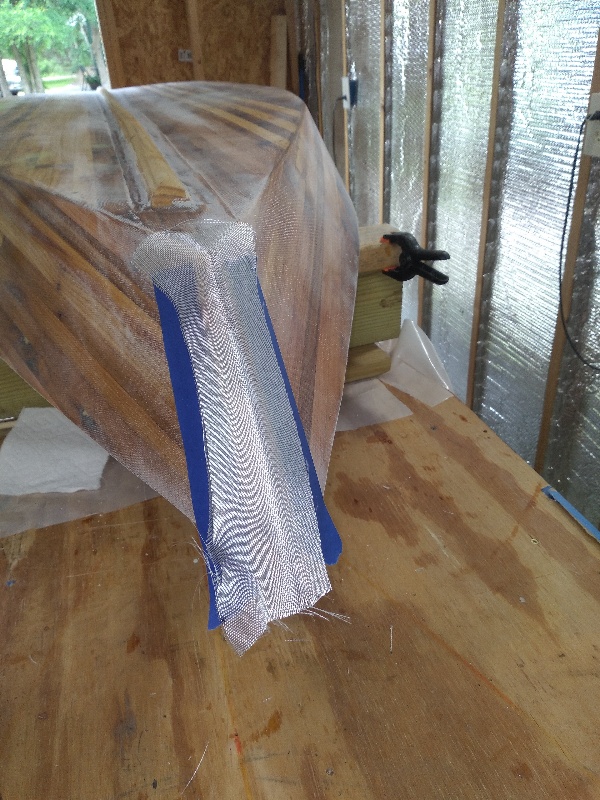
Some progress on glassing the inside. I decded to glass before putting the tumble homes on since I'm still not sure exactly what the deck/tumble home junctionn is goiing to look like. looks like the tumble home
side angle will be about 97 degrees.I'm doing the inside glass on the inside inn three pieces floor and two sides. The floor is done (no pics) and just finished one side. First pictue is the cloth smoothed out and ready. A larger wall paper brush is my favorite for smoothing. Second picture is after the resin has been rolled on.


side angle will be about 97 degrees.I'm doing the inside glass on the inside inn three pieces floor and two sides. The floor is done (no pics) and just finished one side. First pictue is the cloth smoothed out and ready. A larger wall paper brush is my favorite for smoothing. Second picture is after the resin has been rolled on.
Looking great, Andy. It always amazes me how the cloth just disappears when saturated with epoxy.
Thanks and thanks for sharing your knowledge of how things work together.Looking great, Andy. It always amazes me how the cloth just disappears when saturated with epoxy.
Cheated the clock today, lightly sanded the inside glass,wiped it down,and put on the first fill coat. Normally I would be done for the day to let the epoxy cure. But I’m going to run out of Texas work time and return to Kansas in about 10 days. Picture of the first fill coat doesn’t look much different than the wet out coat.
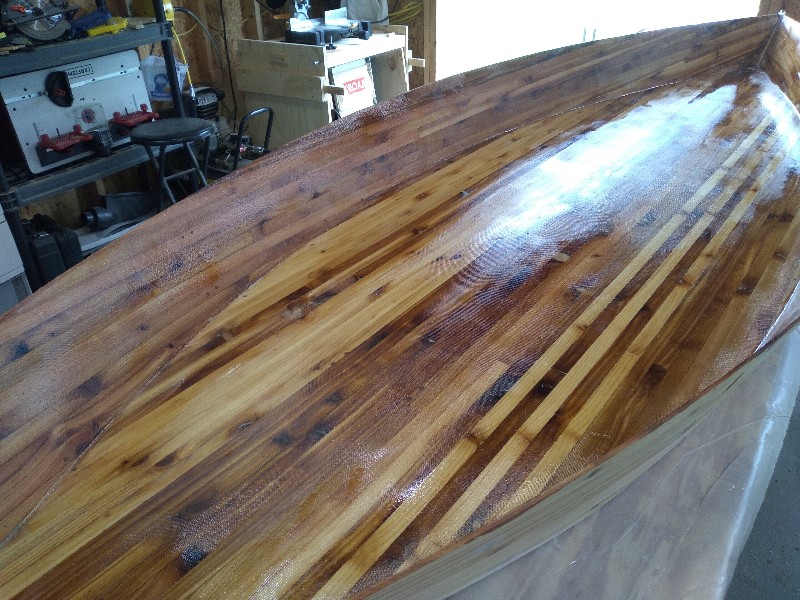
First fill coat on inside
After the inside fill coat cured about 3 hours (still sticky) I turned the boat over, and applied the wood saturation coat. That's it until tomorrow.
Hopefully more tomorrow,
Andy
First fill coat on inside
After the inside fill coat cured about 3 hours (still sticky) I turned the boat over, and applied the wood saturation coat. That's it until tomorrow.
Hopefully more tomorrow,
Andy
Looking good. Hard for me to wrap my mind around the side panels' shape and curve of the strips. I keep forgetting the panel has parallel sides and the ends are the same width as the middle. Nothing wrong with that just different than what I'm used to.
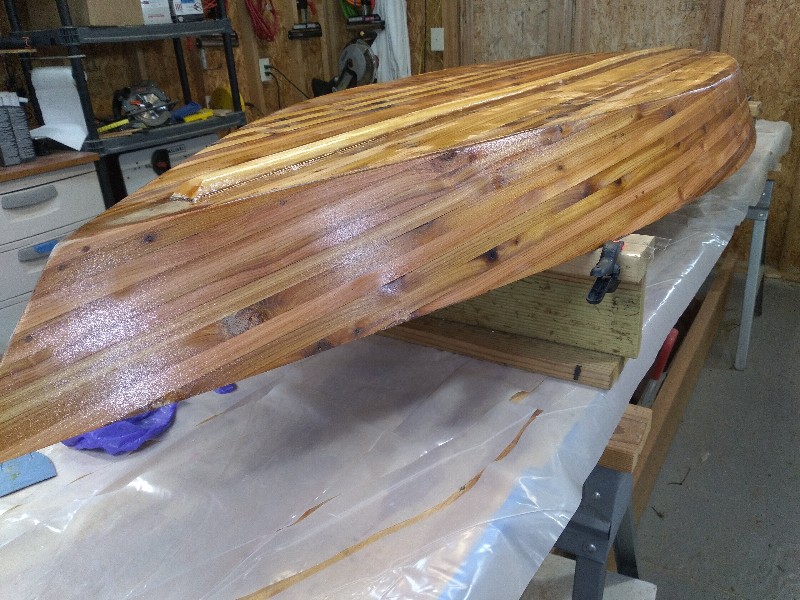
I made a good decision today. I had planned to glass the whole outside at one time, this would have saved a day or two of wait for cure time. I cut the cloth, then started to plan how to wet out the whole outside in one session, then decided it was a bad idea especially with the keel down the middle. Protrusions like that on a flat surface can be a problem area. So I regrouped and cut a center 5” strip out of the cloth to cover the keel, then I will do the outside in three sections, the center keel and two sides.
The center stip on the keel is done, and will be ready to sand the edges tomorrow.
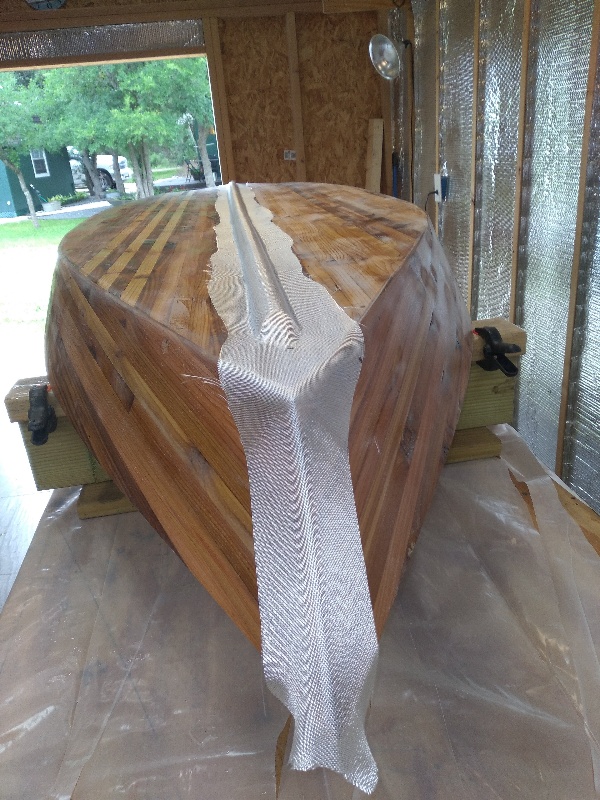
Cloth ready for resin
I wasn’t excited about the curvey edge, but it will be covered with more cloth and graphite epoxy.
The cloth wet out real good, the protrusion and valleys can be hard to do, I got lucky this time!

Hopefully more tomorrow,
Andy
The center stip on the keel is done, and will be ready to sand the edges tomorrow.
Cloth ready for resin
I wasn’t excited about the curvey edge, but it will be covered with more cloth and graphite epoxy.
The cloth wet out real good, the protrusion and valleys can be hard to do, I got lucky this time!
Hopefully more tomorrow,
Andy
Also different than all plans I have built from! Please don't get confused, I'm relying on you and jdupree to keep me straight on how the parts affect each other!Looking good. Hard for me to wrap my mind around the side panels' shape and curve of the strips. I keep forgetting the panel has parallel sides and the ends are the same width as the middle. Nothing wrong with that just different than what I'm used to.
Chewing that elephant in three chunks was a good idea, Andy. One side/end/corner can start to set up before you can get back to it And you’re right about the keel causing wrinkles etc in the center. On a smooth bottommed boat, I have done one side of a boat at a time, overlapping on the keel line.
Glassing is a job where a helping set of hands is very welcome!
Glassing is a job where a helping set of hands is very welcome!
The edges of the fiberglass on the keel were sanded first thing this morning. the ragged edges were not easy, I should have used the masking tape technique to make a smoother straight edge.
I’ll do that technique on the two cloth panels today.
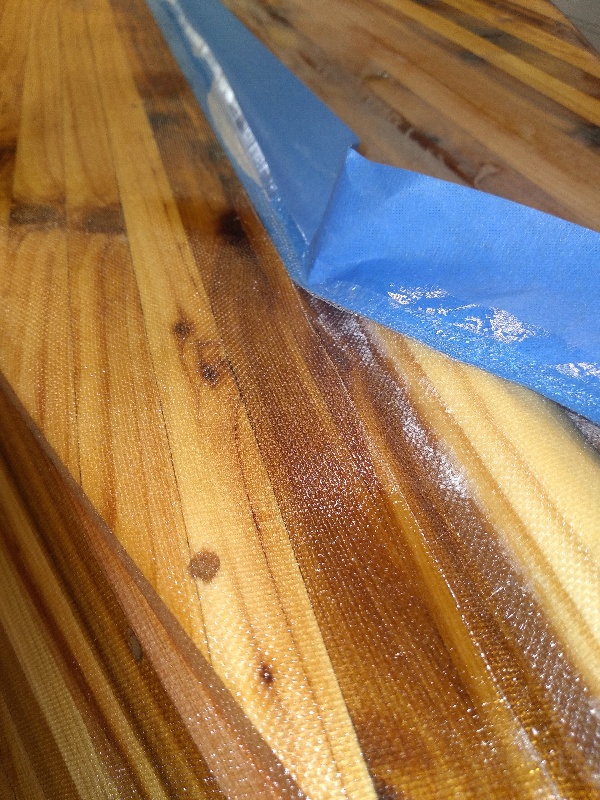
This shows the masking tape edge where the seam of the fiberglass will be.The cloth is laid over part of the masking tape.
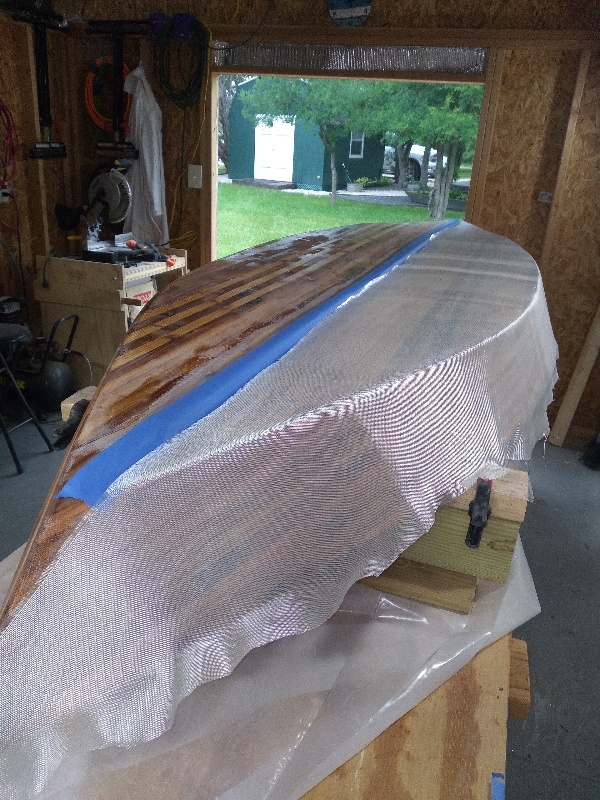
Then when the cloth is wet out also wet out the cloth that overlaps the tape. In these two pictures the cloth is wet out.
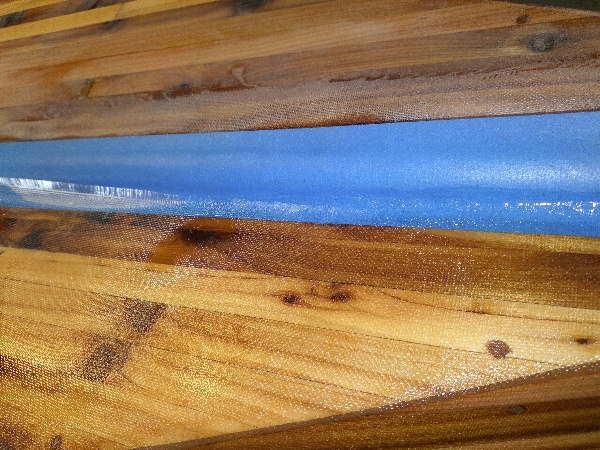
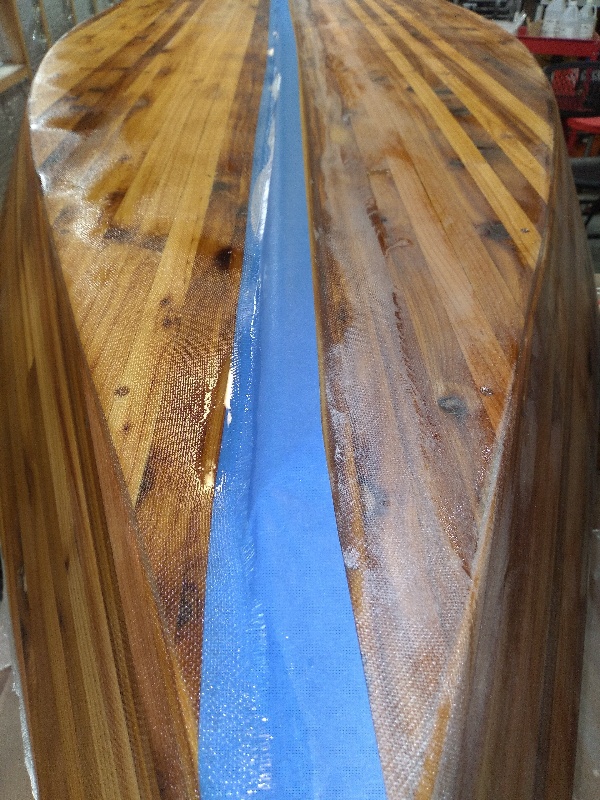
When the epoxy is still green, not sticky,usually about 5 hours, use a sharp utility knife and score the fiberglass right at the edge of the masking tape.
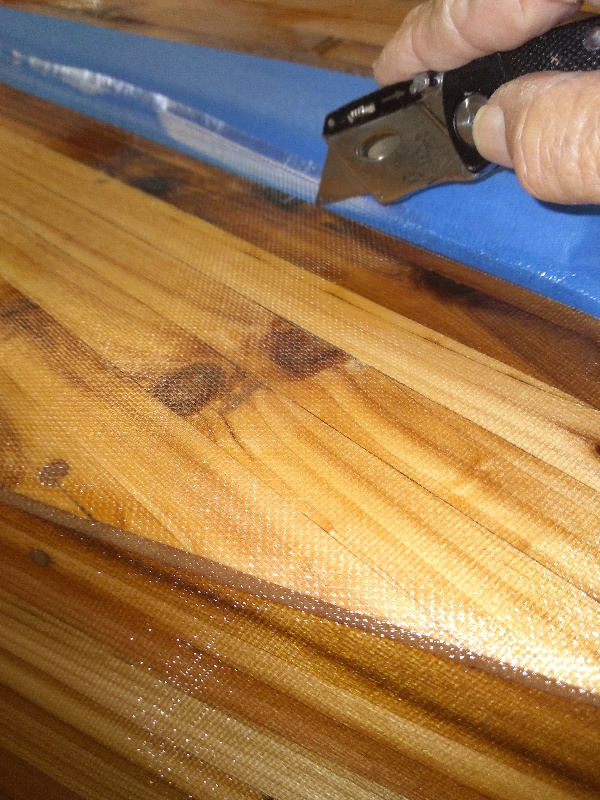
Then carefully pull the tape and fiberglass up and the result is a clean straight edge.
I like this method where a seam will be visible on a bright finished boat. The seam will disappear in short order with a scraper and a pass with an 80 grit sanding stick. the next fill coat covers it.
The next side is glassed and curing, the only problem is tape will need to be scored and removed about 11 PM! Guess I’d better set an alarm")
More tomorrow,
Andy
I’ll do that technique on the two cloth panels today.
This shows the masking tape edge where the seam of the fiberglass will be.The cloth is laid over part of the masking tape.
Then when the cloth is wet out also wet out the cloth that overlaps the tape. In these two pictures the cloth is wet out.
When the epoxy is still green, not sticky,usually about 5 hours, use a sharp utility knife and score the fiberglass right at the edge of the masking tape.
Then carefully pull the tape and fiberglass up and the result is a clean straight edge.
I like this method where a seam will be visible on a bright finished boat. The seam will disappear in short order with a scraper and a pass with an 80 grit sanding stick. the next fill coat covers it.
The next side is glassed and curing, the only problem is tape will need to be scored and removed about 11 PM! Guess I’d better set an alarm
More tomorrow,
Andy
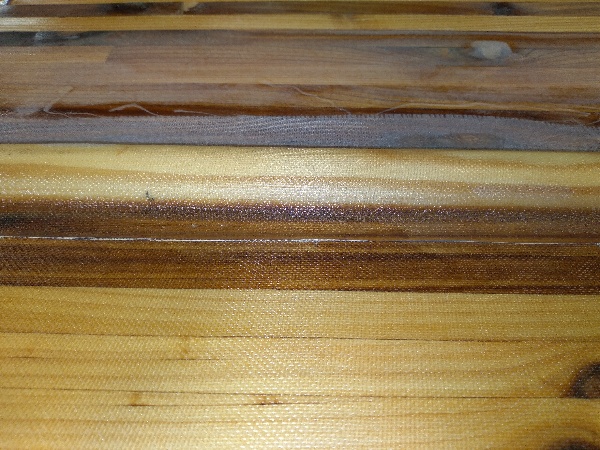
Today I lightly sanded the wet out coat on the outside and wiped it down and put on the first fill coat. This was a good time to put a 4th layer of cloth over the end stems. I like to have extra cloth in the most vulnerable wear areas.I cut some scrap cloth on the bias so it would lay smooth and conform to the shape easier. The first picture is the cloth with the masking tape edge seam, the second is after getting wet out.
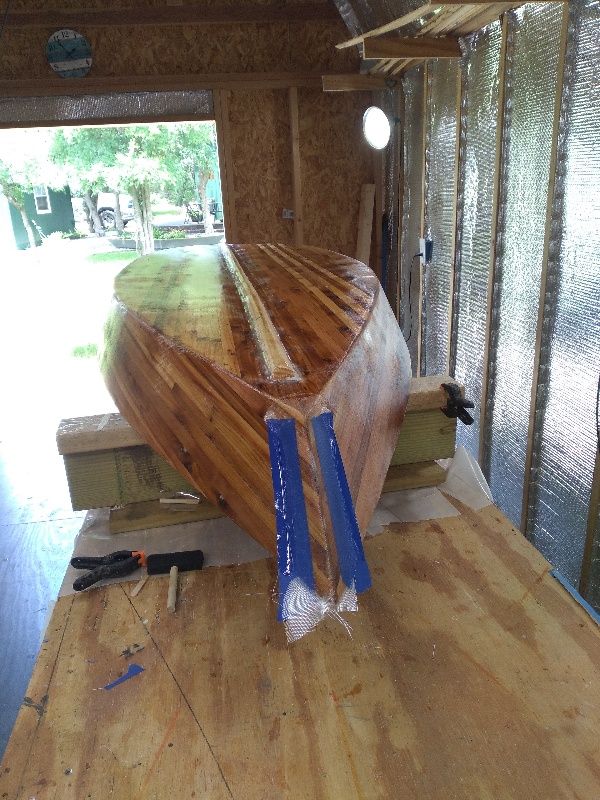
Hopefully tomorrow after cleaning up these seam edges, I’ll put the tumble homes back on and start figuring out the deck/tumble home interface.
Andy
Hopefully tomorrow after cleaning up these seam edges, I’ll put the tumble homes back on and start figuring out the deck/tumble home interface.
Andy
The tumble homes took a turn today. I was working out how to terminate the tumble home into the decks,when I remembered my objective was to create a set of patterns to use in the future. So I diverted my attention to making the full length tumble homes fit perfect (better).
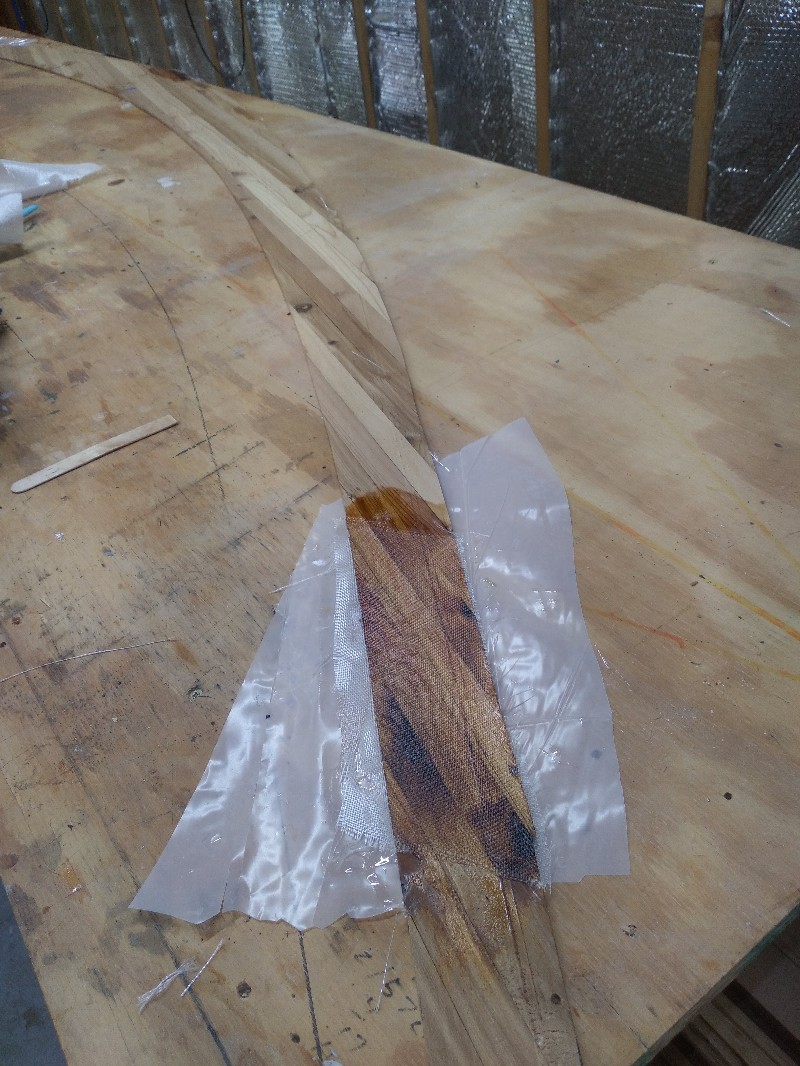
Of course when I was recutting, one of the panels broke, not in a glue seam, but in a piece of brittle wood. These strips are from sawmill cedar 2x8’s I’ve had for about 8 years. I’ve got enough stripped for 3 or 4 boats, but it ‘s so brittle I’m having second thoughts about using it again. I feel sure it will be ok when encapsulated in fiberglass.
Here are the pictures of todays’ work.
Repairing break with epoxy and cloth.
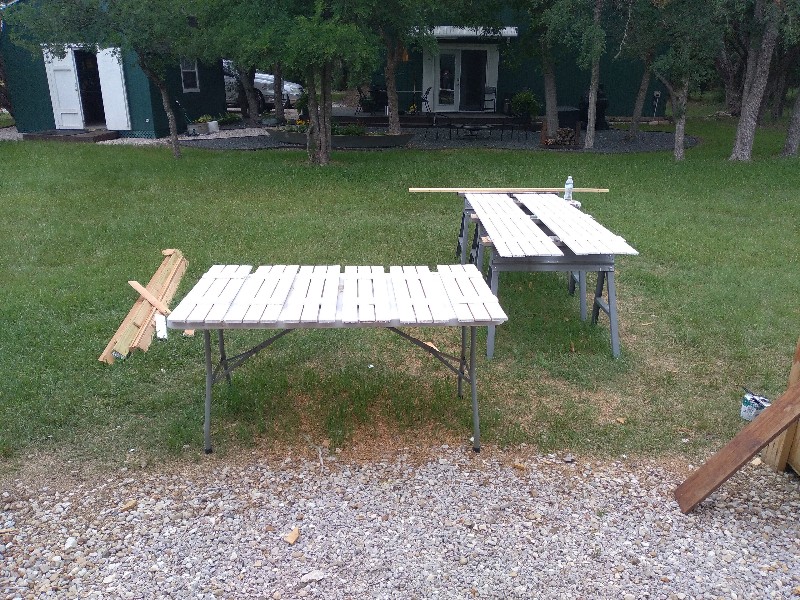
Not boat work, but boat work time was spent painting the new cedar shutters white!!
More boat work tomorrow,
Andy
Of course when I was recutting, one of the panels broke, not in a glue seam, but in a piece of brittle wood. These strips are from sawmill cedar 2x8’s I’ve had for about 8 years. I’ve got enough stripped for 3 or 4 boats, but it ‘s so brittle I’m having second thoughts about using it again. I feel sure it will be ok when encapsulated in fiberglass.
Here are the pictures of todays’ work.
Repairing break with epoxy and cloth.
Not boat work, but boat work time was spent painting the new cedar shutters white!!
More boat work tomorrow,
Andy