Robin's Laker | Page 2 | SouthernPaddler.com

Robin's Laker

oldsparkey

Well-Known Member
Aug 25, 2003
10,479
123
Central , Florida
www.southernpaddler.com
Mick...

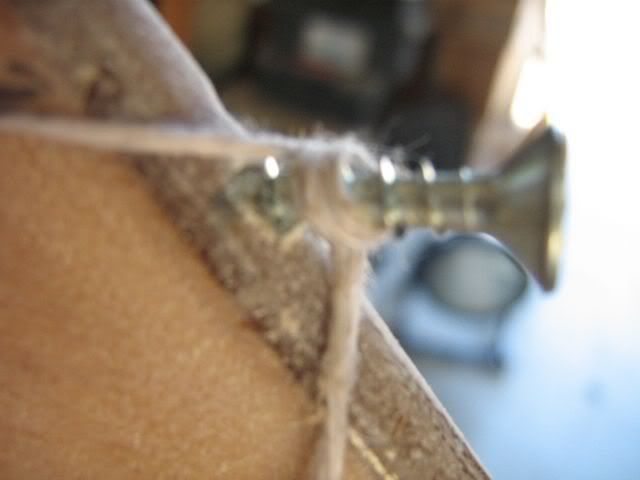
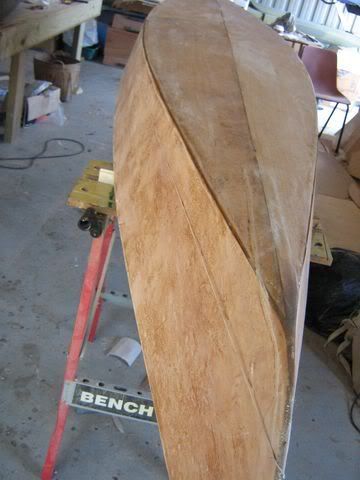
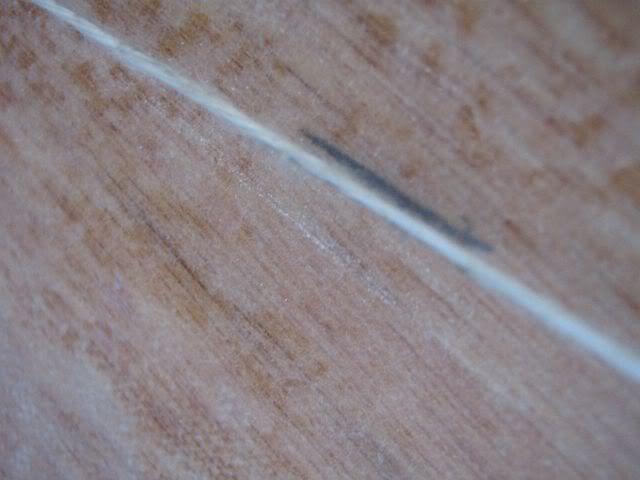
You have almost entered my domain, no spacers and tight fitting seams. Now the next is ....

Never mind .....I will not go there but you might make it. :lol: Anyway it works for me and that is all I care about. All of my boats , except for the kit one , Pygmy Coho , are made with the economy wood ( Can you say cheap).
Forgetting about the stripper pirogue I made from the Redwood I sawed out to make it , heck it was cheap also .. $55.00 worth of wood.:D

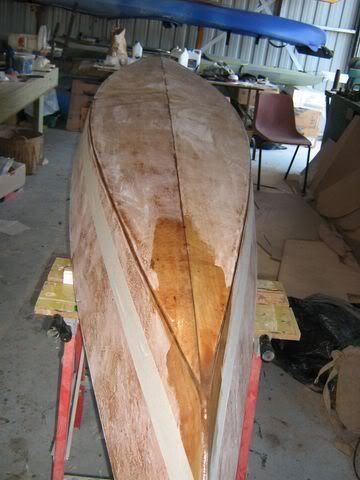
If the economy wood that I used to make my boats ( in this case the canoe ) which survived the rapids from Hell .... That is proof it is not the wood but the way it was built.

The wood is nothing more then the filler between the glass to give it the looks. Sort of like a "P"Nut Butter sandwich.

Without the "P"Nut Butter in the center and the bread on the outside ... Ya have nothing to sit back and enjoy. "O" Don't forget the jelly as in extra additions to the boat.... Ya Know the good stuff that makes folks look at it and say ... WOW.

It's not what you use .. it is how you use that to make it. You can use the Two dollar stuff or the $ 200.00 stuff and the results will be the same. One might or will require more work but it will give you the same thing in the end.

It's all a mind set , I paid more for this so it is better ... HELL .. It is all wood , plain and simple no matter how you look at it. What it comes down to is something really easy to understand... Use what you are comfortable with you like ... Anyone else , they can decide and then do that or whatever they want to do.

The options expressed on here is what helps a lot of folks decide on which way to do it.

Chuck.
 

hairymick

Well-Known Member
Dec 8, 2005
2,107
2
Queensland, Australia
G'day Chuck.

Mate, I hear and understand what you are saying, and up to a point, agree with you.

The kicker for me is this. I can get the top quality stuff for a mere $11.00 per sheet more than what I was paying for the rubbish.

The good stuff, has no voids, is made with three genuine laminates and each one being thicker than the paper thin veneer on either side of the rubbish ply I was using. Add to that, the fact that the 4mm Gaboon ply is a reported 2 kilograms (4.4 pounds) per sheet lighter than the 3mm "blonde" ply that i have been using up to now and for me these things alone make for a very strong argument in favour of the Gaboon.

But there is more! :D

Being marine ply, with water proof glue between the laminates, one doesn't need to worry so much about damage to the epoxy coating allowing moisture in, causing the veneers to delaminate. This stuff is also much much easier to work with.

In a four sheet boat, the added cost is only $44.00. This is much more than recouped in time savings and also money that doesn't have to go into the cuss jar during the build. :p
 

john the pom

Well-Known Member
Jul 30, 2007
345
1
Queensland
Ok Mick this no spacer thing is intriguing me. Do you have any inside info on whether or not this will be as strong as a spaced joint? Would the edges line up at the inside corners as I would imagine for a neat result? Would/will you use a larger fillet on the inside to replace the adhered area of the missing "root gap and face"?
I'm imagining that as this is Robin's Laker you'd probly have plenty of faith in the no spacer thing.
Now I've begun wondering if tape, rather than ties would work on this, or at least some stages. This is a fine example of what you guys do best and thats to make everyone think, plot and scheme towards innovation.
 

JEM

Well-Known Member
The spacers help keep things aligned especially if the panels weren't cut very cleanly.

In power boats, you don't want any wood-on-wood contact of your panels because the epoxy/filler does a better job of evenly distributing the load forces a power boat experiences. Kinda like the cartilage in a knee joint.

This is not critical in a paddled boat because it doesn't get on plane and pound in waves.

A patient builder could bevel the edges of the panels where they meet for a more square fit. But that could create gaps since you'd be taking away material and the frames aren't sized for something like that.

But if you build a pirogue or something with less panels, that wouldn't have much impact.
 

dangermouse01

Well-Known Member
Sep 8, 2006
312
1
Palm Bay, FL (East coast)
john the pom said:
Now I've begun wondering if tape, rather than ties would work on this, or at least some stages. This is a fine example of what you guys do best and thats to make everyone think, plot and scheme towards innovation.

There are kayaks out there that have been built using tape instead of stitches, some have it in the instructions. I used tape for attaching all the deck panels on my Wadefish2.0 also when I put the deck on my WR18.
From the pictures so far, other than some stitches at the bow & stern of the hull, doesnt look like it would be trouble to use tape, since there does not seem to be a lot of twist in the panels to get the shape. A little bit more work maybe.

But, you would want to use tape that doesn't stretch. You would also want tape that removes easily and doesn't leave behind a glue residue. Use care when removing the tape to be sure it doesnt lift any of the top surface of the wood with it. May have to use lots of tape to get the shape (on some boats), which would decrease the area you have left for tabbing the joint. Its harder to give small tweaks to a edge than with stiching.

DM
mike
 

Kayak Jack

Well-Known Member
Aug 26, 2003
13,976
171
86
Okemos / East Lansing Michigan
Hitch hiking on Mouse's post, I'd be damned leery of tape. First off, I don't see it as having the strength to hold a joint that wire does, or even a plastic thingey-do.

Secondly, we often use the twisting of the wire like a Spanish windlass to draw in the wood to shape. I cannot envision tape ever being able to provide this utility.

Thirdly, if left very long, tape will begin to slip and the panel will be out of line.

Fourthly, as Mouse says, beware of adhesive being left behind.

In my mind, tape would be a poor soluti0n to a problem that doesn't yet exist. But, I was wrong once before in 1952 when I thought I'd made a mistake. I hadn't. :shock:
 

hairymick

Well-Known Member
Dec 8, 2005
2,107
2
Queensland, Australia
"root gap and face"?

Aahh, :shock: :D You a Boily mate? :D (guys, Boily is Aussie slang for a boilermaker or trade qualified welder) :D

Because it is Robin's boat, I am trying to make it as light as I can but still retain hull strength and integrity. I took an inordinate amount of care in marking out and trimming the panels and when stitched, they were allmost a perfiect fit. With this very good fit, the only part of the ply panels to come into contact with each other were the extreme inside corners or the root of the joint, leaving a very small "V" to be filled.

I was able to achieve 100% epoxy penetration by using plain epoxy applied with a brush prior to filling with wood flour. It is more work and more care is required to do it this way but I like the end result a lot and i am using less woodflour - hence less weight.

I have been closely studying other builds for some time now and am slowly getting the confidence to try to incoorporate what I like about their methods into my builds. Hopefully, the end result will be a better build process and a better boat.

One big name boat designer that I know of recommends the tape method but I like neither their boats (most of them anyway) nor their build processes.

A couple more piccies.

Hull tacked
1640x480.jpg


Stitches out :D
2640x480.jpg


Back to w@#k now, Will post more later in the week.
 

Kayak Jack

Well-Known Member
Aug 26, 2003
13,976
171
86
Okemos / East Lansing Michigan
I was reading, West System I think, that thinning epoxy in an attempt to get better penetration of the first coat is not a good technique. As the thinner evaporates out through the epoxy, it leaves behind a network of tiny holes through which water seeps into the wood.

They recommended only pure epoxy for the saturation coat. Something that looked good at first glance - thinning - has unintended consequences that is detrimental to our boats.
 

hairymick

Well-Known Member
Dec 8, 2005
2,107
2
Queensland, Australia
G'day guys,

Had another pretty good day today. :D

Hull outside is all cleaned up and saturation coats are on. :D

IMG_2090004640x480.jpg


IMG_2093007640x480.jpg


Glass lay- up - I waited till the saturation coat was allmost touch dry, or only just tacky to the touch, before laying out the cloth. I am using a tight weave cloth from Duckworks and this helps a lot to get it to conform to the hull shape. :D


IMG_2096010640x480.jpg


First or Glass wet out coat is on :D


IMG_2099013640x480.jpg


IMG_2098012640x480.jpg


Since these piccies were taken, two more, filler coats of resin have been applied and i am delighted with the way the cloth has wet out. It has completely dissappeared and there are minimal imperfections in the finish. it will be a very easy matter to clean them up later for the finish coat of resin. I really like this cloth and will be using it a lot more.
 

hairymick

Well-Known Member
Dec 8, 2005
2,107
2
Queensland, Australia
Thanks Chad. :D

Inside is filleted and glassed.

I had to cut my tight weave cloth into strips to get it to conform to the hull shape. Even so, I have a fair bit of cleanup to do before I put the top resin coat on.

Stem fillets,

IMG_2109009640x480.jpg


The bloke next door gave me some nice hoop pine boards today. I ripped them down to 3/4" X 1/4" strips, scarfed them where needed abd glued in the sheer clamps. easy - :D

IMG_2112012640x480.jpg


IMG_2115015640x480.jpg
 

sheetsrep

Well-Known Member
Dec 7, 2007
69
0
Mick your work is impressive! How did you apply the graphite? I am going to do mine soon and looking for ideas. You application looks "clean" ........no mess. Thanks, Brian
 

Kayak Jack

Well-Known Member
Aug 26, 2003
13,976
171
86
Okemos / East Lansing Michigan
Brian, I'm not sure how Mick did his, and others will provide other methodologies. Here's mine.

Select a "water line" below which you will apply graphite enriched epoxy. Tape it off. Roll the boat inverted. Mix a small batch of epoxy, say, 1.5 oz. Mix in about 20% by volume of graphite, to about the 0.3 oz mark in this case. THOROUGHLY mix it in.

I use disposable, foam brushes to apply the mix. Smooth it out nicely and evenly. As soon as the stuff is sticky and no longer runny, remove the tape. Your next tape for coat# 2 should go on about 1/8" out beyond the first. Same for taping for coat# 3.

Be sure to remove the tape before the glue sets up hard. Once it has set up for a week or so, take the boat outside. This bears repeating, TAKE THE BOAT OUTSIDE. Lightly sand off the gloss to alight gray finish. Wipe it down with dampened paper towel.
 

hairymick

Well-Known Member
Dec 8, 2005
2,107
2
Queensland, Australia
G'day Brian,

Thanks mate.

Are you building a Laker?

Here is a step by step, of what I do. It works pretty well for me. I copied a lot of Chuck's ideas.

First up, Robin is a little person so her boat won't be carrying much weight. Perhaps 150 pounds all up - so the waterline was never going to be very high.

I measured down from the TOP of each stem, 9 1/2" and drilled a 1/8" hole.

Into that, I screwed a wall board screw

007.jpg


And ran a string line between them.

009.jpg


Then I marked the side about every 6" or so with a pencil against the string line.


008.jpg


When done, I masked about 3/8" closer to the bottom of the boat.

011.jpg


I applied the graphite with a disposable foam roller and when it got tacky, I removed the masking tape and re taped it up the side about 1/8" and applied the second coat and so on till I reached my pencil marks.

Hope this helps a bit mate. :D