Time for another pirogue | SouthernPaddler.com

Time for another pirogue

jdupre'

Well-Known Member
Sep 9, 2007
2,327
40
South Louisiana
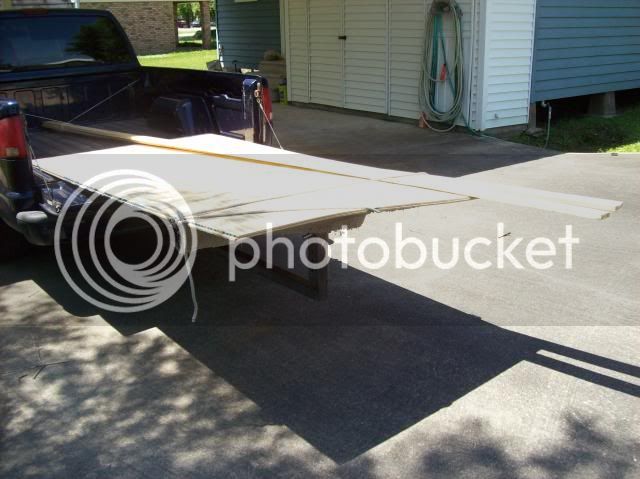
I'm ready to make some sawdust. After burning, digging and chopping at a stump in order to make room for a new workshop, and then washing the whole house down, I made a run to Home Depot for some humble materials..... two sheets of BC exteror sanded pine ply , a couple of lengths of semi-clear pine, a bottle of Titebond III glue and some screws.


I am VERY encouraged by the testing I've been doing to the model I made out of the pine ply. 6-7 soaking/drying cycles with no problems with water intrusion. Now, this is with NO paint or sealer of any kind on the flat faces of the ply.....just glue sealing up most of the edges. Even the non-sealed edges look great.

The bill at HD was even less than I expected. The check-out gal scanned only one of the sheets of ply so that saved $21.95. We didn't notice until we were almost home. I figure we're even, since I spent 5 grand with them for my bath reamodel. So...... so far, I'm into the build for $52.87. I have a quart or two of epoxy left that I'll use to seal the boat up where it does the most good.

Not looking for a 20 year boat. Heck, at 59 , I doubt I'll be able to or even in the mood to paddle at 79 years old. If the boat lasts a few years.....fine.......I'll have the fun of building another.

Joey

( Chuck stepping in here ) Joey , You could have 30 or more years left.
One of the guys who has done a lot of paddling with the crew is Harry ( The Commodore ) and he is still paddling his aluminum Grumman at the young age of 90. So build the boat to last a few more years then you expect you will last. :D
 

jdupre'

Well-Known Member
Sep 9, 2007
2,327
40
South Louisiana
Chuck, I hope you're right and I'm wrong. :mrgreen:

I got right to the job at hand right after lunch. Four panels designed, cut, edges faired .....ready to settle on the exact length. Ended up cutting them to give sides 14' 4" long . The pirogue should finish up at close to 14 feet. 4 inch reverse curve cut in the bottom edge.


An hour or so later, the two sides with the glass butt joints curing. I thought about doing both sides on both pieces at once, but that seemed to be flaunting Murphy's Law.


Joey
 

jdupre'

Well-Known Member
Sep 9, 2007
2,327
40
South Louisiana
The pine I bought to make the chines seemed to gain more weight everytime I moved them. Out of curiosity I weighed them........21 lbs!! Not that I was going to use all of them, but that's still a lot of weight. I returned them to HD and found some decent cedar at Lowes. I figure a bit more than half the weight. Shorter pieces so I have to do a few scarfs. Good practice to build up the ole woodworking skills.


A jack plane with a convex blade profile followed by 60 grit paper on a long sanding board did the trick in short order.

Joey
 

jdupre'

Well-Known Member
Sep 9, 2007
2,327
40
South Louisiana
I ran into a little snag with the butt splices. I think the fit of the two pieces was just too close and what little epoxy there was in the crack got abosrbed into the edges. The glass patches held enough to turn both pieces over. I'll widen the crack some with a saw kerf and apply more epoxy and the other patch.

Joey
 

oldsparkey

Well-Known Member
Aug 25, 2003
10,479
123
Central , Florida
www.southernpaddler.com
Did you have to much weight on them with the three blocks ?
That would squeeze the epoxy out and make for a weaker bond.

On the ones I do they panels are as close together as I can get them making the seam as small as possible. The epoxy gets into the seam but also stays with the glass and bonds it to the wood without any loss in the epoxy or voids.
I do use a lighter weight over the seam then most folks do.

Chuck.
 

jdupre'

Well-Known Member
Sep 9, 2007
2,327
40
South Louisiana
Chuck, the weights were not pushing the joint tighter, they were there mostly to line up the two panels. The glass layed down on the panels well.

After turning the panels over I opened up the joint a smidge and worked the epoxy in there and put on a layer of cloth. I might just go over the first side with another layer of cloth if it needs it.

Joey
 

jdupre'

Well-Known Member
Sep 9, 2007
2,327
40
South Louisiana
Jack, I thought about using both......kind of a "belt and suspenders" thing. 8)

Oh, by the way, a build table with the supports held back from the edges is IMMENSELY helpful for clamping ply pieces in all kinds of configurations with the ubiquitous 1" spring clamps.

Joey
 

Kayak Jack

Well-Known Member
Aug 26, 2003
13,976
171
86
Okemos / East Lansing Michigan
I use a boat rough; I want something I can truly trust. I trust the plywood scab patch; it works when I misuse the boat and I should be lectured about boat etiquette. I guess other bonding methods work too, but I don't know for sure.
My boats get bridged once in a while - one end up high and dry, me and a full load of gear inside, and the other end resting either on water of something solid. That's a big NO! NO! The boats don't complain a bit.
So, I'll stumble along and use the butt block, otherwise called a scab patch.
 

jdupre'

Well-Known Member
Sep 9, 2007
2,327
40
South Louisiana
Jack, I used butt patches on the pirogue I made a few years ago. They did fine, and were glued up with Titebond glue. About the only downside to them is maybe fitting seats, bulkheads, etc around them. No big deal.

Joey
 

seedtick

Well-Known Member
Jul 22, 2006
1,161
7
Denham Springs, LA
scarf
pull back the two pieces about 1/16" when you glue and you never have to worry about too much squeeze out

also don't worry about a stiff spot when you're bending to a fair curve
 

jdupre'

Well-Known Member
Sep 9, 2007
2,327
40
South Louisiana
Tic, I did that with the cedar strips. The side pieces are a just butted up to each other. There was about a 1/16" + or - between them. The patch I put on the other side looked good this morning after curing under a light all night.


Joey
 

jdupre'

Well-Known Member
Sep 9, 2007
2,327
40
South Louisiana
Put the pirogue on the centerform to get an idea of the rocker and the sheer line . I allowed about (.....) this much for adjustment :wink: :mrgreen: so I knew It was going to need trimming. Cut almost 2" off the bow gradually reducing to 1/2" at the center. Much better to my eye.


Tentative specs: 22" bottom, 14' length, approx 30 degree side flair, rocker---1" , sides are 12 1/2" at ends and 9 3/4" amidships, 4" reverse curve for the chine.

Plans are for some type of ventilated gunwhales, two color paint job--- darker outside, light but strong breast hooks. Might go a touch lighter on the gunnels and put in a thwart behind the paddler if it needs it. I hate thwarts in the front of a boat. With the fairly narrow 22" bottom, I might get away with no floor or side ribs.

Joey
 

Kayak Jack

Well-Known Member
Aug 26, 2003
13,976
171
86
Okemos / East Lansing Michigan
You need a ratcheting crane to lift those big gators aboard, don'tcha? All the ones on TV have to wrastle'em by hand; I hoped that you, being native-born Cajun, would be motorized. Get one of those make and break lunger engines from Keith & Seedtick, hook it up to a hand-made rope you made from soaked cedar roots, and tie it to a bone pointed harpoon. None of them sissy rifles for you! :wink:

Otherwise, it looks like a darned good start.
 

jdupre'

Well-Known Member
Sep 9, 2007
2,327
40
South Louisiana
Jack, you don't need any o'that sissy stuff. Nothin' but a piece of chicken. You tease the gator with the chicken til he climbs in the boat with ya and dispatch him with a handmade knife. :roll: Maybe not true, but wouldn't it make great television?!


Joey
 

beekeeper

Well-Known Member
Mar 4, 2009
1,917
59
jdupre' said:
Put the pirogue on the centerform to get an idea of the rocker and the sheer line . I allowed about (.....) this much for adjustment :wink: :mrgreen: so I knew It was going to need trimming. Cut almost 2" off the bow gradually reducing to 1/2" at the center. Much better to my eye.

Tentative specs: 22" bottom, 14' length, approx 30 degree side flair, rocker---1" , sides are 12 1/2" at ends and 9 3/4" amidships, 4" reverse curve for the chine.

. With the fairly narrow 22" bottom, I might get away with no floor or side ribs.

Joey

Looking good! :)
What is the beam width?
How many splces in the floor?
You may want to consider ribs placed over the butt splices. They will act like scabs for the joints, and reinforce the floor and brace the sides. You can save weight and material if you only put side ribs where the sides are spliced, unless you need/want more bracing for the sides.


beekeeper
 

jdupre'

Well-Known Member
Sep 9, 2007
2,327
40
South Louisiana
I didn't measure the beam width, but it's the same center form as the aluminum pirogue and that one had a beam width about 10" wider than the bottom.

Joey
 

jdupre'

Well-Known Member
Sep 9, 2007
2,327
40
South Louisiana
It'll probably have one splice behind center. I'm thinking of going with a patch. That will help stiffen up the floor. I'm not planning on any side ribs but will use one about at center if it needs it, or maybe a light thwart there.


Joey